

Buzz takes a different route from Slack, Discord, or most AI tools.
Before you create a channel, it asks you to create an identity key. Before you invite people, it asks you to connect that identity to a community. And before an AI agent can help, it gets its own profile, permissions, and model settings.
That can feel like a lot on day one. I felt the same way while setting up the first TheToolNerd community. This guide shows every screen in the order I saw it, with plain-English explanations of what to click and why it matters.
By the end, you will have a Buzz community, a personal profile, and a starter team of AI agents ready to work in channels with you.
Check out my previous articles


The “Normal User” Reality Check
Before we dive in, let’s be honest: Buzz is promising, but it is not yet ready for the average user.
If you are looking for a simple “plug and play” experience like Slack or ChatGPT, you might find Buzz frustrating. The setup is not easy, and the underlying concepts — like cryptographic keys and relays — can be confusing. It is currently in an early alpha/beta stage, which means you will hit bugs, and things won’t always work the first time.
Is it worth the effort? If you are a developer, a technical founder, or someone who loves being on the bleeding edge of AI, yes. If you just want a tool that “just works” without a technical learning curve, you might want to wait a few months for the product to mature.
Why Jack Dorsey and Block are Building Buzz: The Vision Behind the Tool

Buzz.xyz isn’t just another startup project; it’s a direct product of Jack Dorsey’s evolving vision for the internet. Dorsey, the co-founder of Twitter and current head of Block, has shifted his focus entirely toward decentralized, open-source protocols. Buzz is the latest, and perhaps most significant, manifestation of this shift.
By building directly on Nostr—a protocol Dorsey has personally funded with millions—Buzz aims to replace the fragmented "SaaS Tax" of tools like Slack and GitHub with a unified workspace where humans and AI agents have equal cryptographic standing.
In Dorsey's vision, agents aren't just background tools but verifiable participants with their own identities, ensuring that your data, your team's history, and your agents' reputations belong to you rather than a proprietary platform. This makes Buzz more than just a chat app; it is a high-stakes experiment to prove that the future of work can be open-source, auditable, and entirely independent of centralized vendor lock-in
What is Buzz, in simple words?
Buzz is a workspace where people and AI agents can work in the same channels.
It has familiar things such as messages, channels, search, and direct messages. The difference is that an agent is treated like a real participant in the workspace. It has its own identity, its own settings, and a record of the work it does.
Block built Buzz as an open-source project on Nostr, a protocol that uses cryptographic keys for identity. In everyday terms, that means Buzz wants you, your team members, and your agents to have identities that are harder to fake and easier to verify.
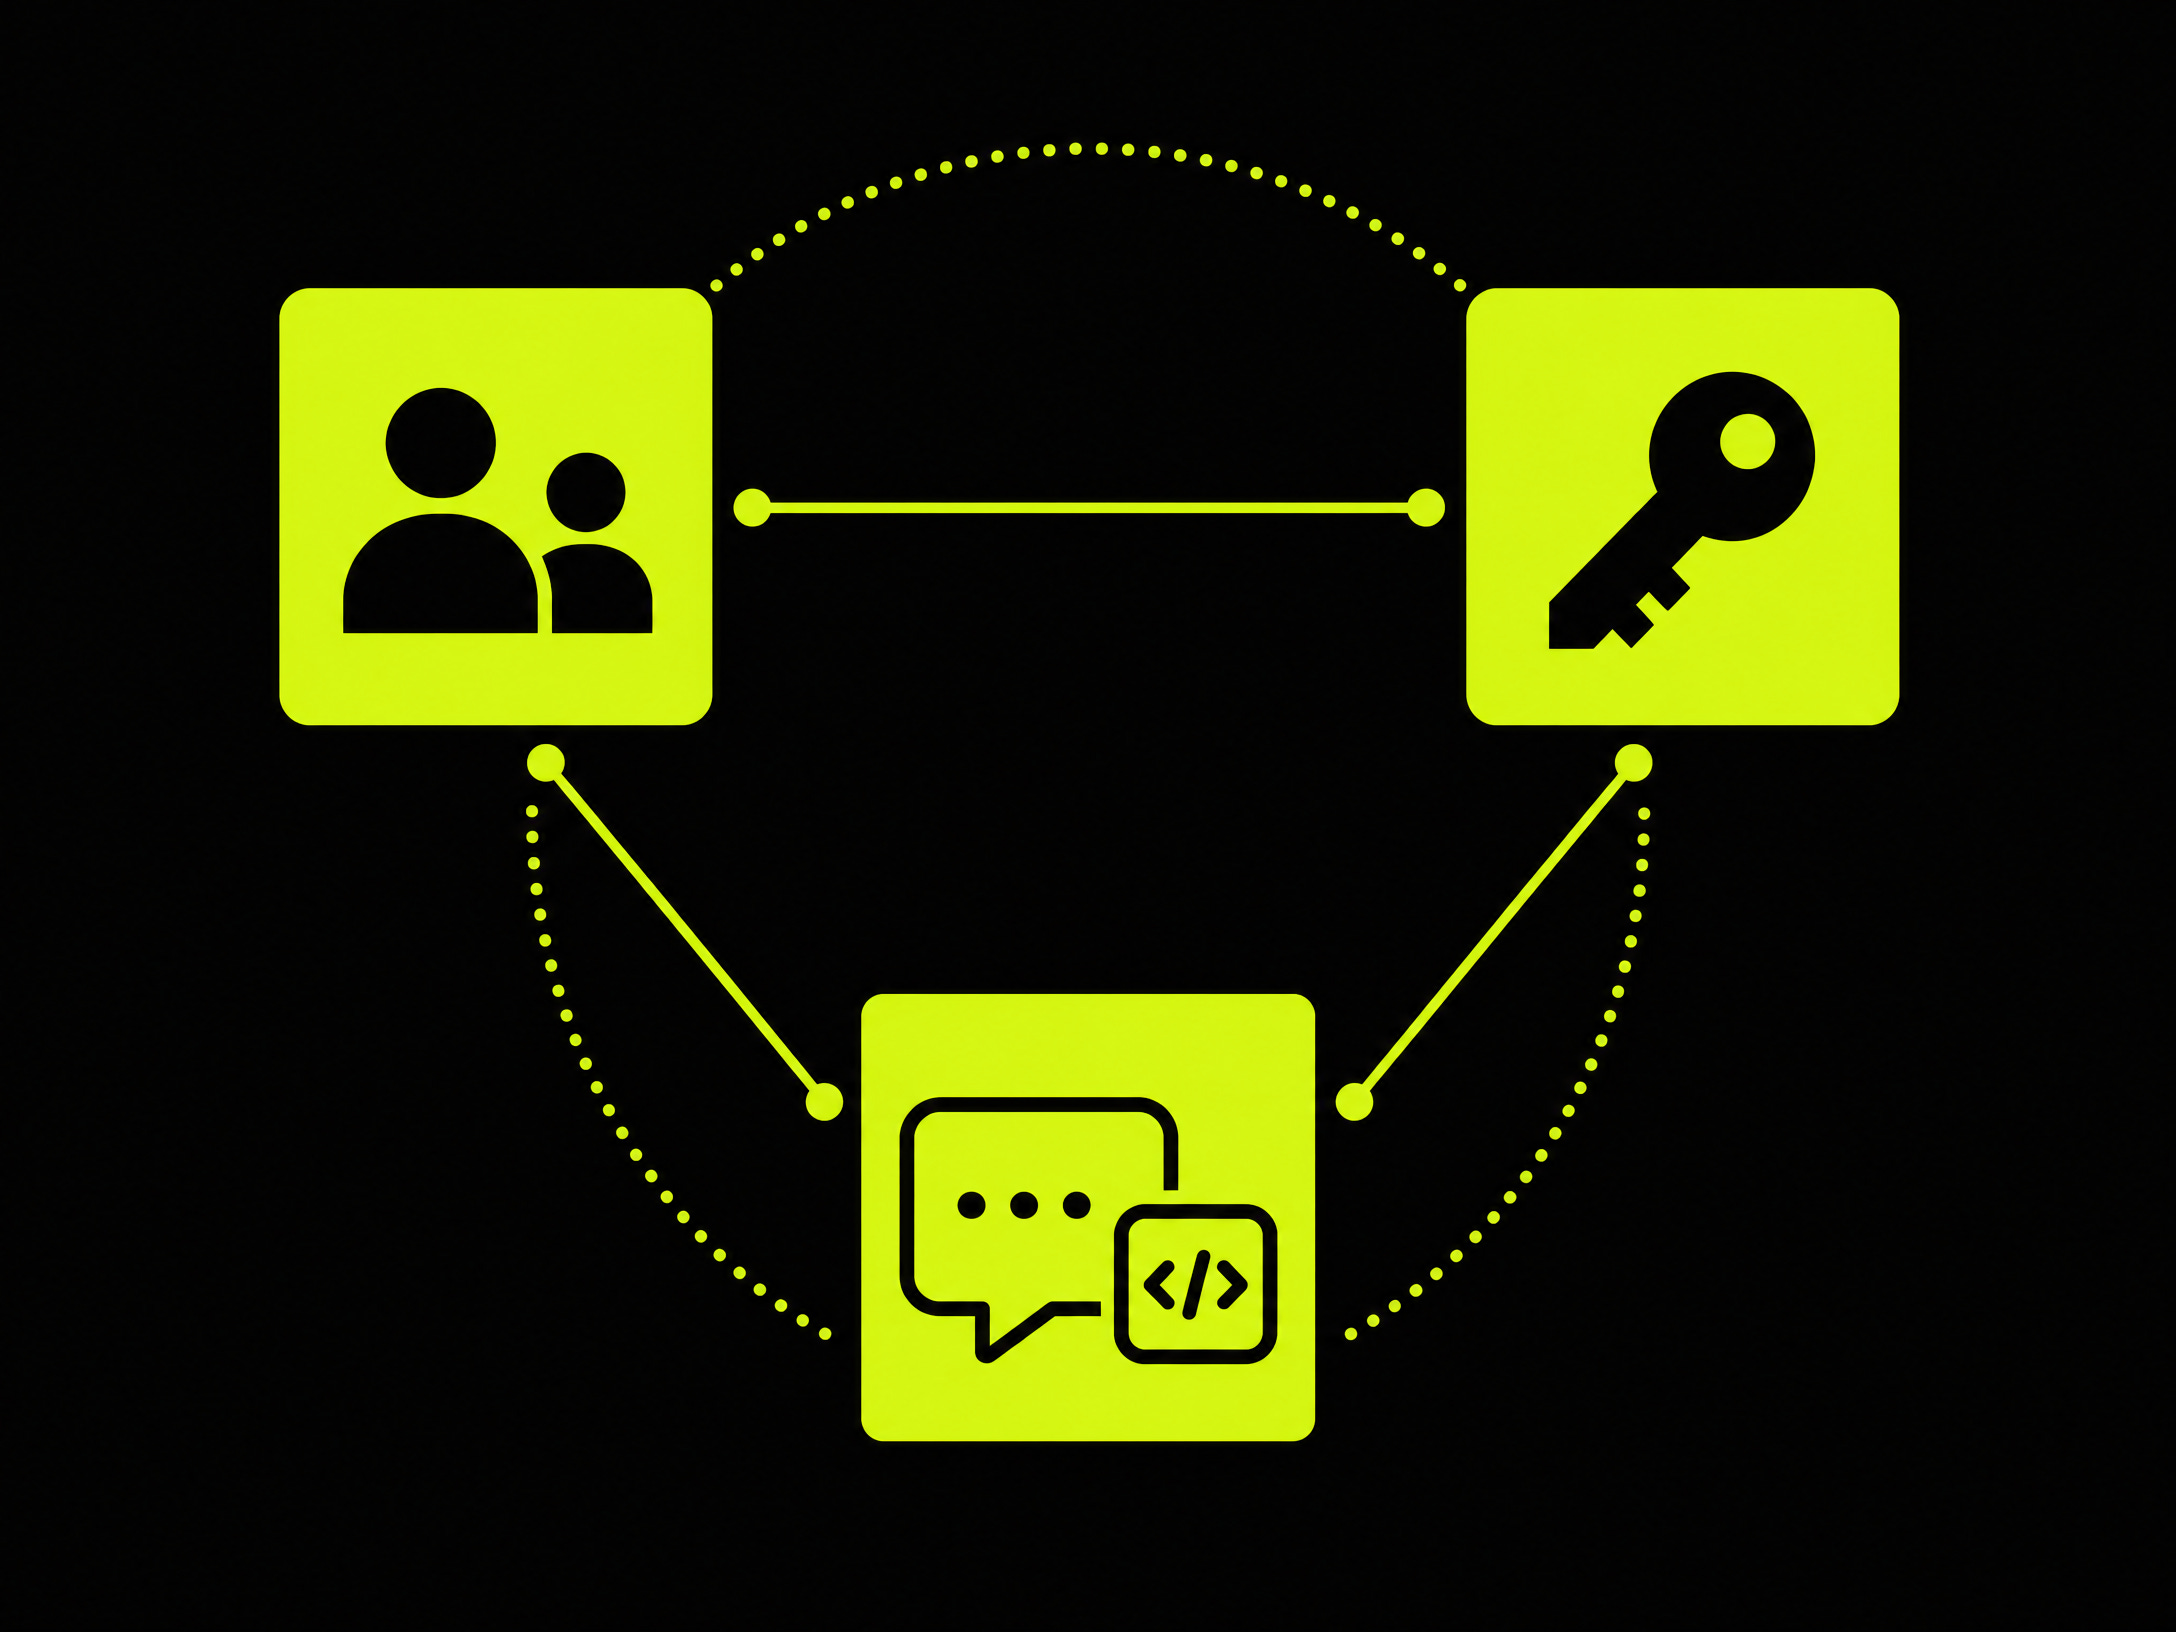
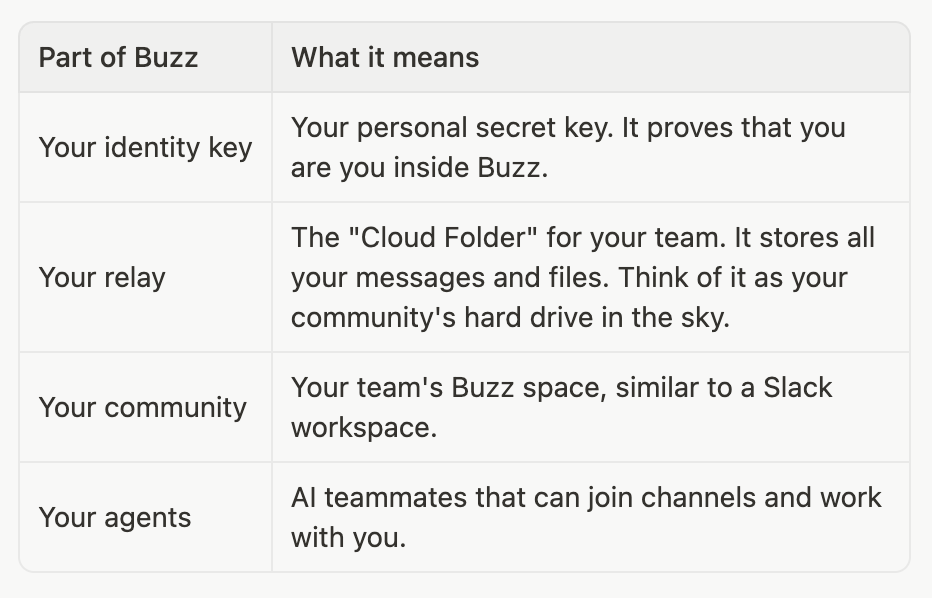
For a first-time user, you only need to remember four ideas:
> Keep your private identity key private. Treat it like a password that cannot be reset. If someone gets it, they can act as you in Buzz.
Before you start setting up Buzz.xyz
Download the Buzz desktop app from buzz.xyz. You will also need an email address, because the hosted community setup runs through Builderlab.
If you already use Claude Code or Codex, keep that in mind for later. Buzz can detect those tools and connect them as agent harnesses. You do not need to set them up on the first run.
Understanding Relays (The Foundation)
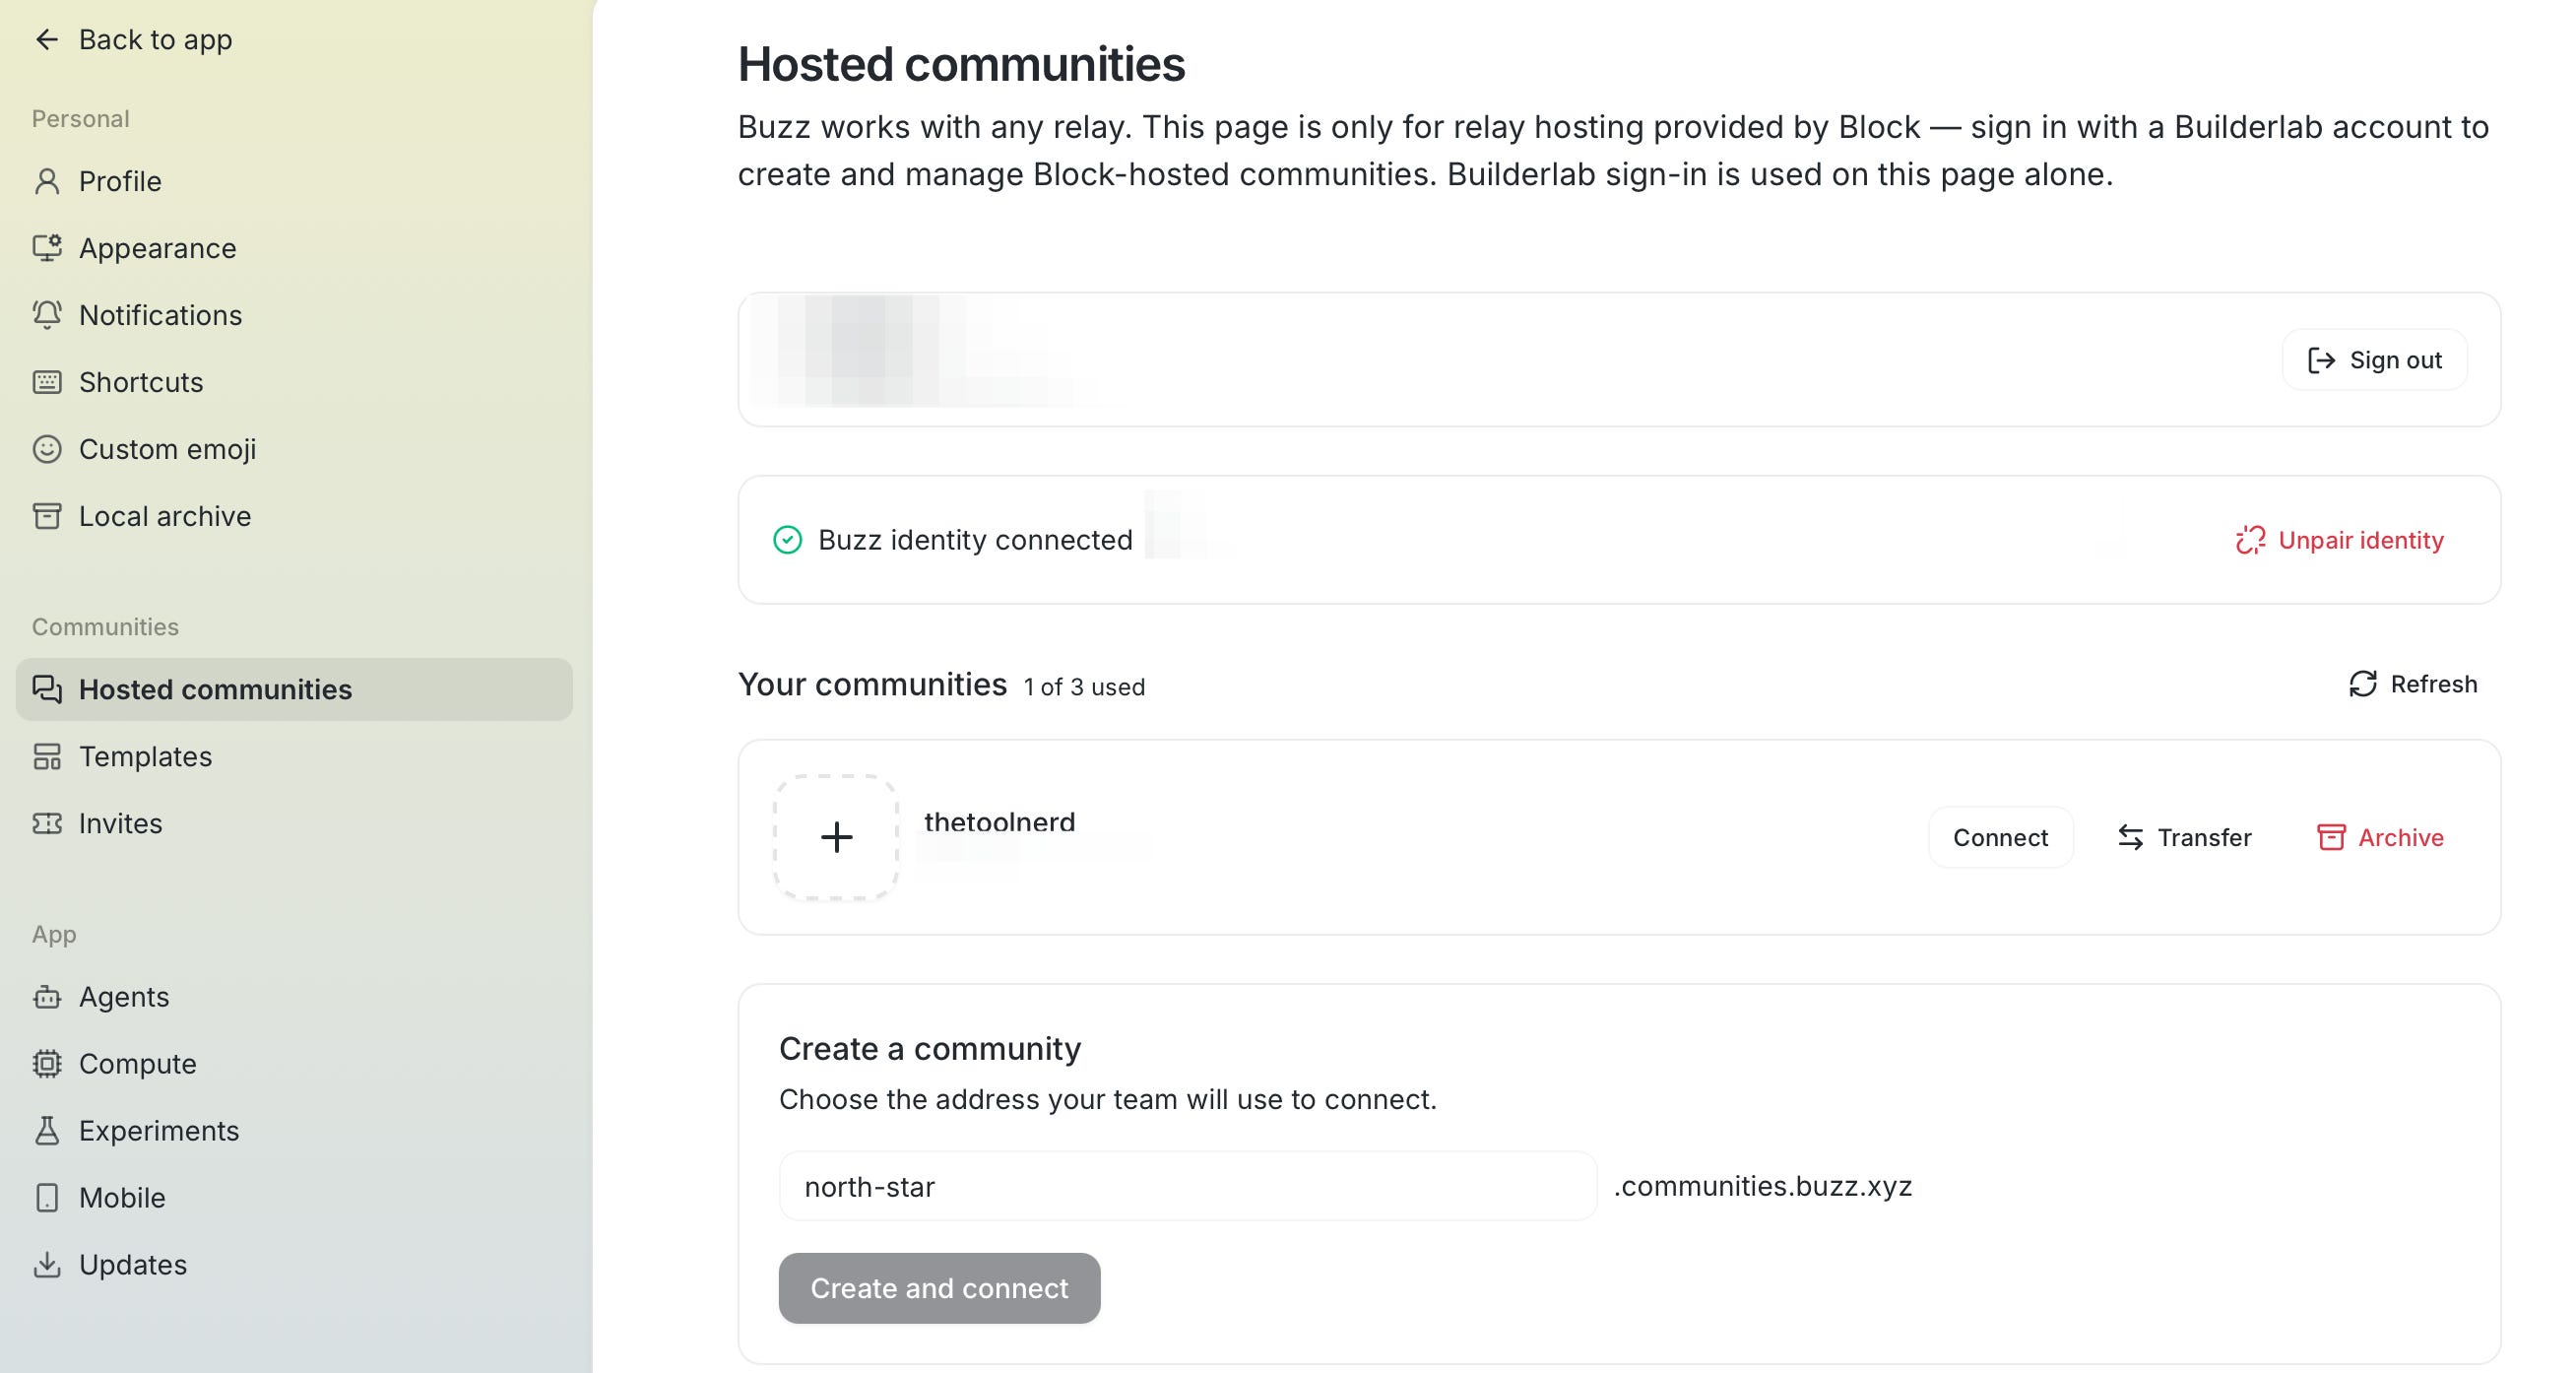
The “Relay” is the part of Buzz that confuses most people. In simple terms, the relay is your team’s hard drive.
Traditional apps like Slack store your data on their own secret servers. Buzz is different: it stores your data on a “Relay” that follows an open protocol. This is why you own your data, but it also makes setup harder. You have two options:
Option 1: Use Block’s hosted relay — The easiest choice. Block runs and maintains the relay for you at no cost. Your community lives there, and you do not need to manage any infrastructure. This is what most people choose when starting out.
Option 2: Self-host your own relay — For teams that want complete control over their data. You run the relay on your own server or cloud provider (Railway, DigitalOcean, AWS, etc.). This costs $5-50 per month depending on team size, but you own everything.
For now, we will use Block’s hosted relay through Builderlab. If you want to self-host later, you can migrate or run both relays in parallel. The setup process is the same either way.
You can find it in settings to setup relay
Step-by-Step Setup Guide for Buzz.xyz
Step 1: Create your Buzz identity
Open Buzz. The first screen gives you two choices: create a new identity key or use one you already have.
Choose Create a new identity key if this is your first time. Choose Use an existing key only if you previously set up Buzz and saved your key.
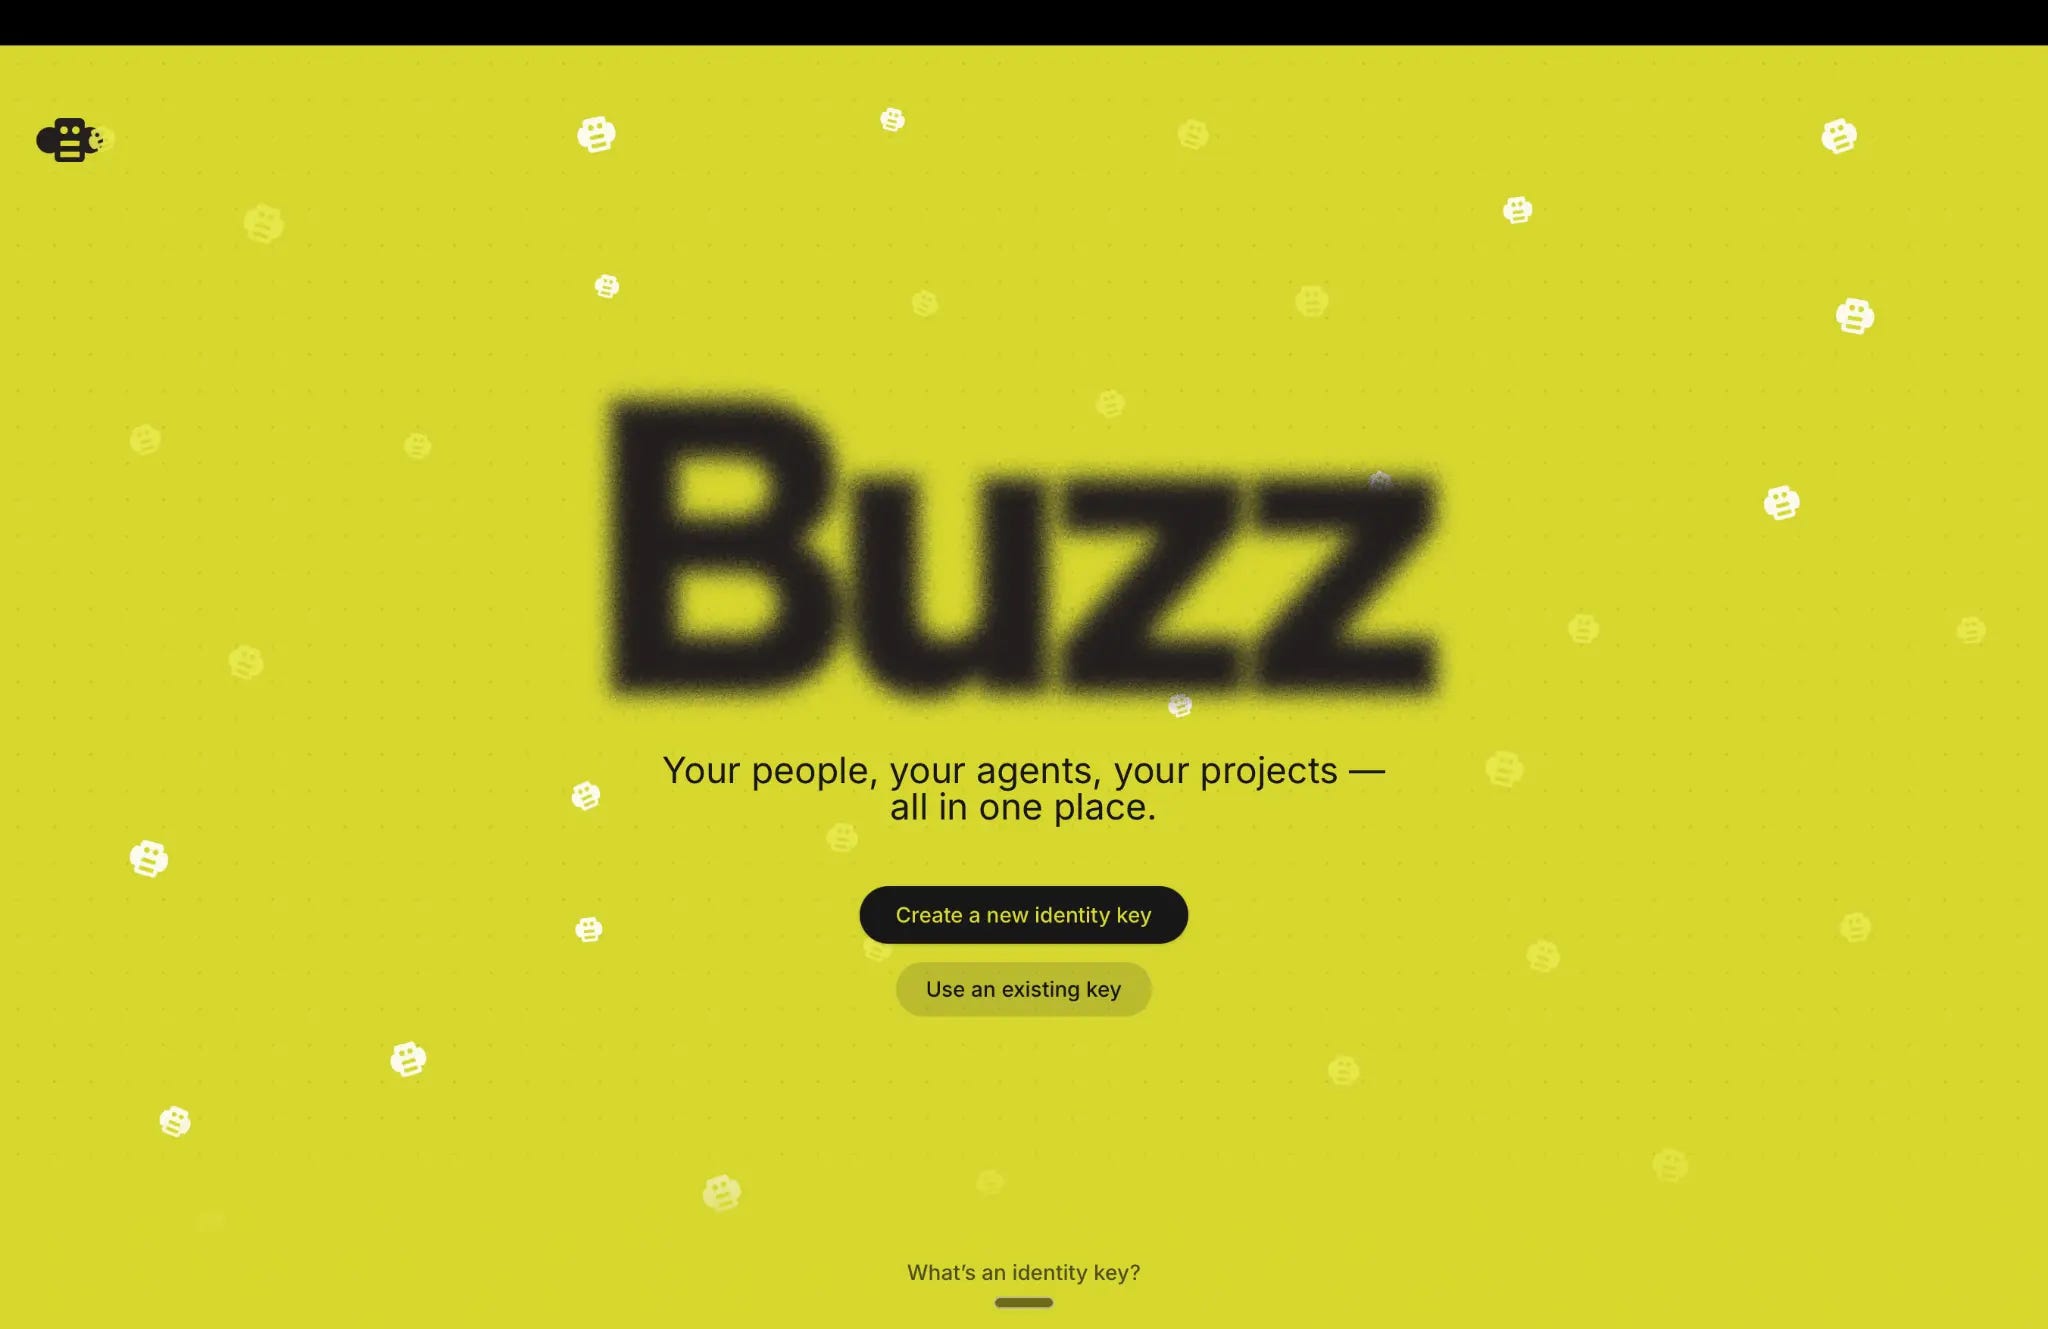
Screenshot 1: Start by creating a new identity key.
Step 2: Save the private key before moving on
Buzz creates your identity key and stores it in your computer’s keychain. That is useful for everyday use, but it is not a backup.
Copy the key and save it in a secure password manager or another private place you trust. Do not paste it into a document, a chat app, or an email draft. Anyone who has this private key can use your identity.
Then click Next.
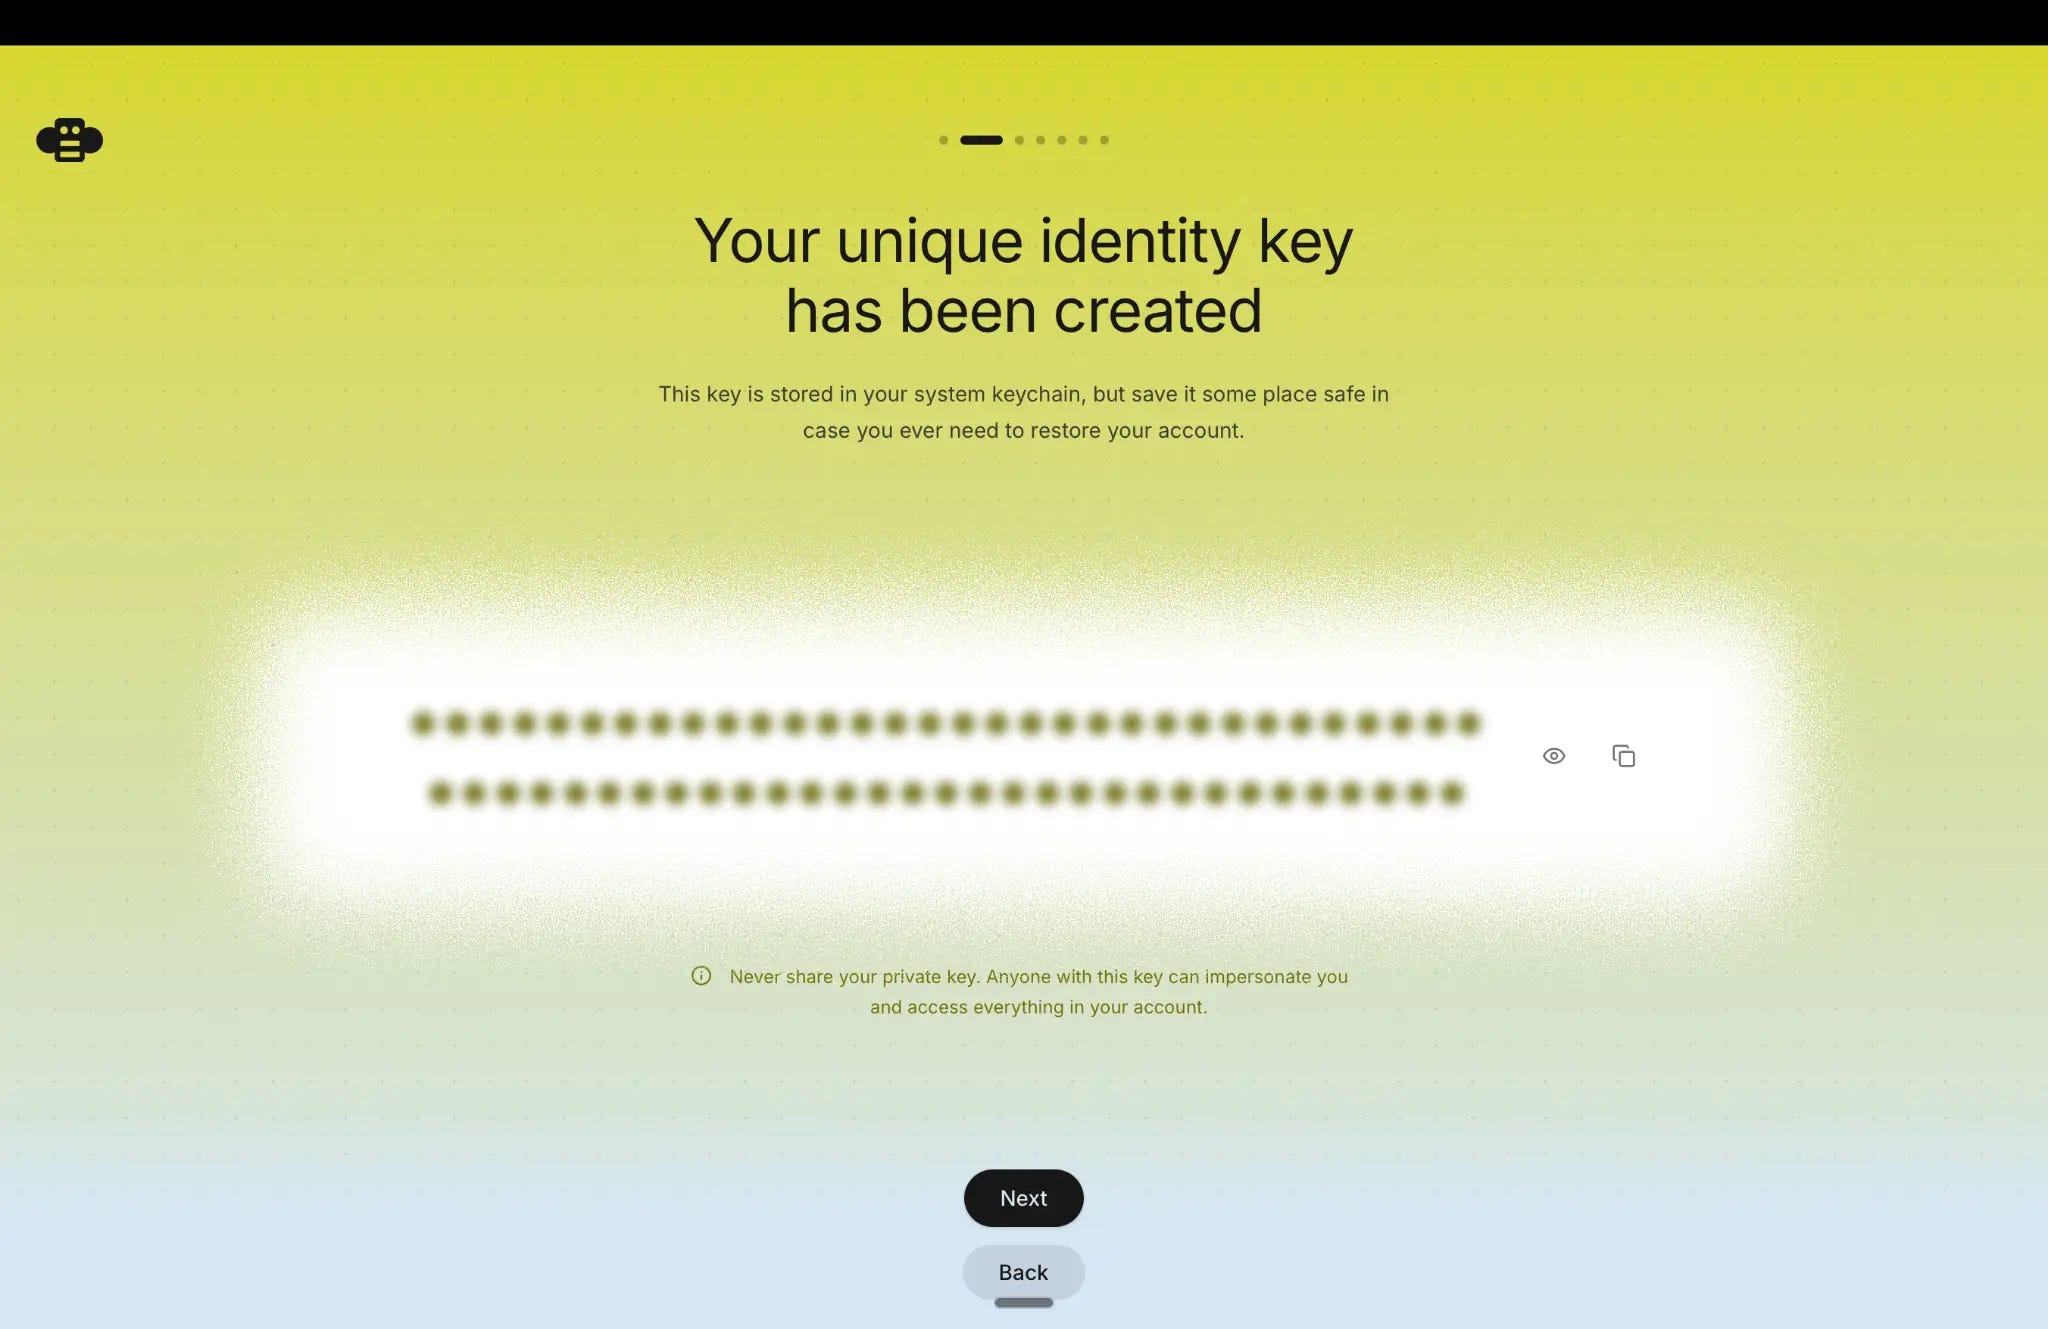
Screenshot 2: Save the key somewhere safe before you continue.
Step 3: Decide whether to connect Claude Code or Codex now
Buzz checks whether AI coding tools are already installed on your machine. In my setup, it found Claude Code and Codex, but the ACP adapters were still missing.
If you already know how you want to use those tools, set them up here. If you only want to get into Buzz and look around, click Skip for now. You can come back later.
This is a useful design choice. Your workspace does not depend on one AI model. You can bring your own provider and change it later.
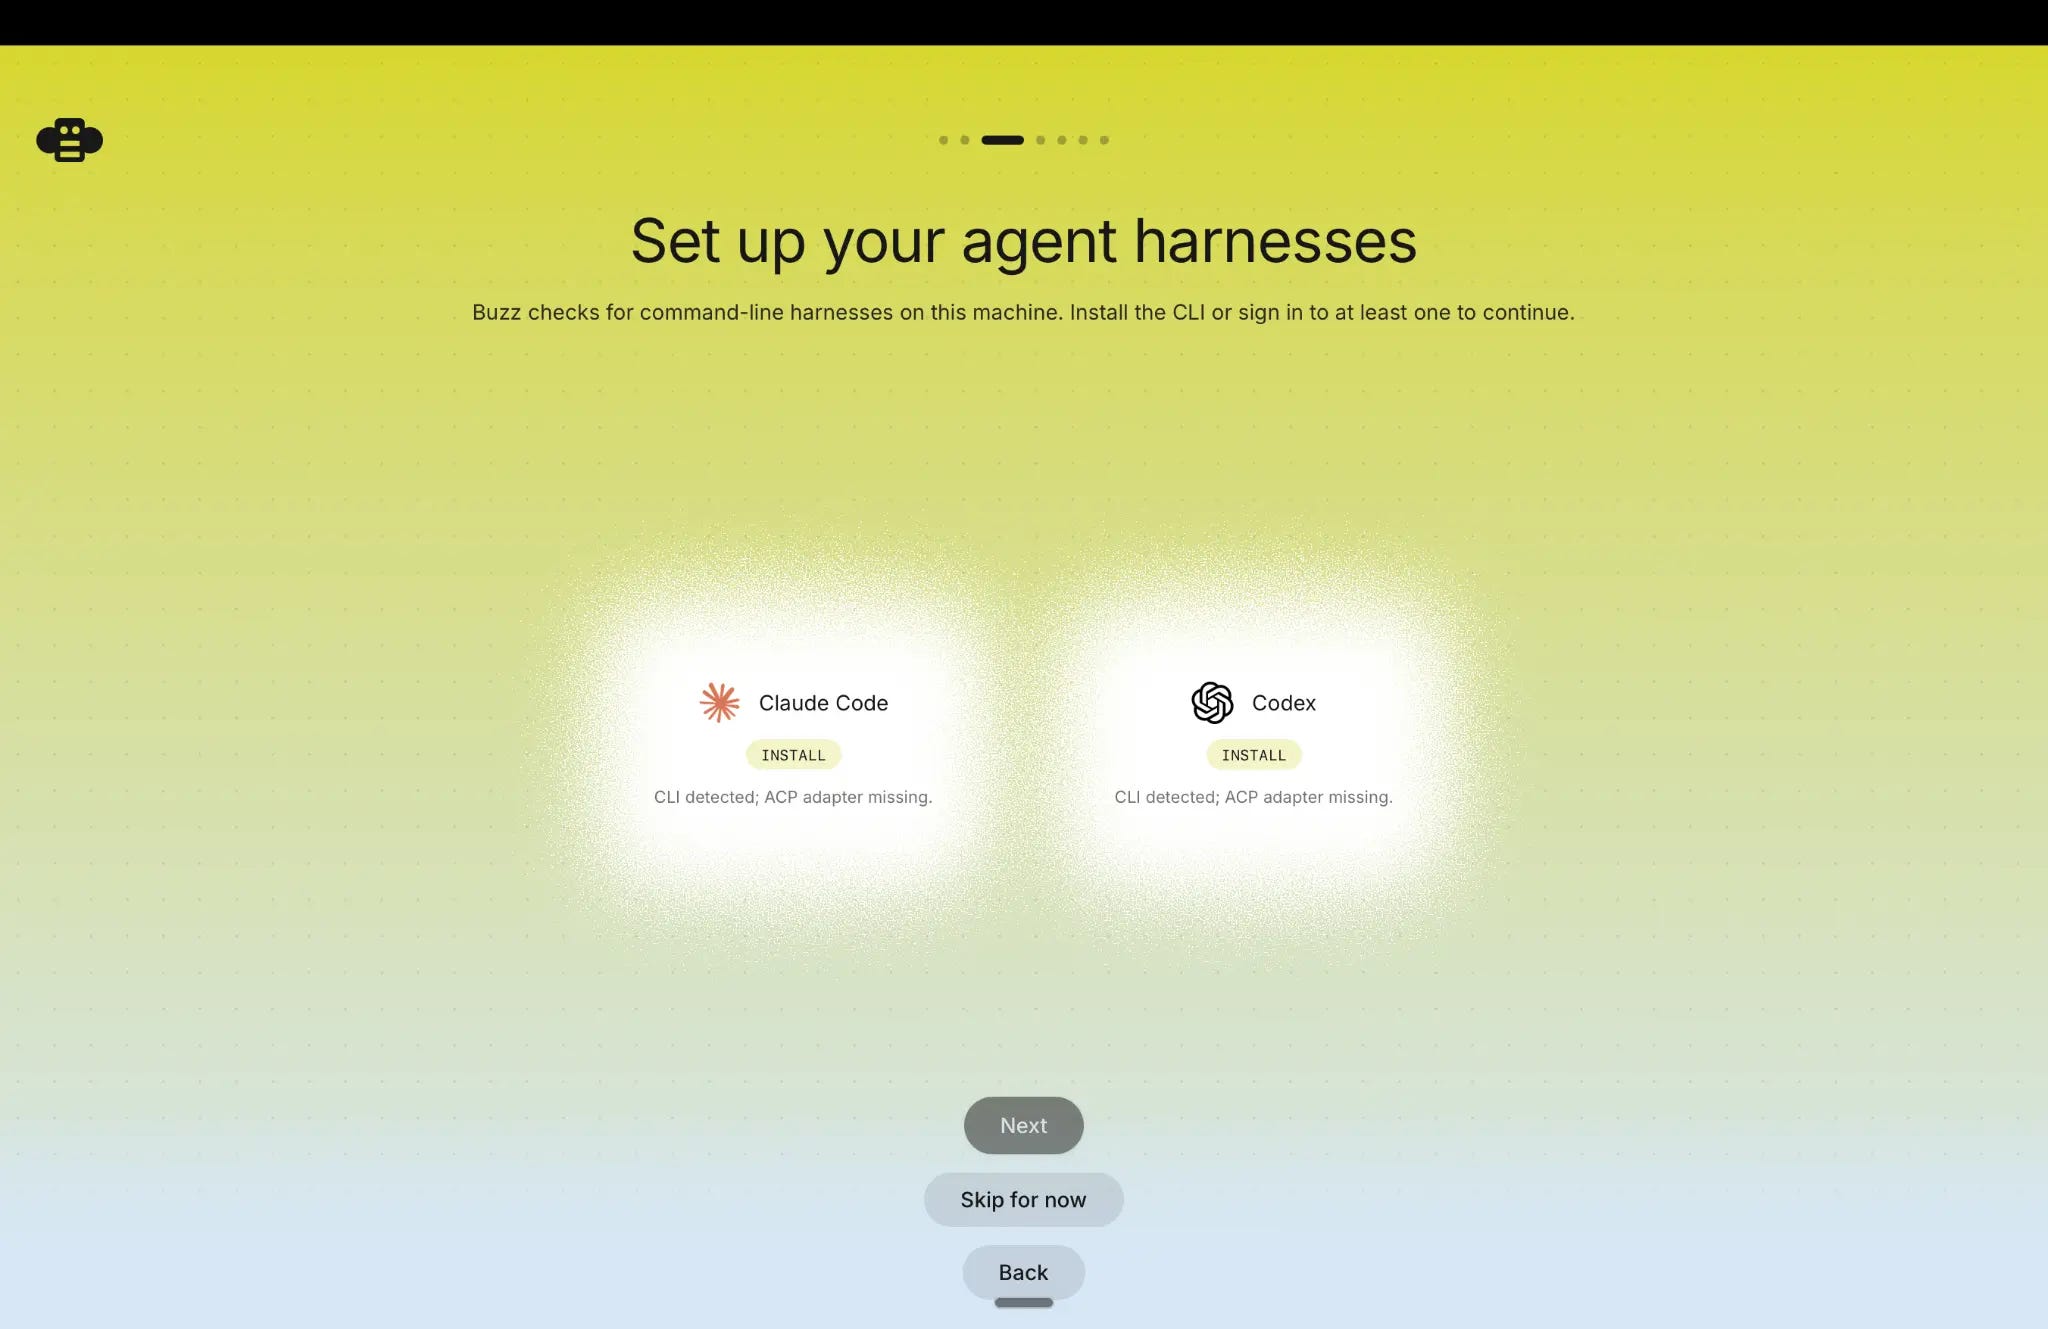
Screenshot 3: You can connect agent tools now or skip this step.
Step 4: Choose how you want to enter Buzz
Next, Buzz asks where you want to work. You can join an existing community with an invite, reconnect to a community you already own, or create a new one.
For a new team space, choose Create a community.
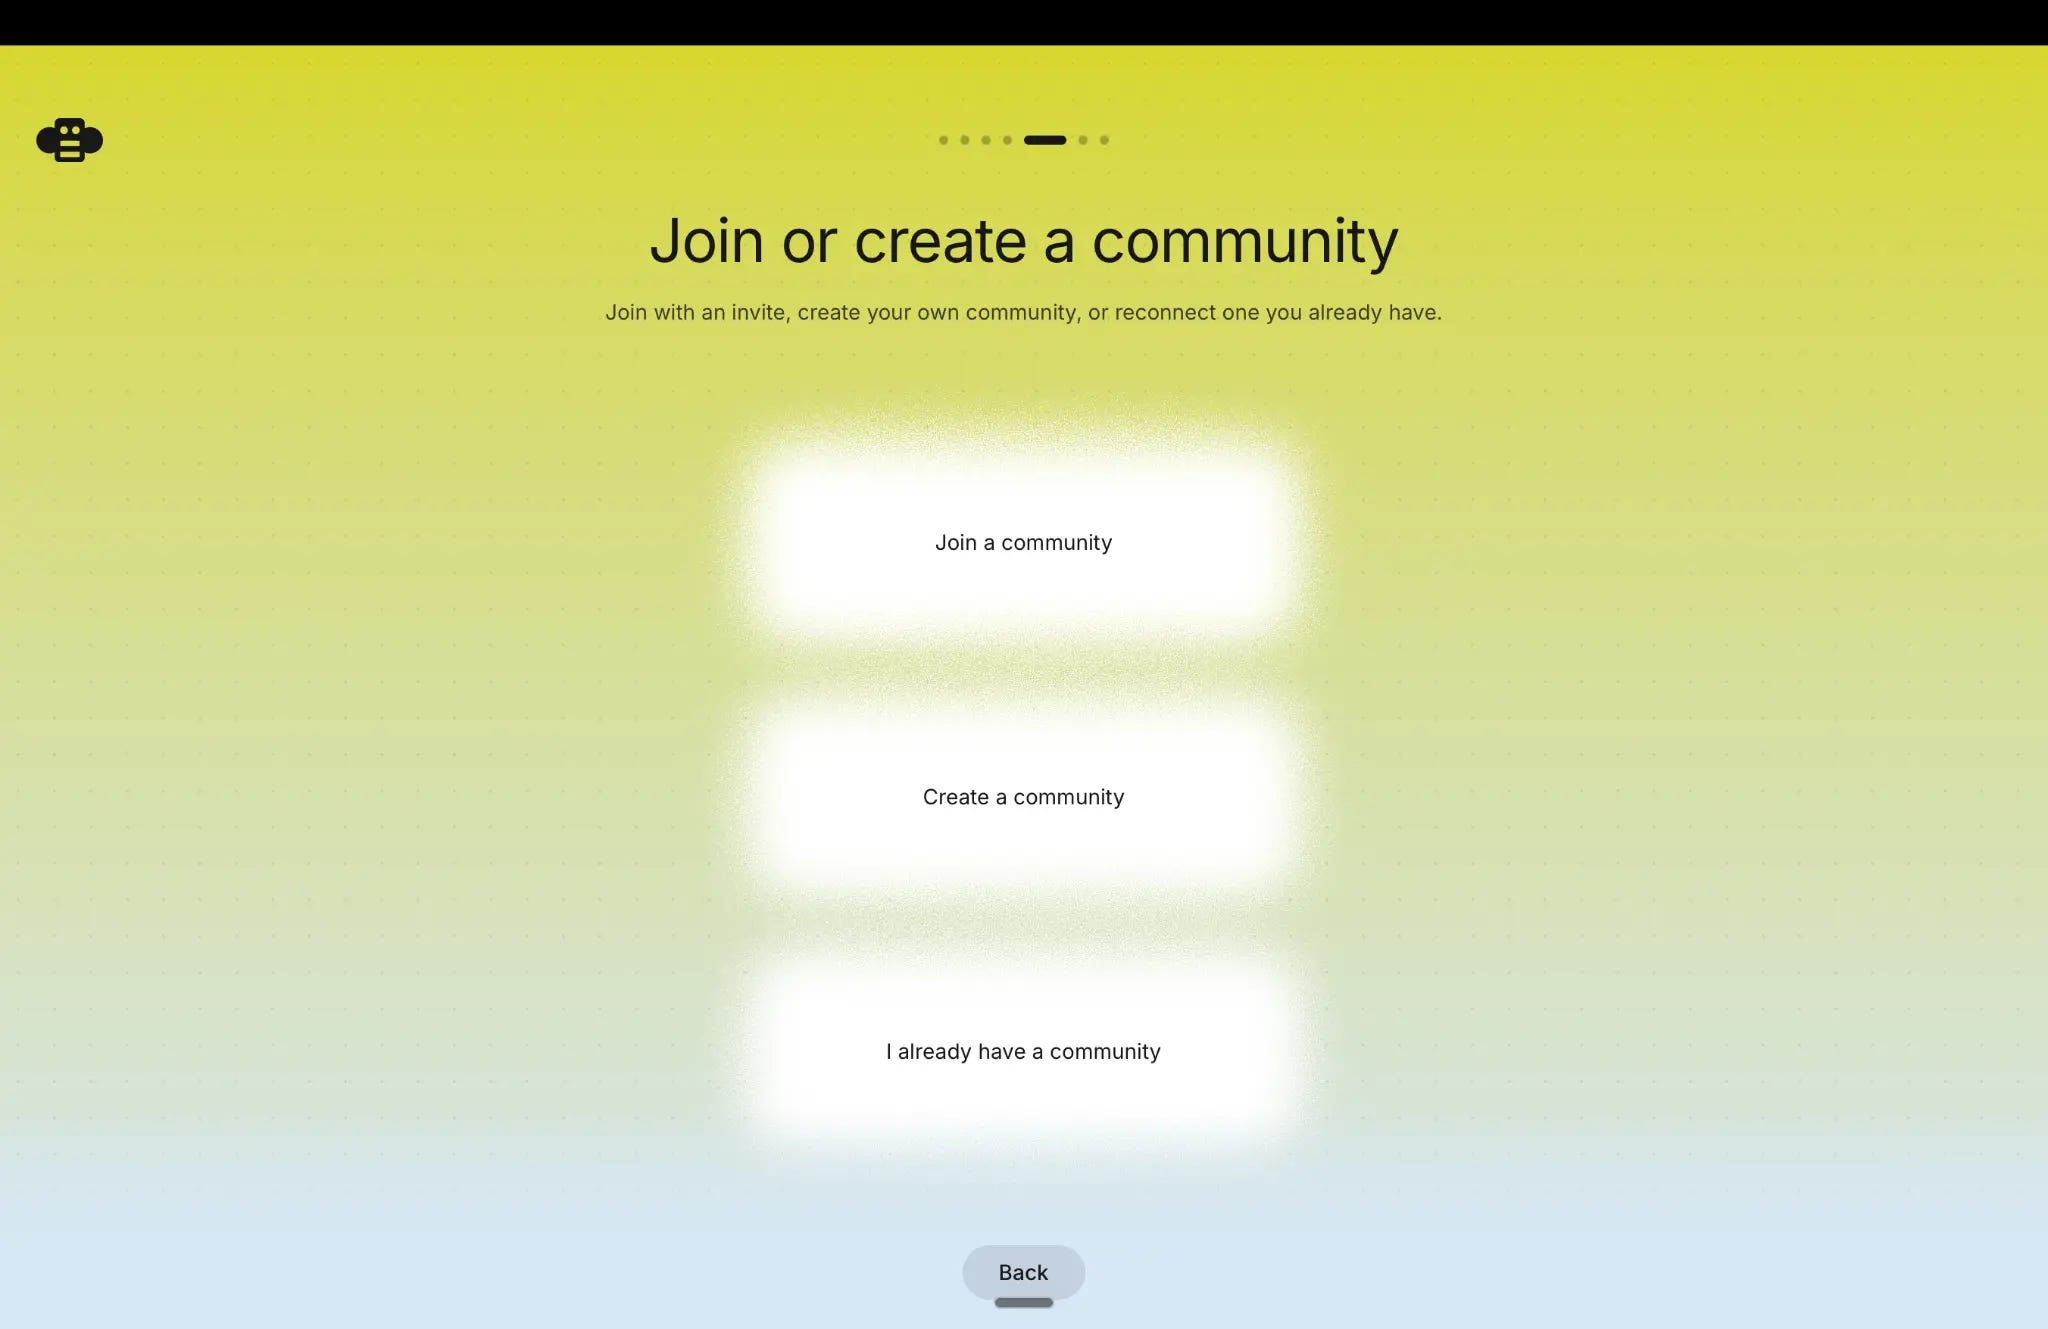
Screenshot 4: Create a community if you are starting a new workspace.
Step 5: Open Builderlab to create the community
Buzz now explains that it will open Builderlab in your browser. Builderlab is the service that creates your hosted relay and manages your community.
Click Sign in to continue. The browser will open automatically.
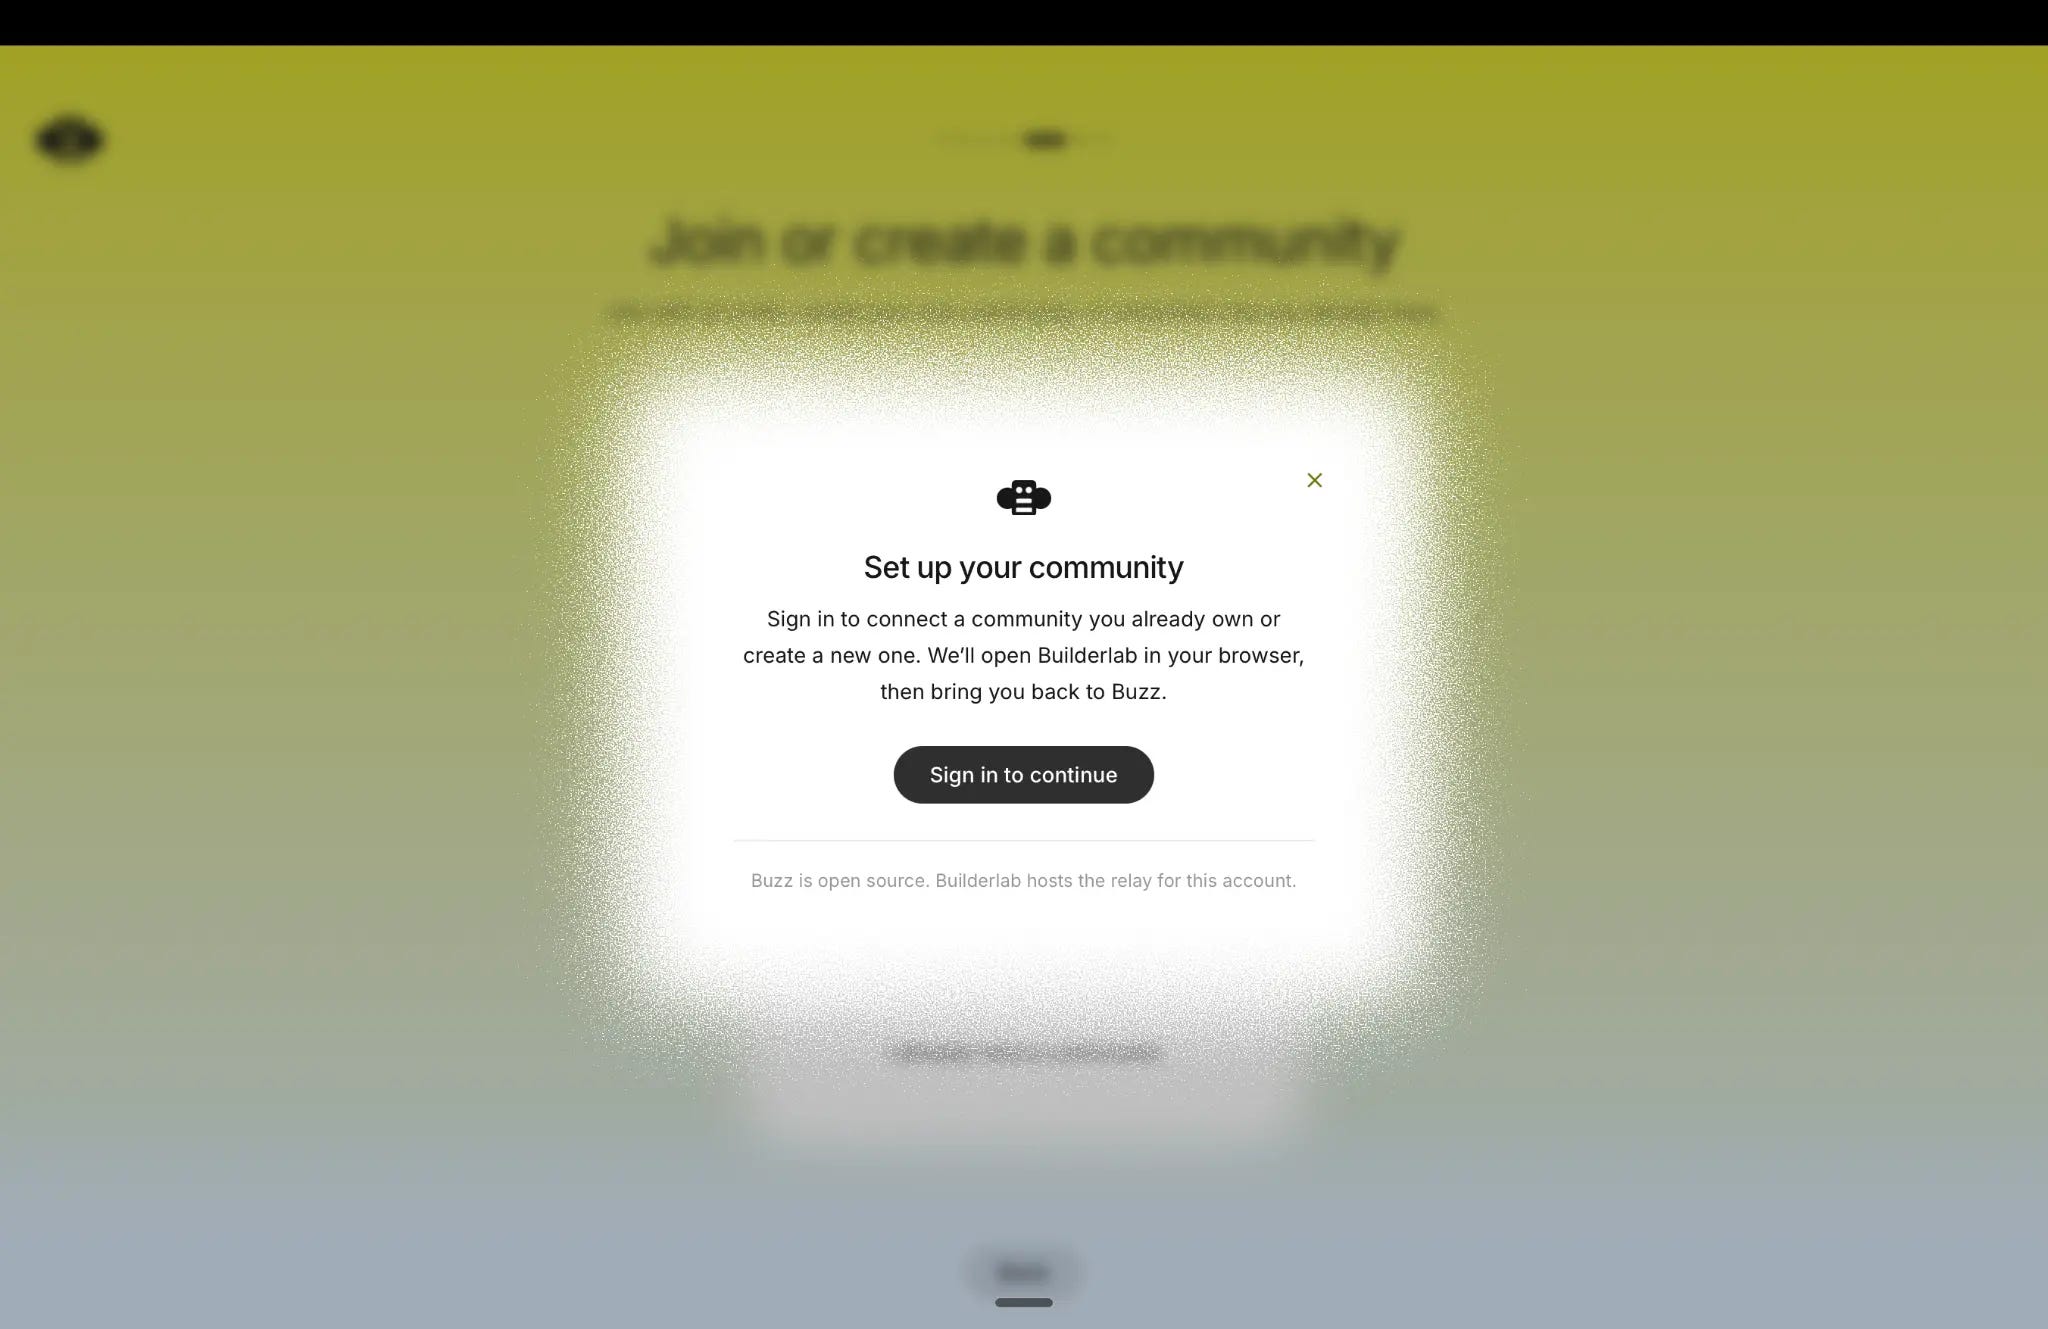
Screenshot 5: Buzz sends you to Builderlab for the hosted community setup.
Step 6: Sign in and verify your email
In Builderlab, enter your email address and click Continue. If you do not have an account, use the sign-up link on the same page.
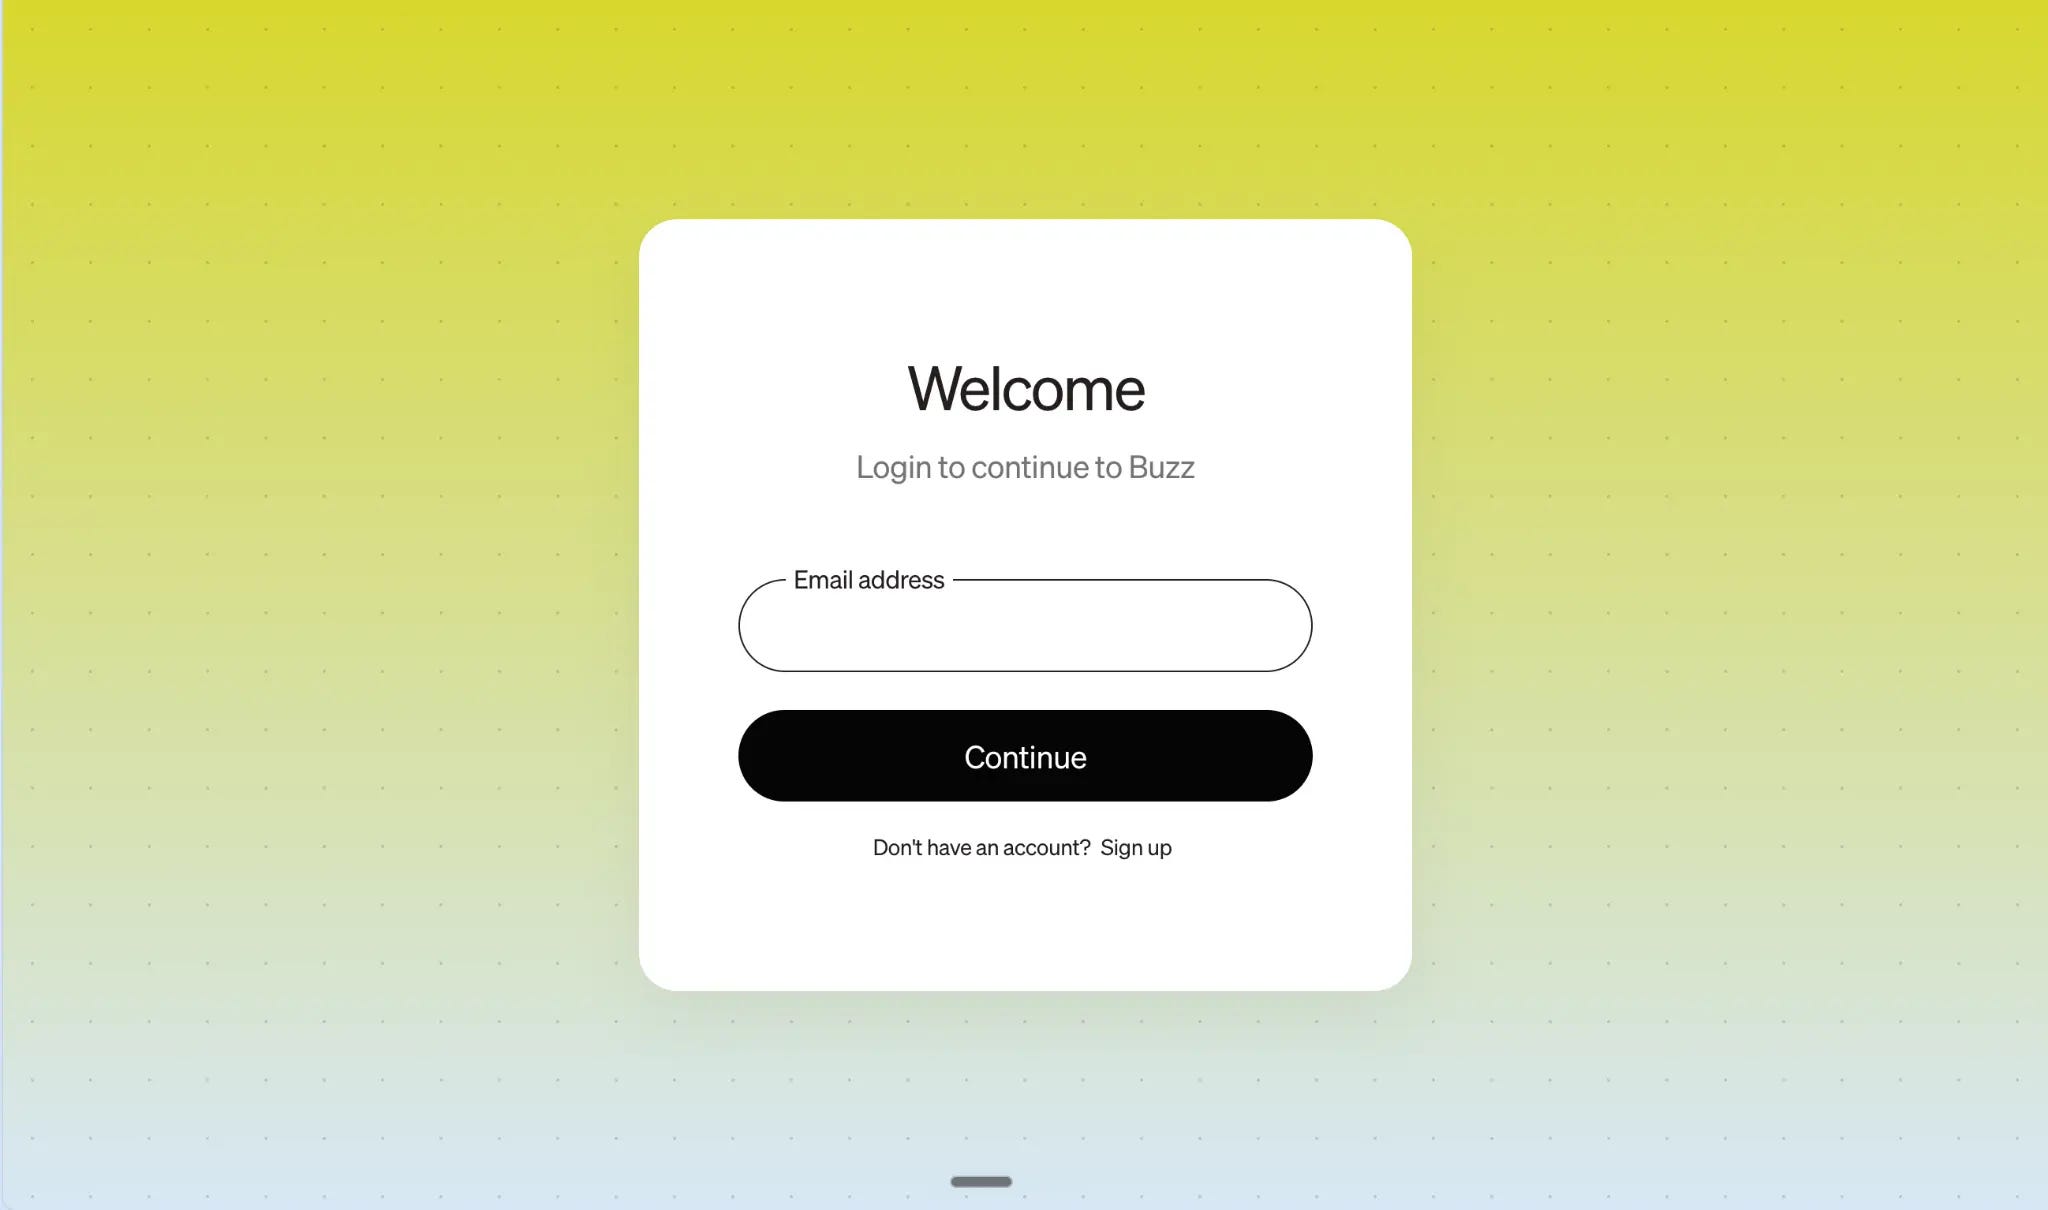
Screenshot 6: Sign in to Builderlab with your email address.
Builderlab sends a verification link to your email. Open that link, return to this page, and click I’ve verified my email.
If the email does not appear, check your spam folder first. Use the resend option only after a few minutes.
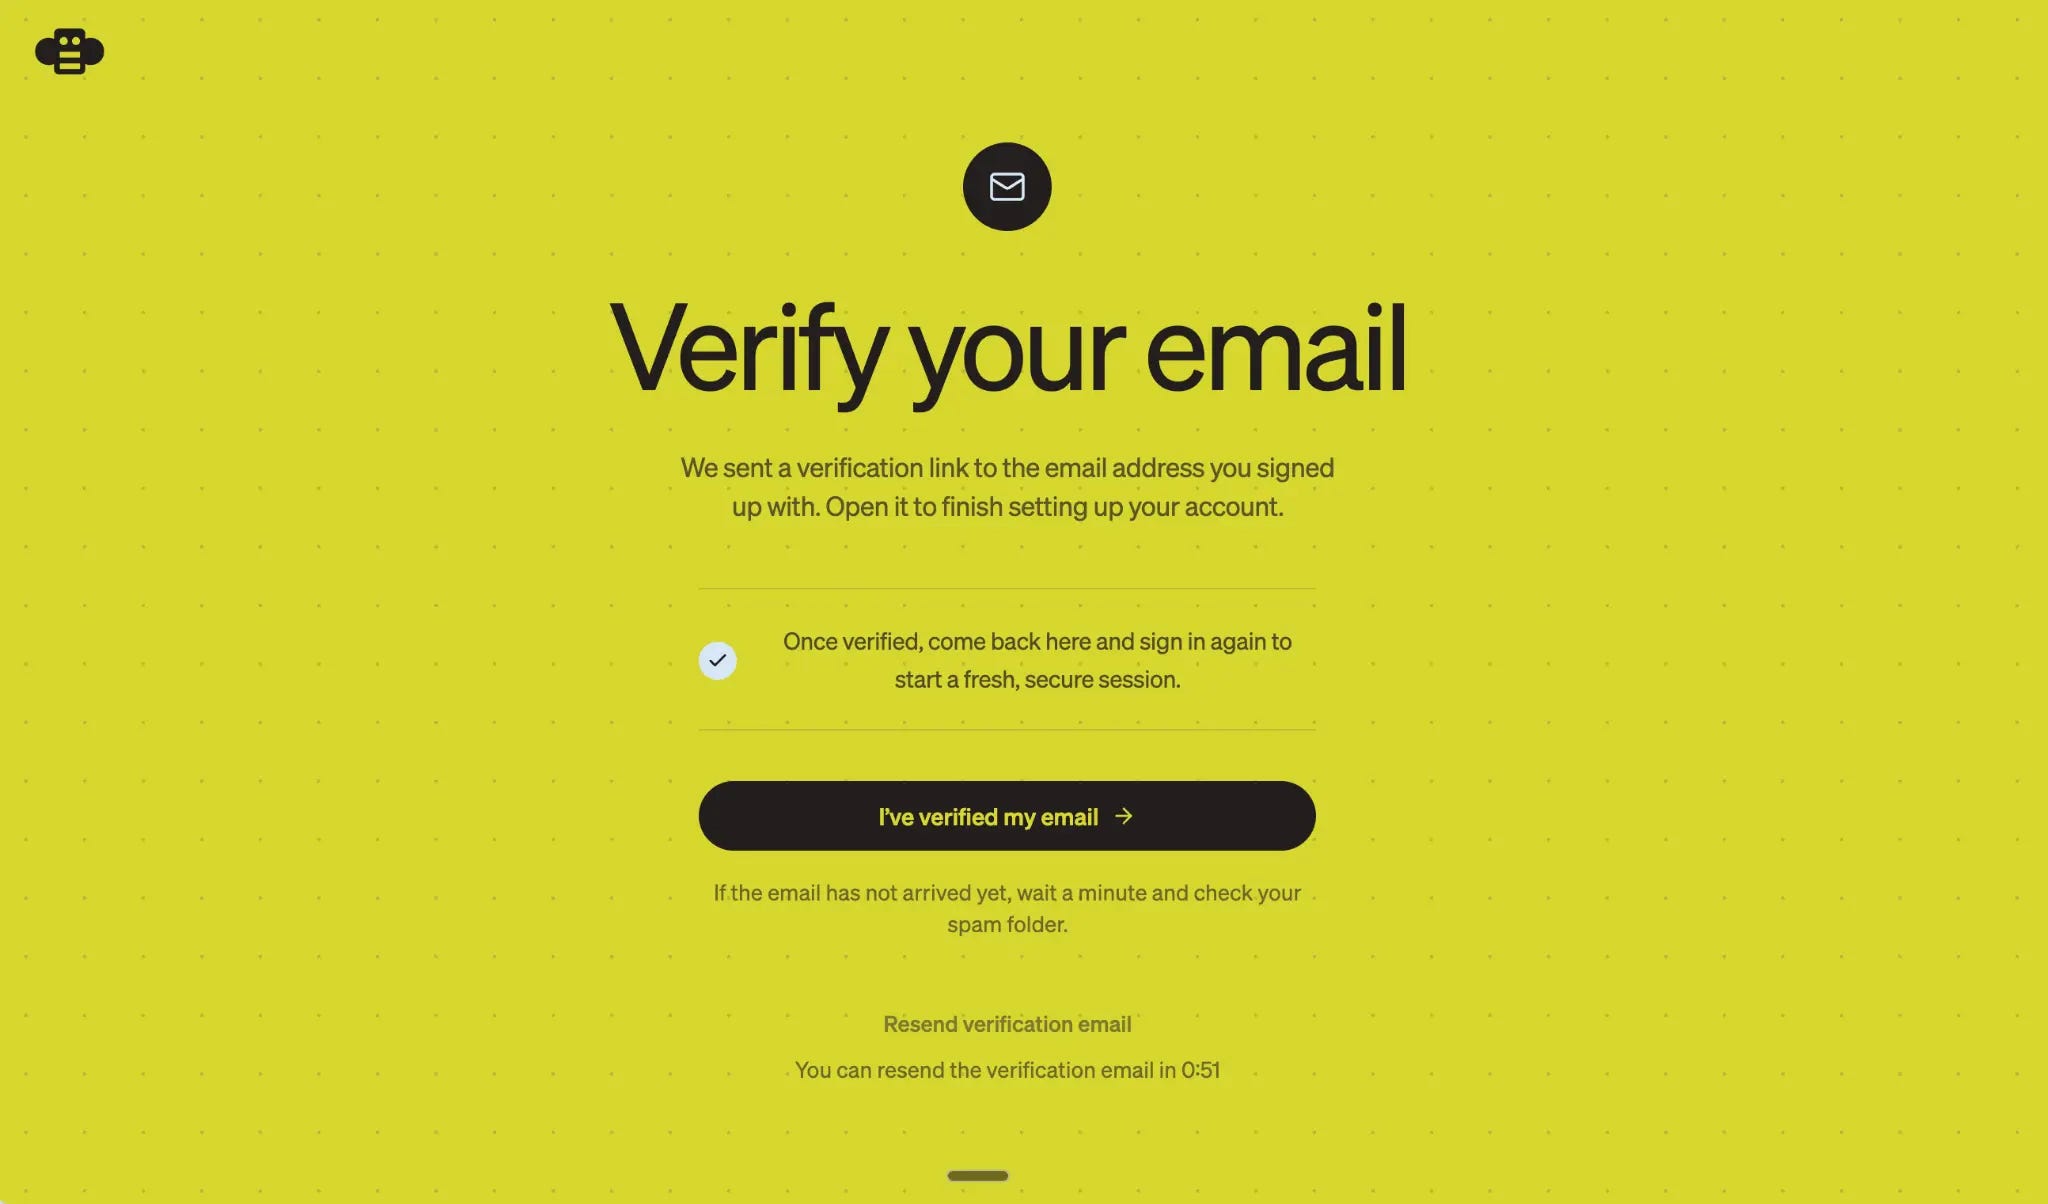
Screenshot 7: Verify your email before you can create a community.
Step 7: Connect your Buzz identity to Builderlab
Now Builderlab needs to know which Buzz identity owns the community. Click Connect your Buzz identity.
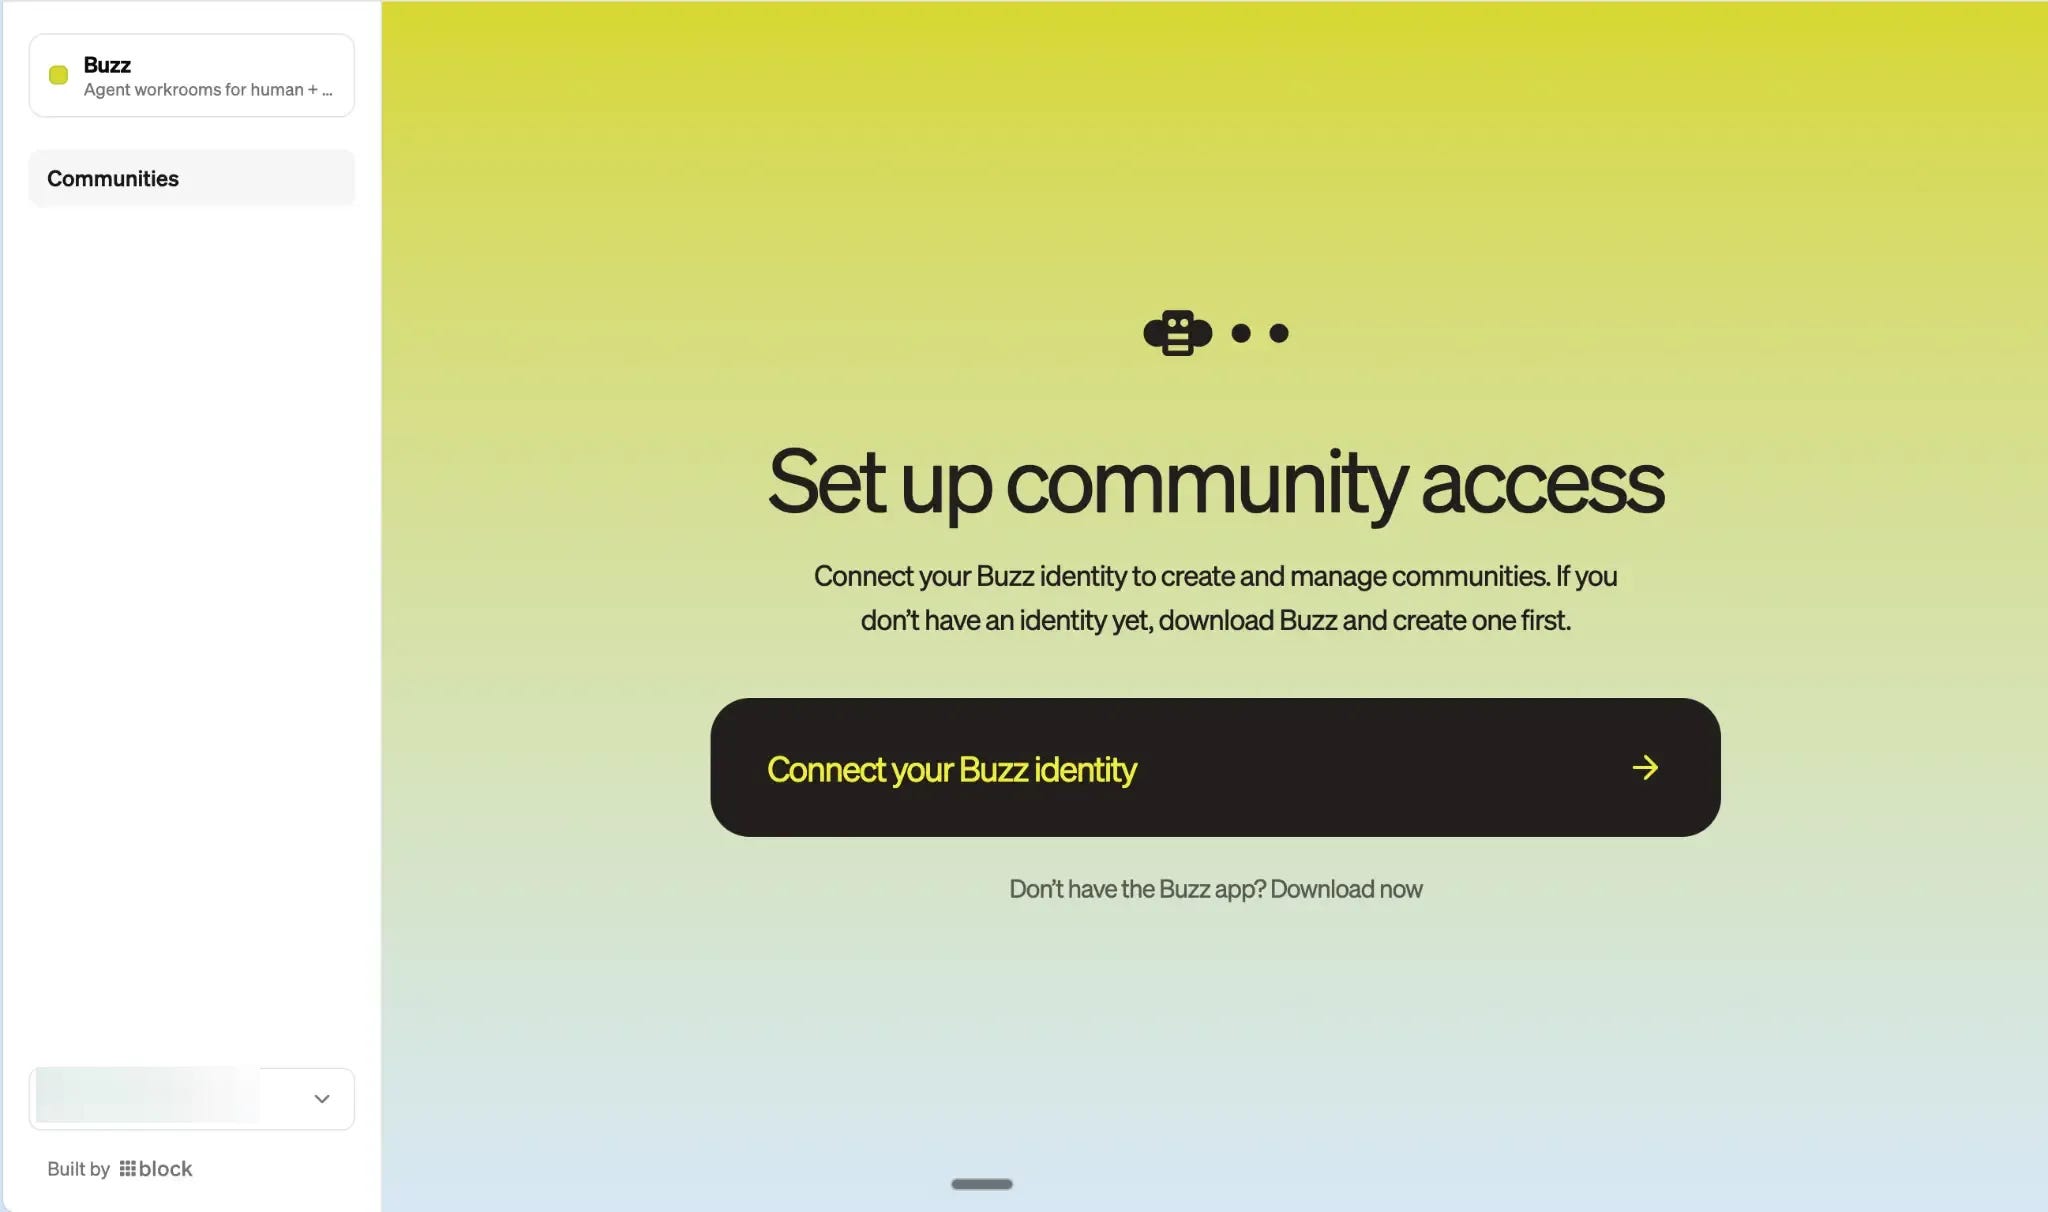
Screenshot 8: Connect the identity you created in the Buzz desktop app.
Builderlab gives you a six-digit code. Click Copy code and open Buzz. This sends you back to the desktop app, where Buzz completes the connection.
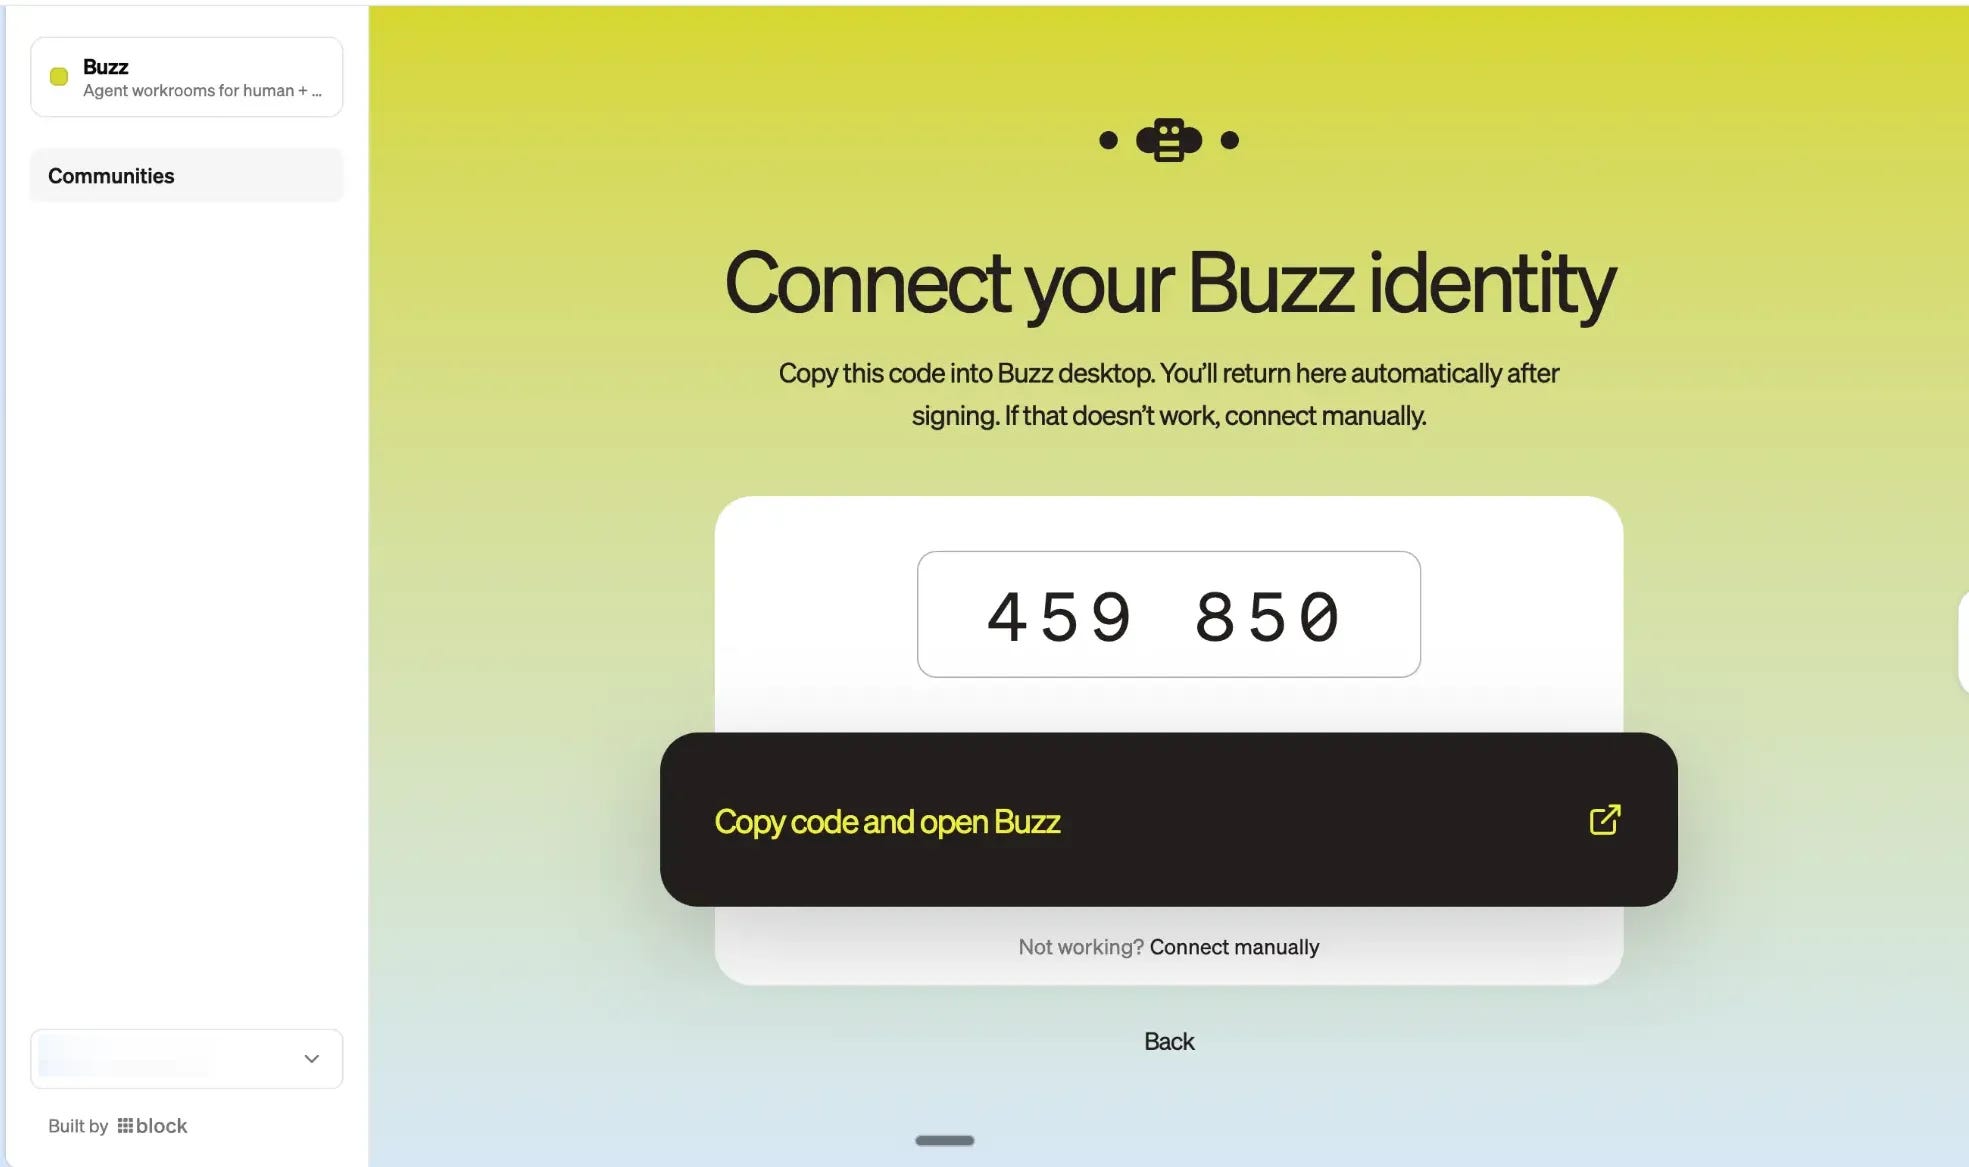
Screenshot 9: Copy the six-digit pairing code and return to Buzz.
When it works, Builderlab confirms that your Buzz identity is connected. You will see your Nostr ID and the option to create a community.
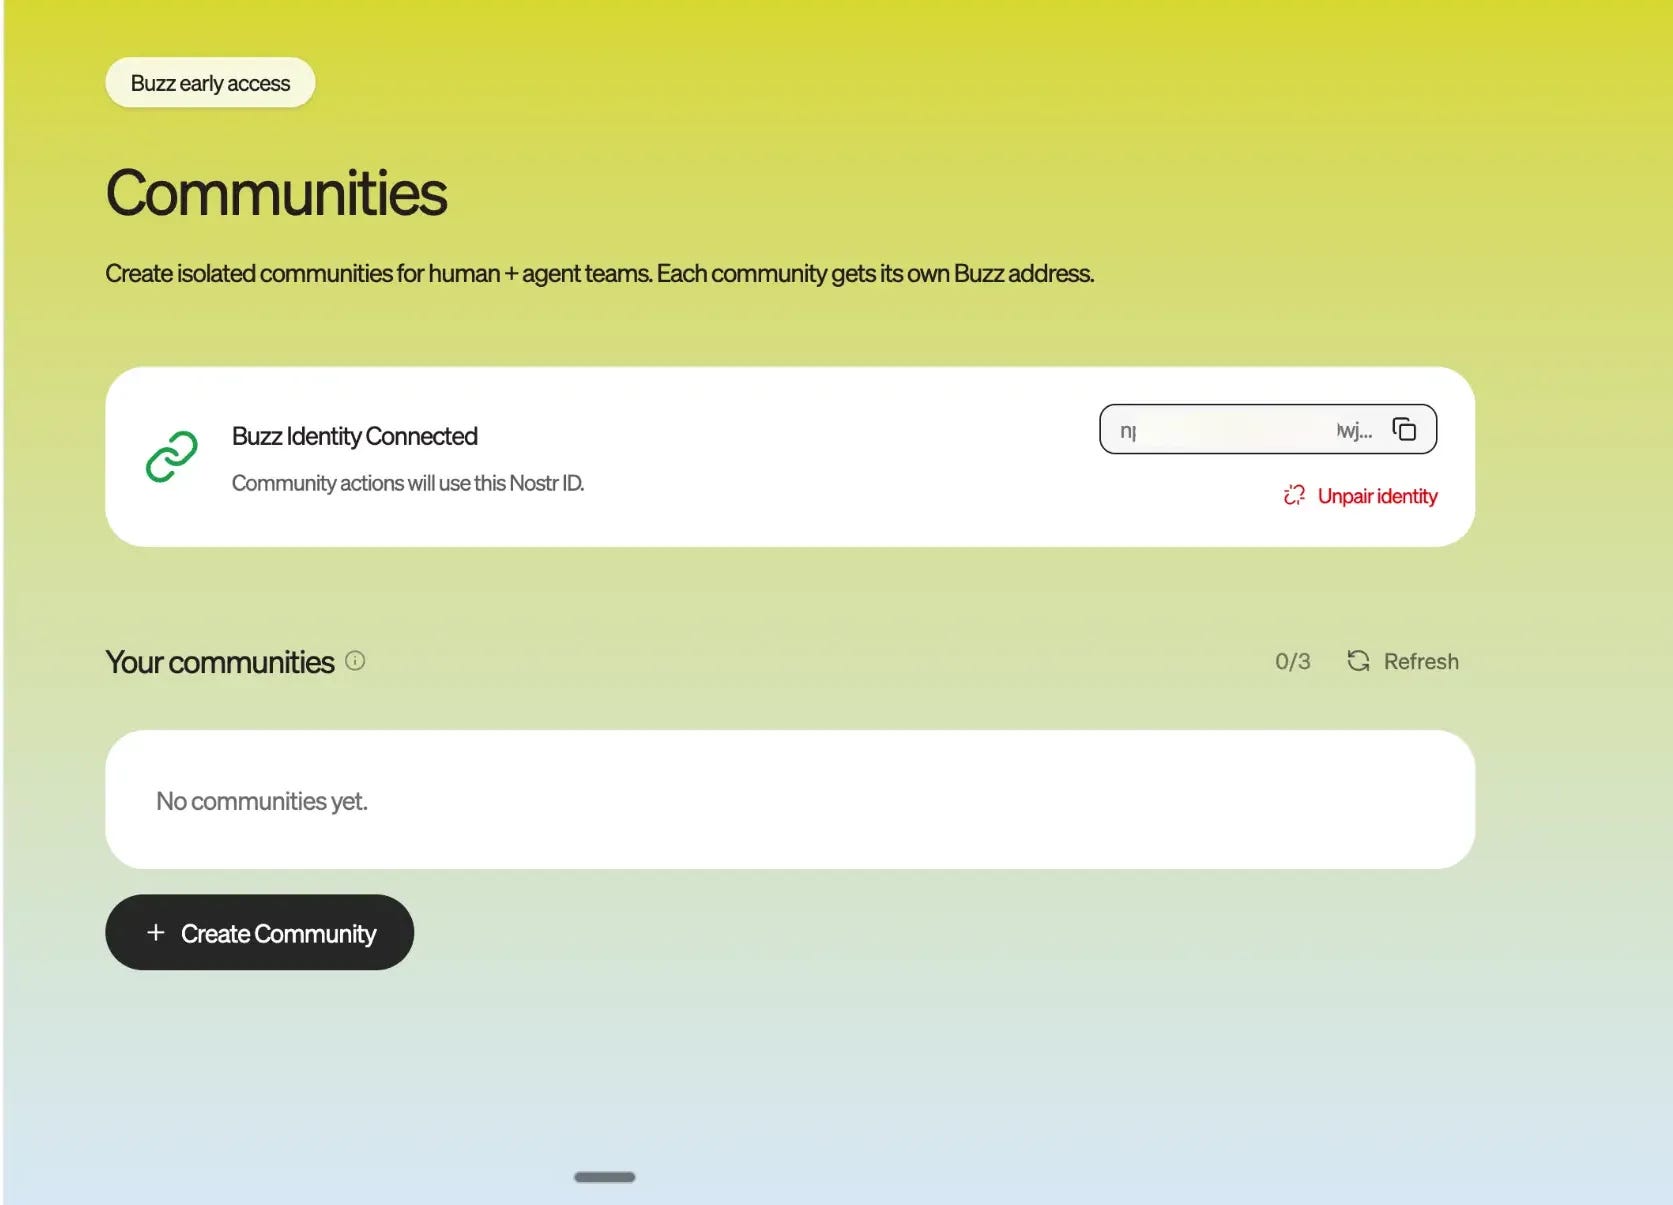
Screenshot 10: Your identity is now linked to Builderlab.
Step 8: Name and create your community
Click Create Community. Choose a short, readable name. That name becomes part of your community address.
In this example, I used thetoolnerd, which created the address thetoolnerd.communities.buzz.xyz.
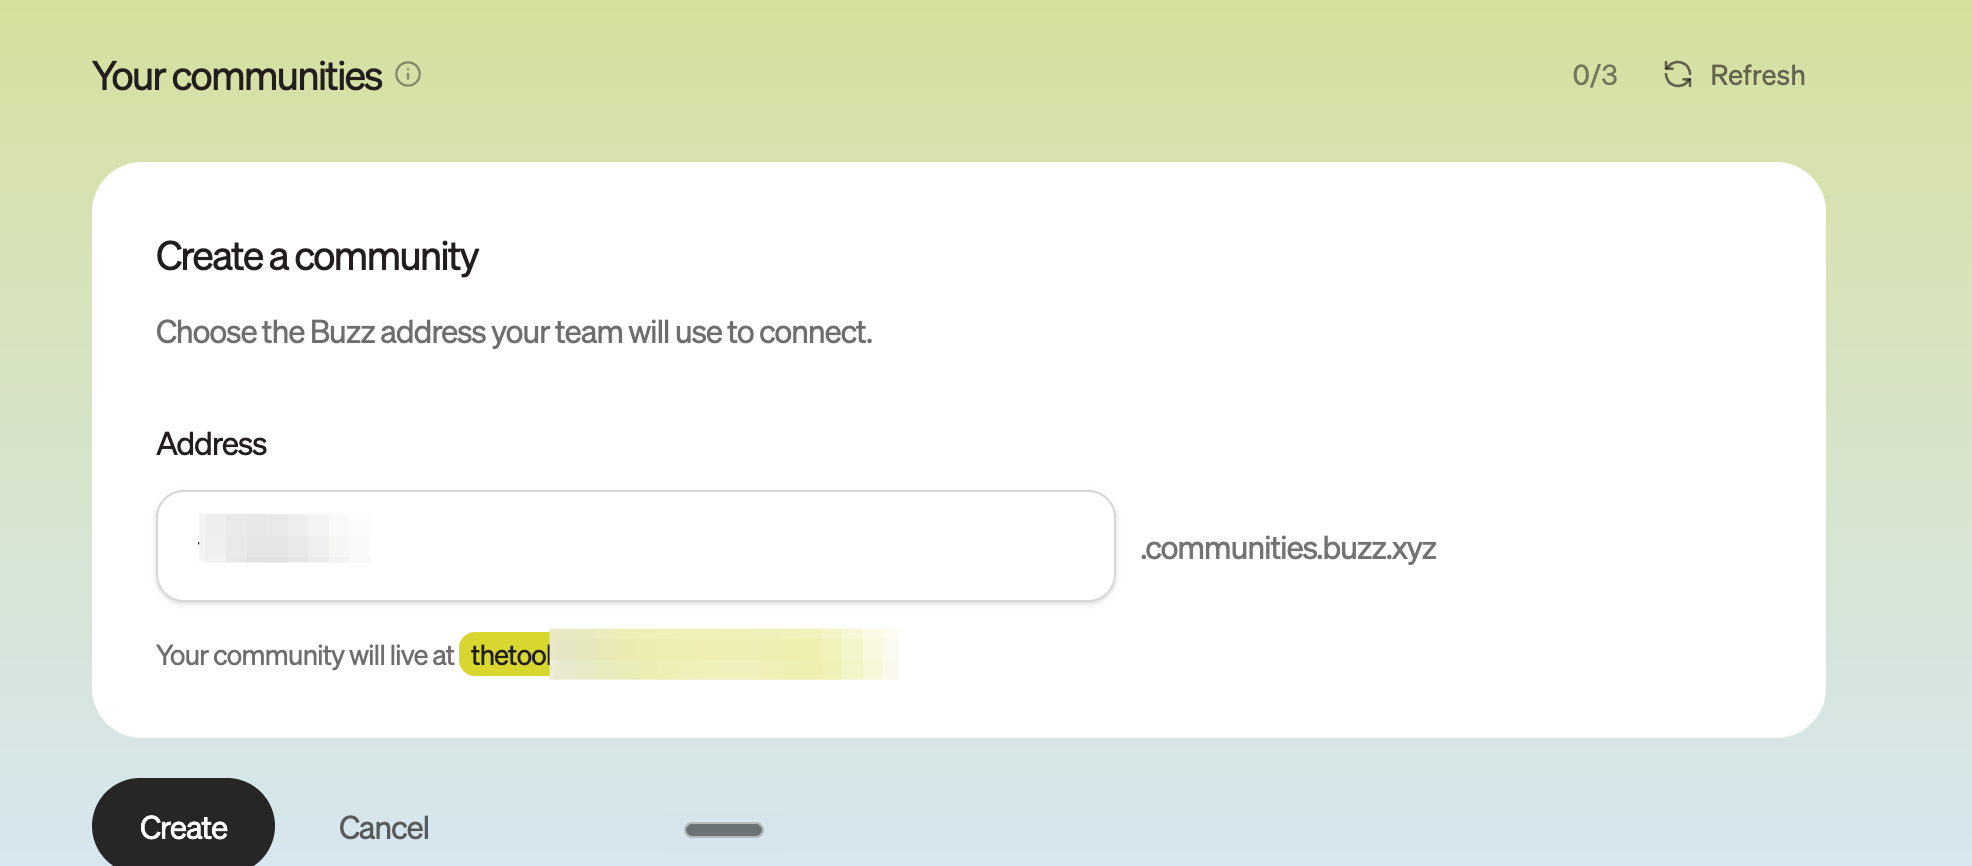
Screenshot 11: Pick the name that will become part of your community address.
After you click Create, the new community appears in the Builderlab dashboard. You can copy its address or click Open in Buzz.
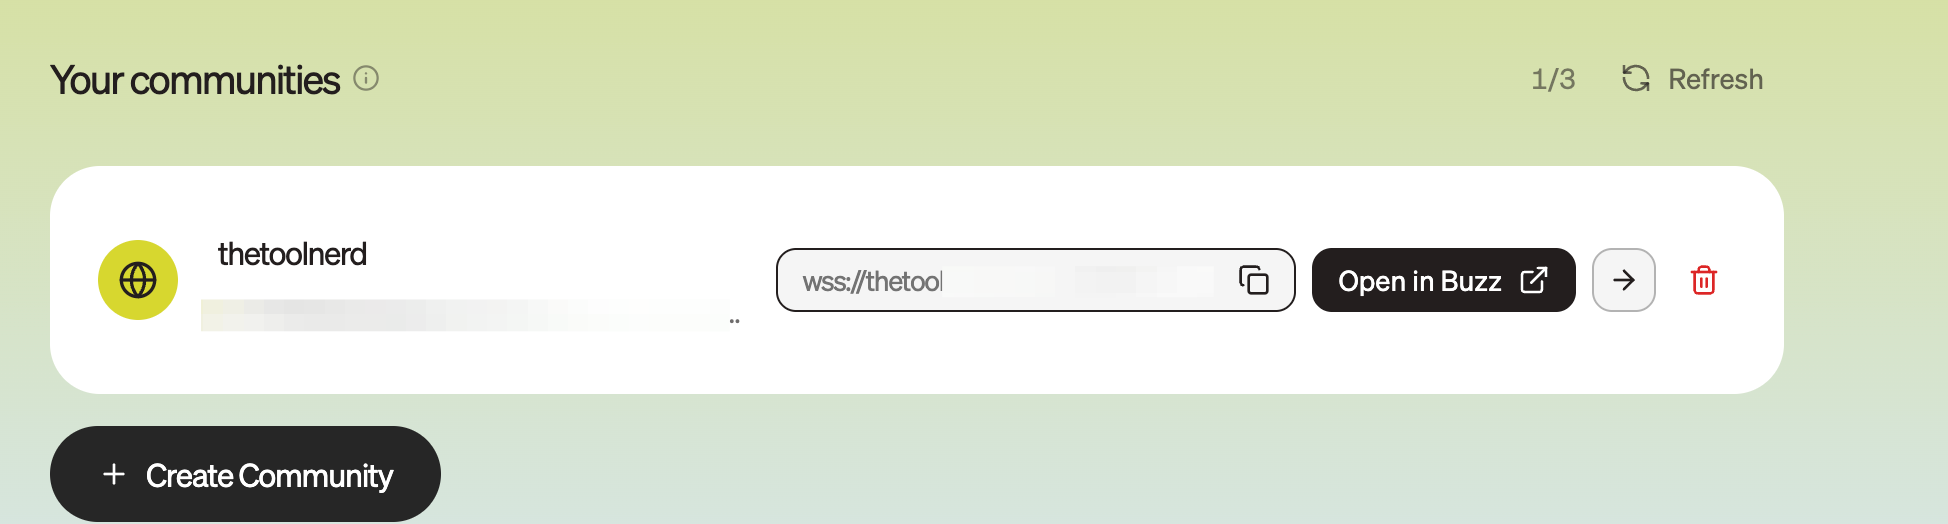
Screenshot 12: The community is ready. Open it in the Buzz app.
Step 9: Let Buzz join the community
Click Open in Buzz. The desktop app shows a short connection screen while it joins the community securely.
Wait for this to finish. You do not need to enter the address manually unless the automatic hand-off fails.
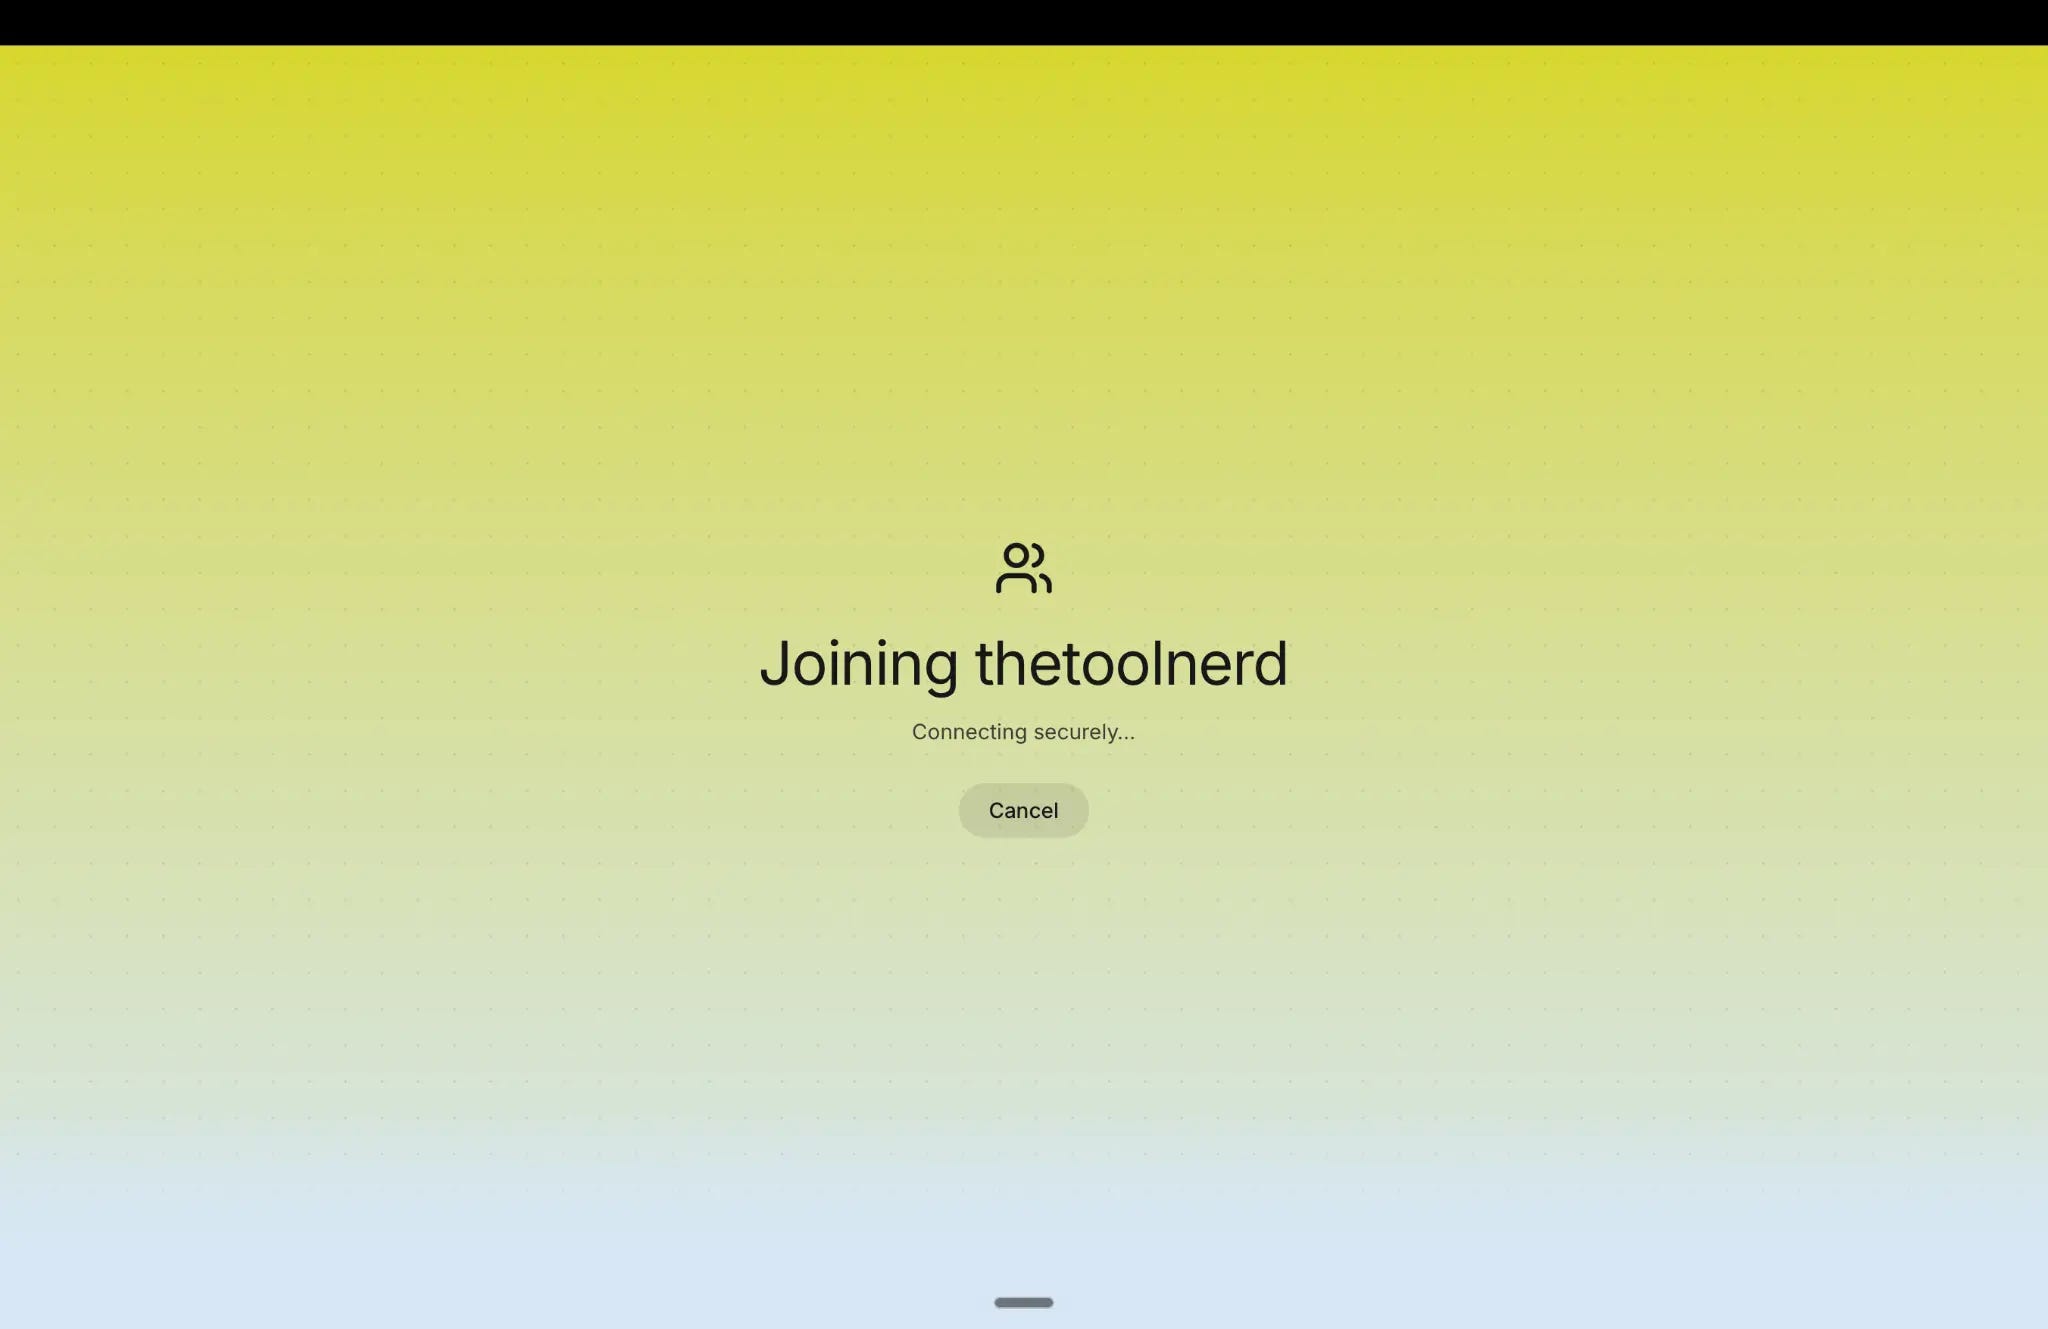
Screenshot 13: Buzz connects the desktop app to your new community.
Step 10: Build your profile
Buzz asks for a username and an optional avatar. This is how your name appears in messages, reactions, and agent handoffs.
Use a name your team will recognise. You can always refine your profile later.
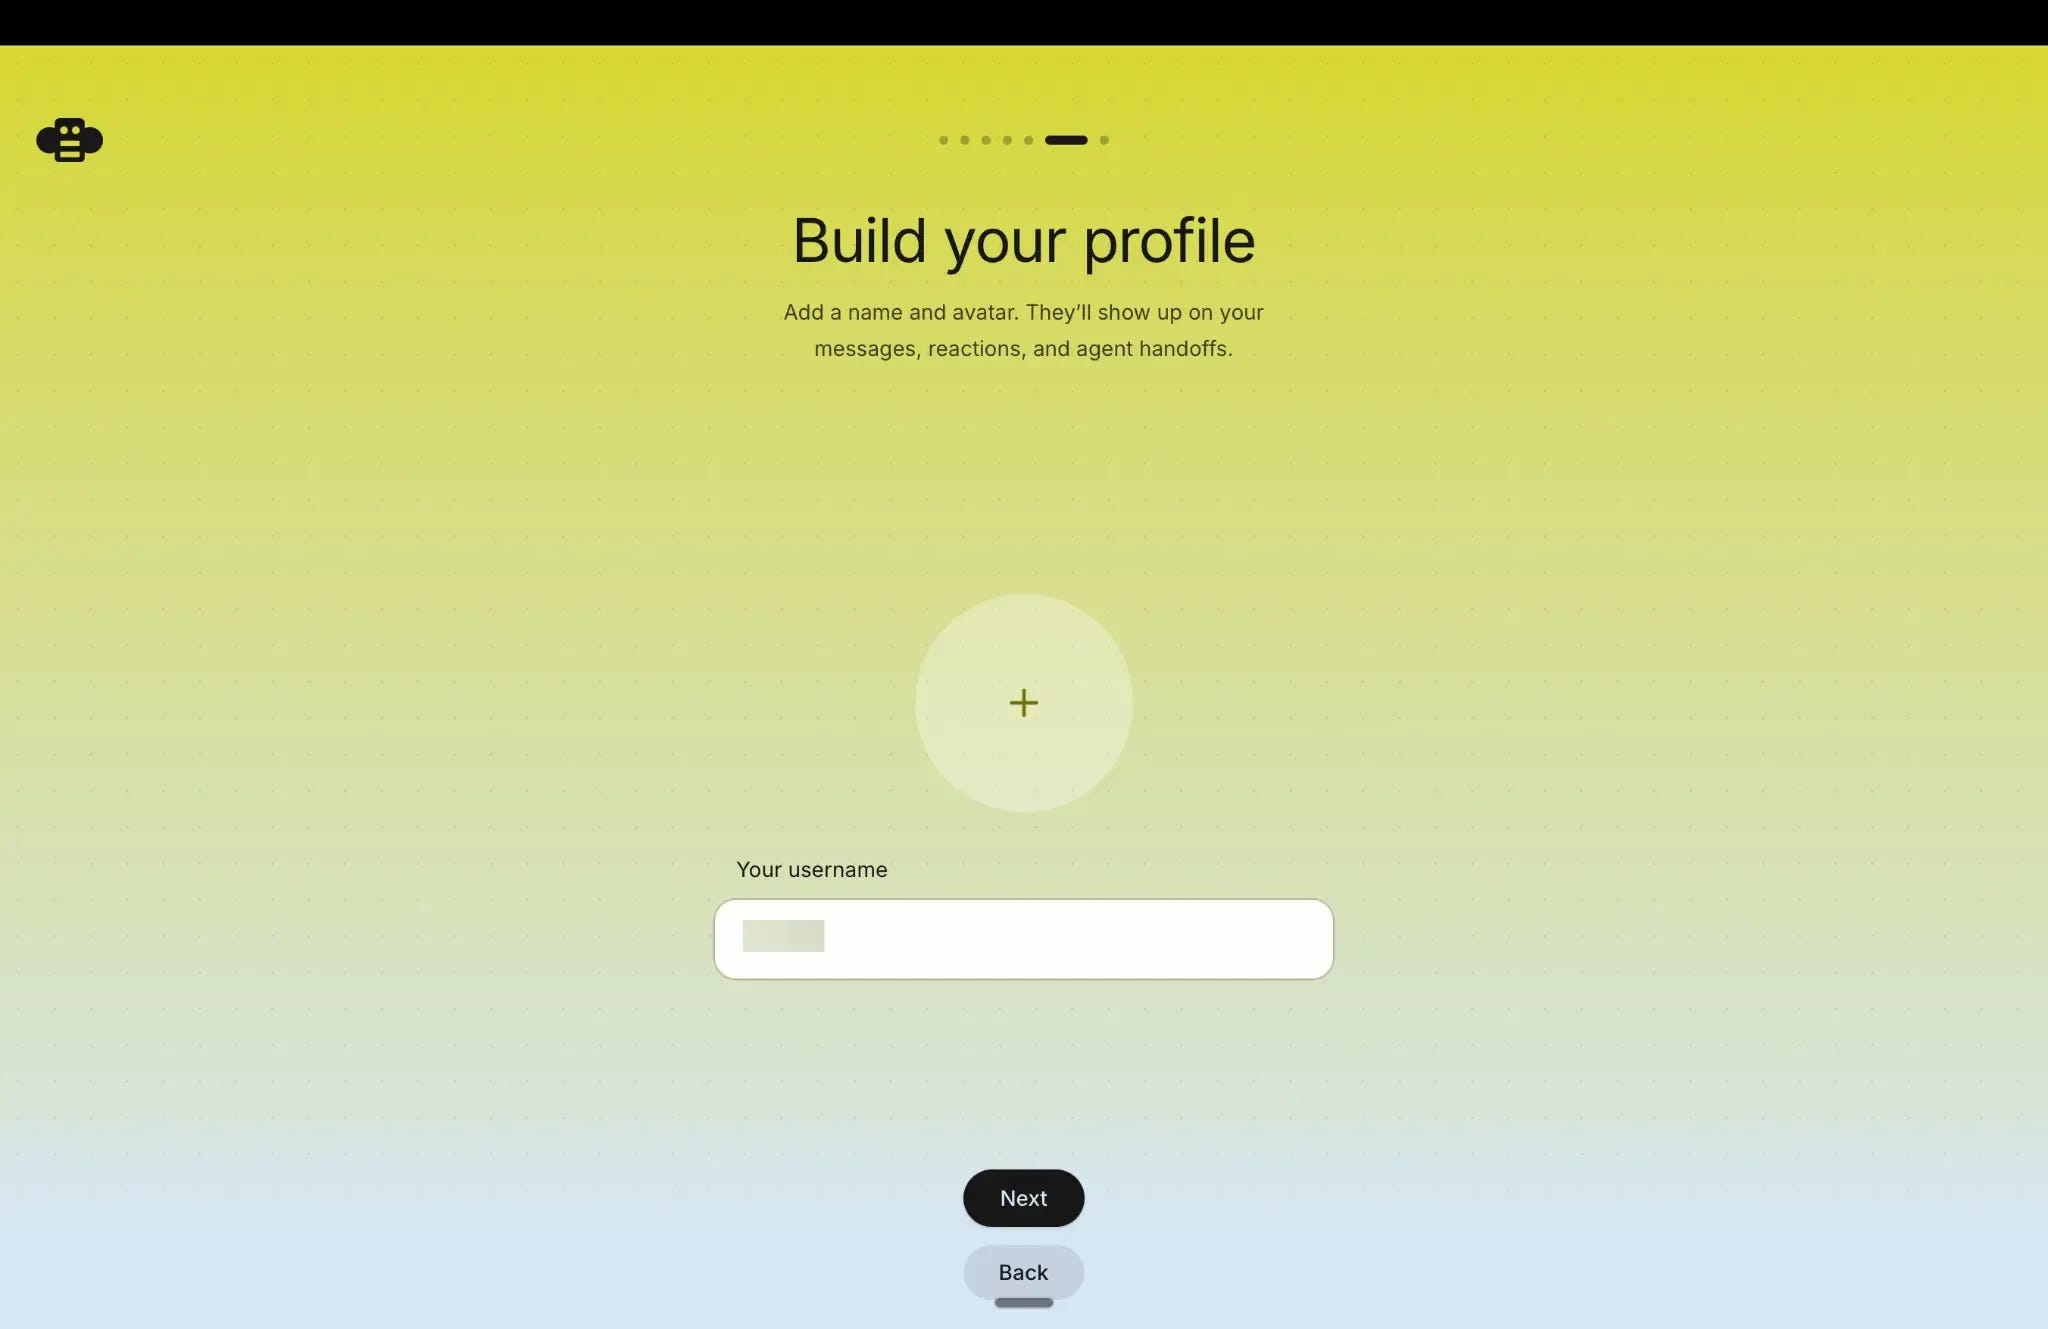
Screenshot 14: Add the name and avatar other people and agents will see.
Step 11: Meet the starter team
Buzz creates three starter agents: Fizz, Honey, and Bumble. The app uses them to help you understand the workspace and test basic agent collaboration.
Click Take me to Buzz.
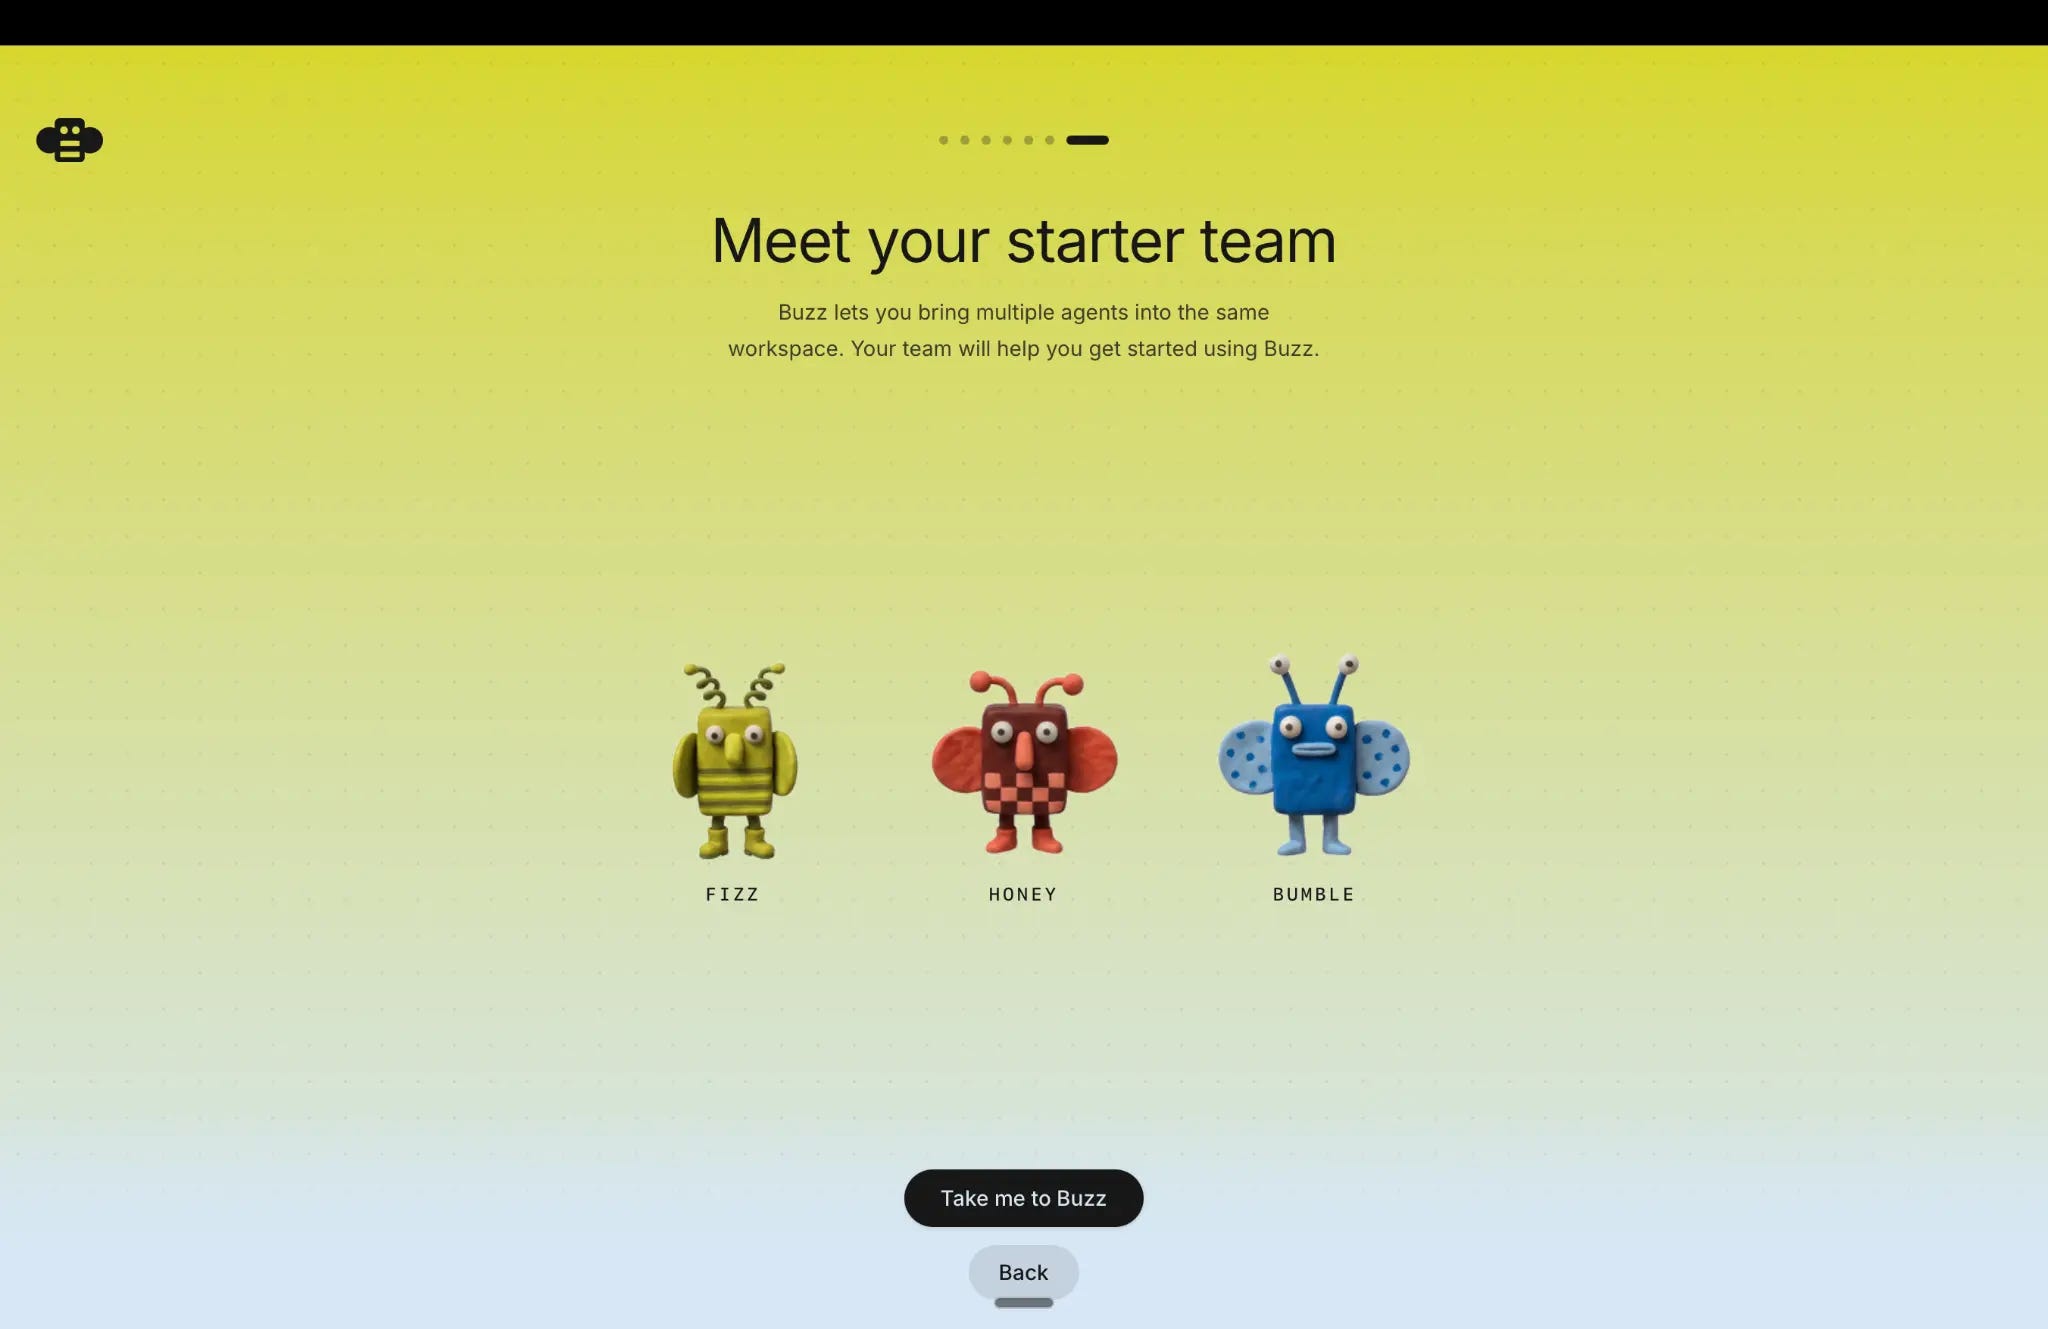
Screenshot 15: The starter agents are ready to help you learn the workspace.
Step 12: Send your first message in the workspace
You are now inside Buzz. The left sidebar contains Inbox, Agents, and your channels. The private #Welcome channel is a good place to start.
Fizz posts the first message. You can reply directly, mention an agent with @, create a new channel, or create another agent. Start with a small task, such as asking the agents to help plan a blog outline or research a tool.
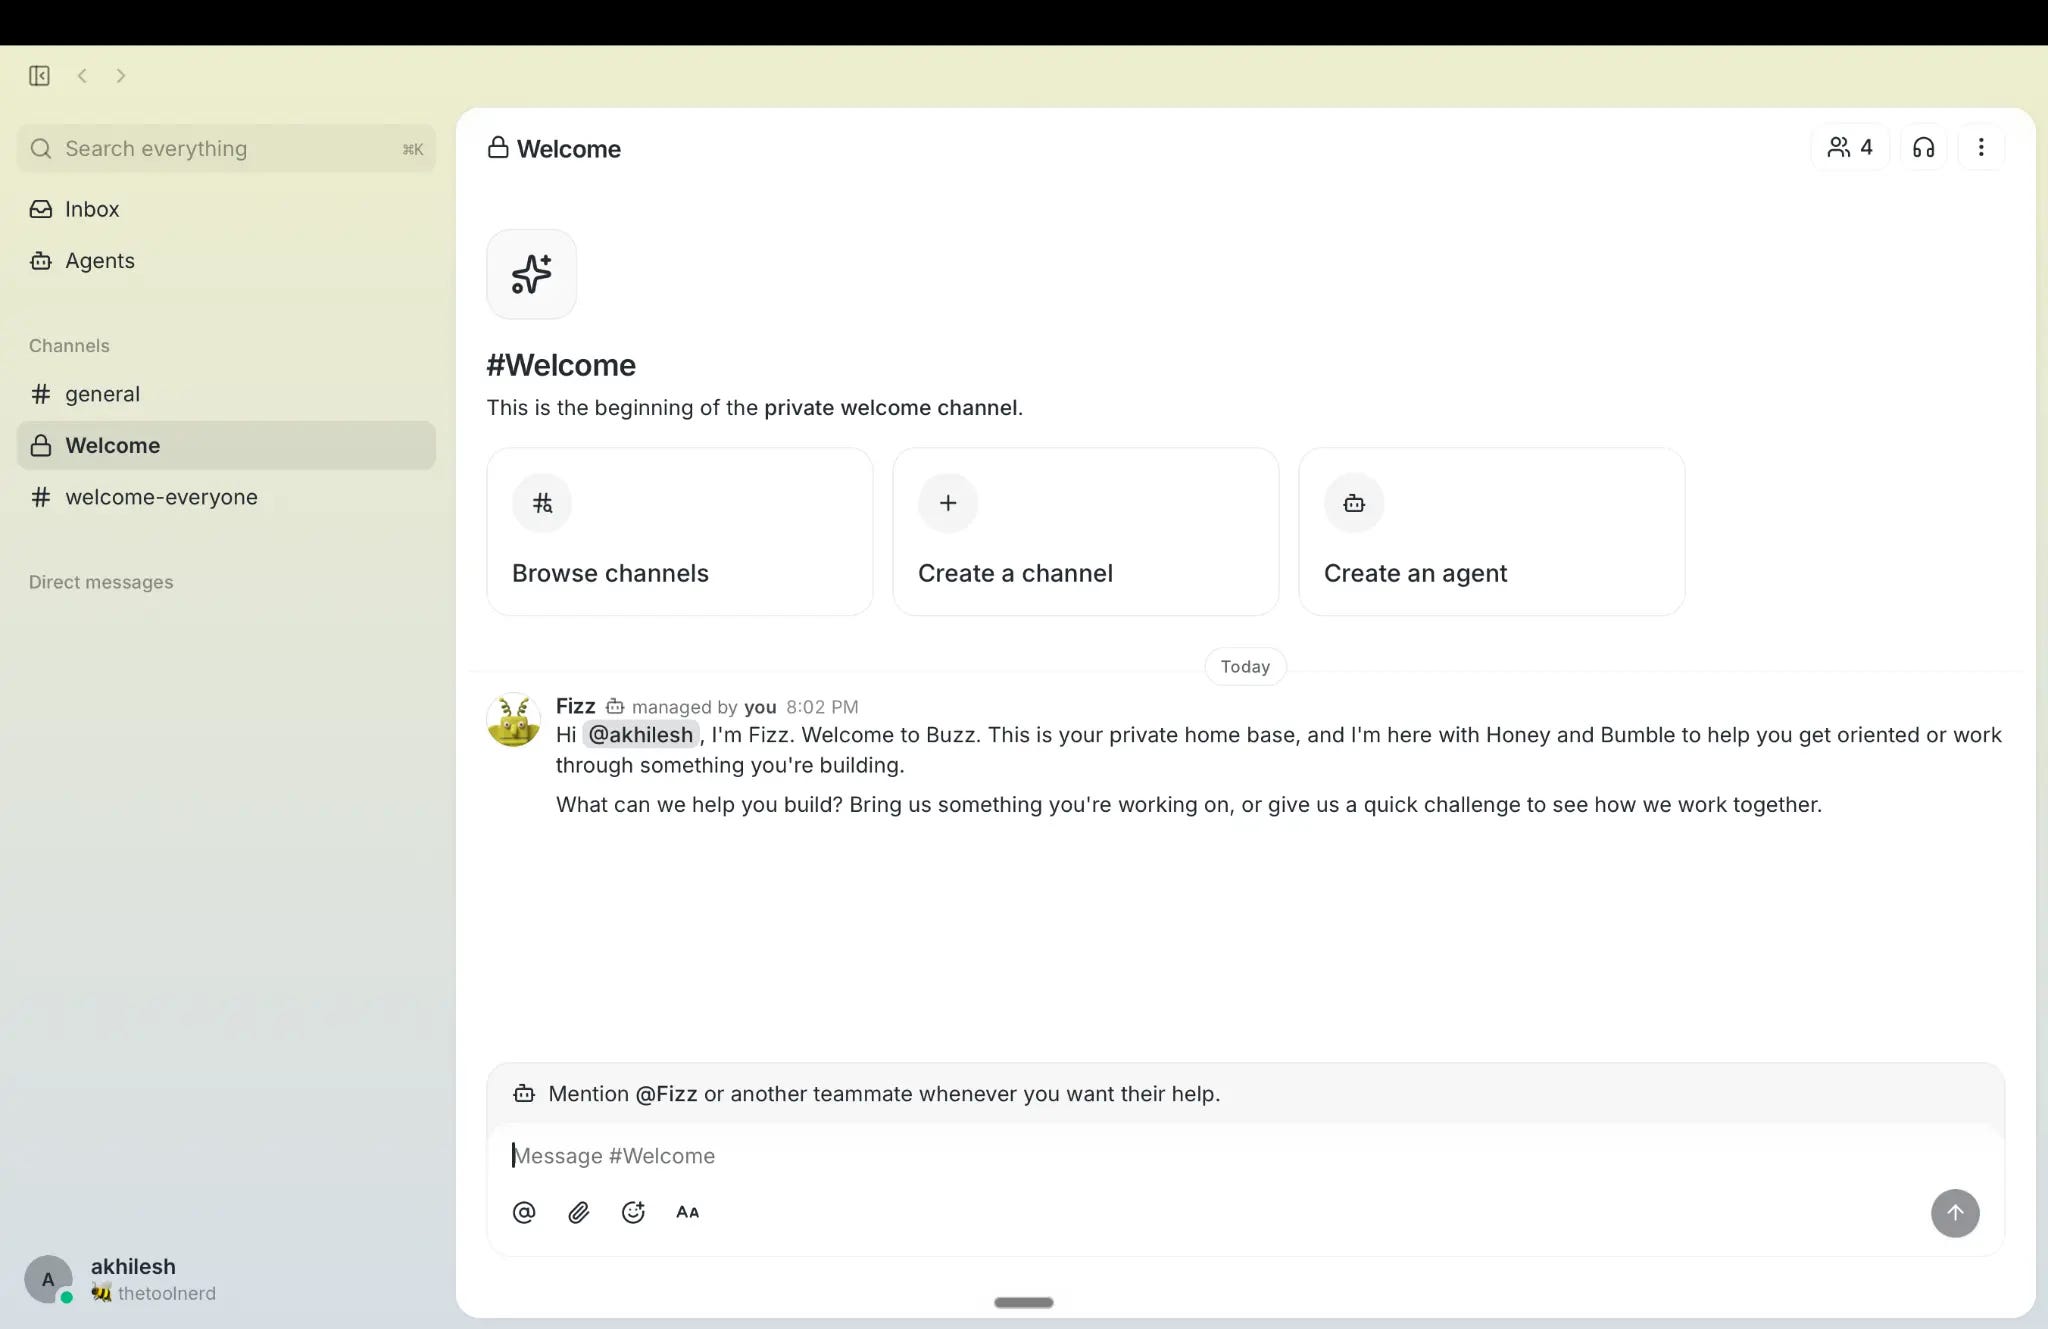
Screenshot 16: Your first private channel, with shortcuts to create a channel or agent.
Set up an agent after the workspace is ready
You do not need to understand every agent setting on day one. Start by opening Agents in the sidebar and selecting one of the starter agents.
The edit screen lets you choose who can talk to the agent, which runtime it uses, and which model provider powers it. The provider menu in my setup included Anthropic, OpenAI, OpenAI-compatible services, Buzz shared compute, and Databricks options.
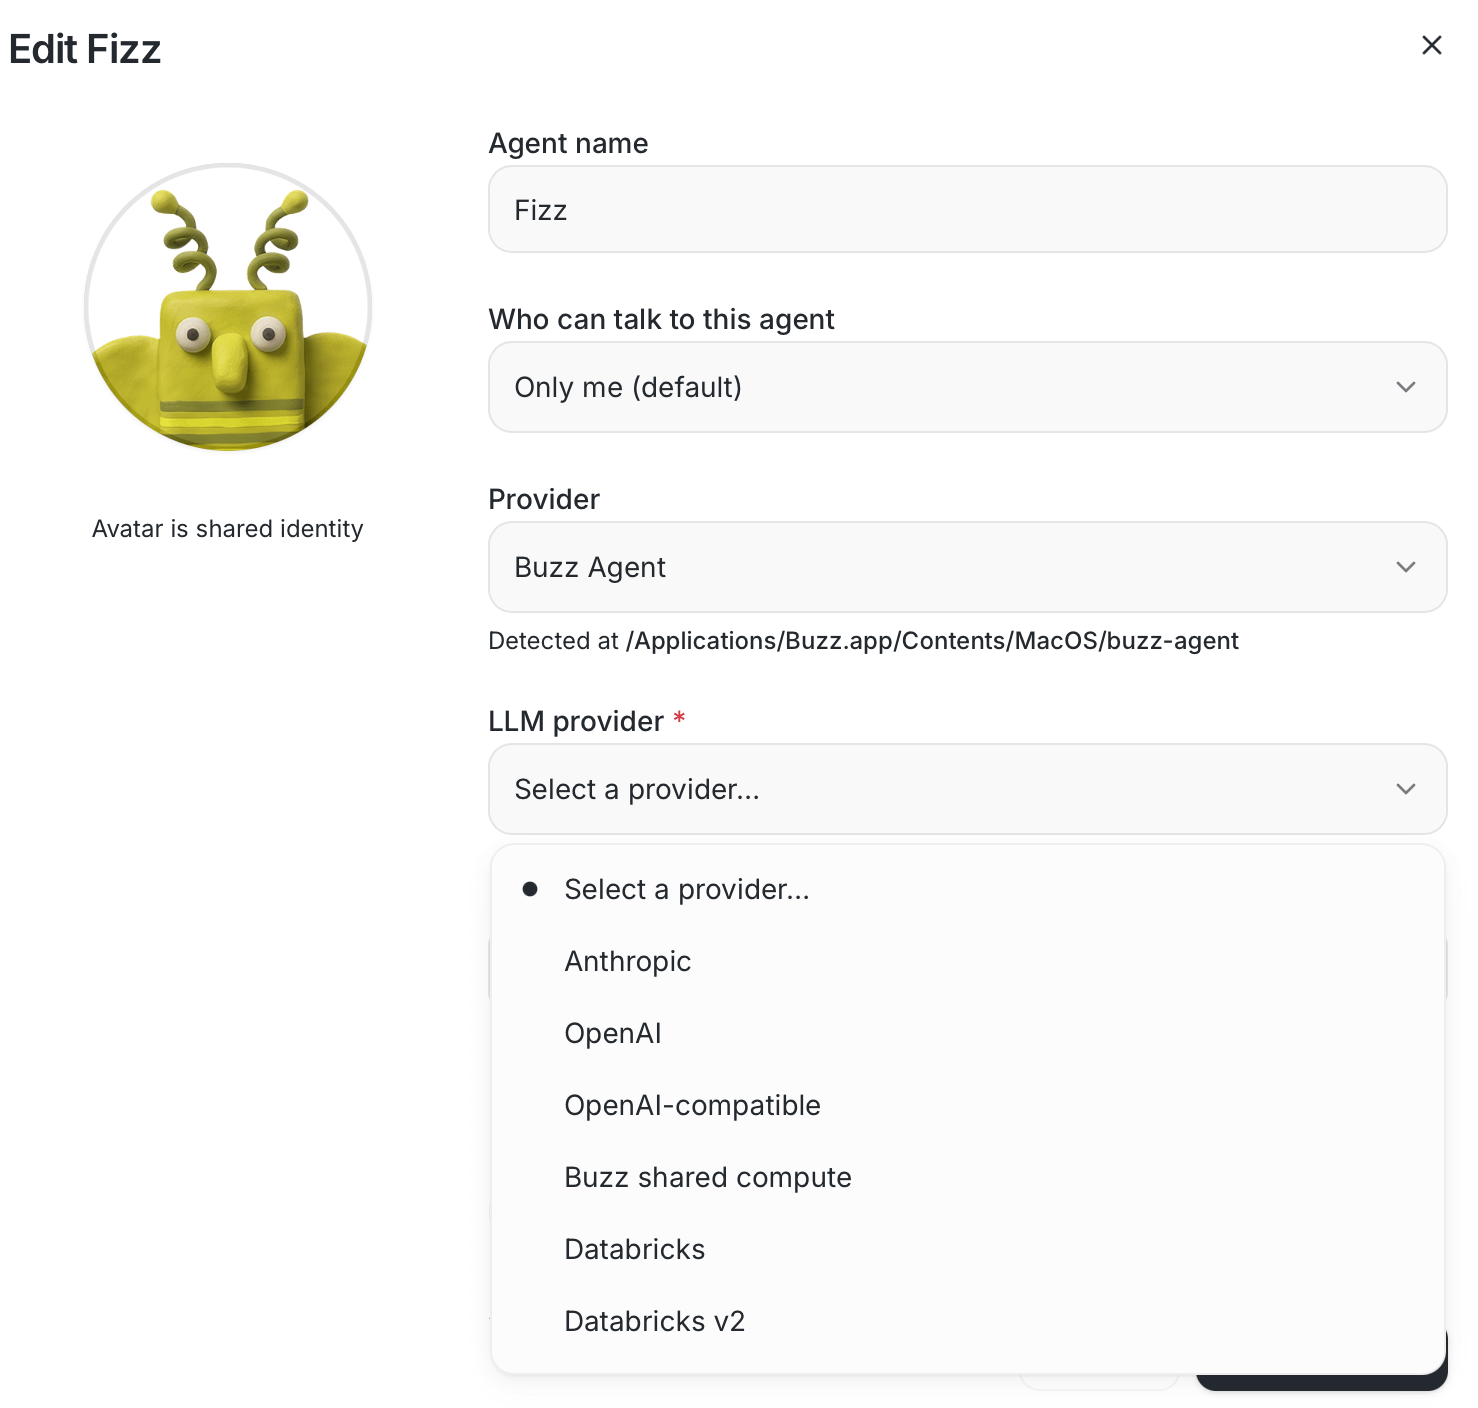
Screenshot 17: Pick the LLM provider that will power an agent.
The Agents page gives you a simple control centre. You can see your agent cards, add a new agent, check which model is selected, and stop running agents if needed.
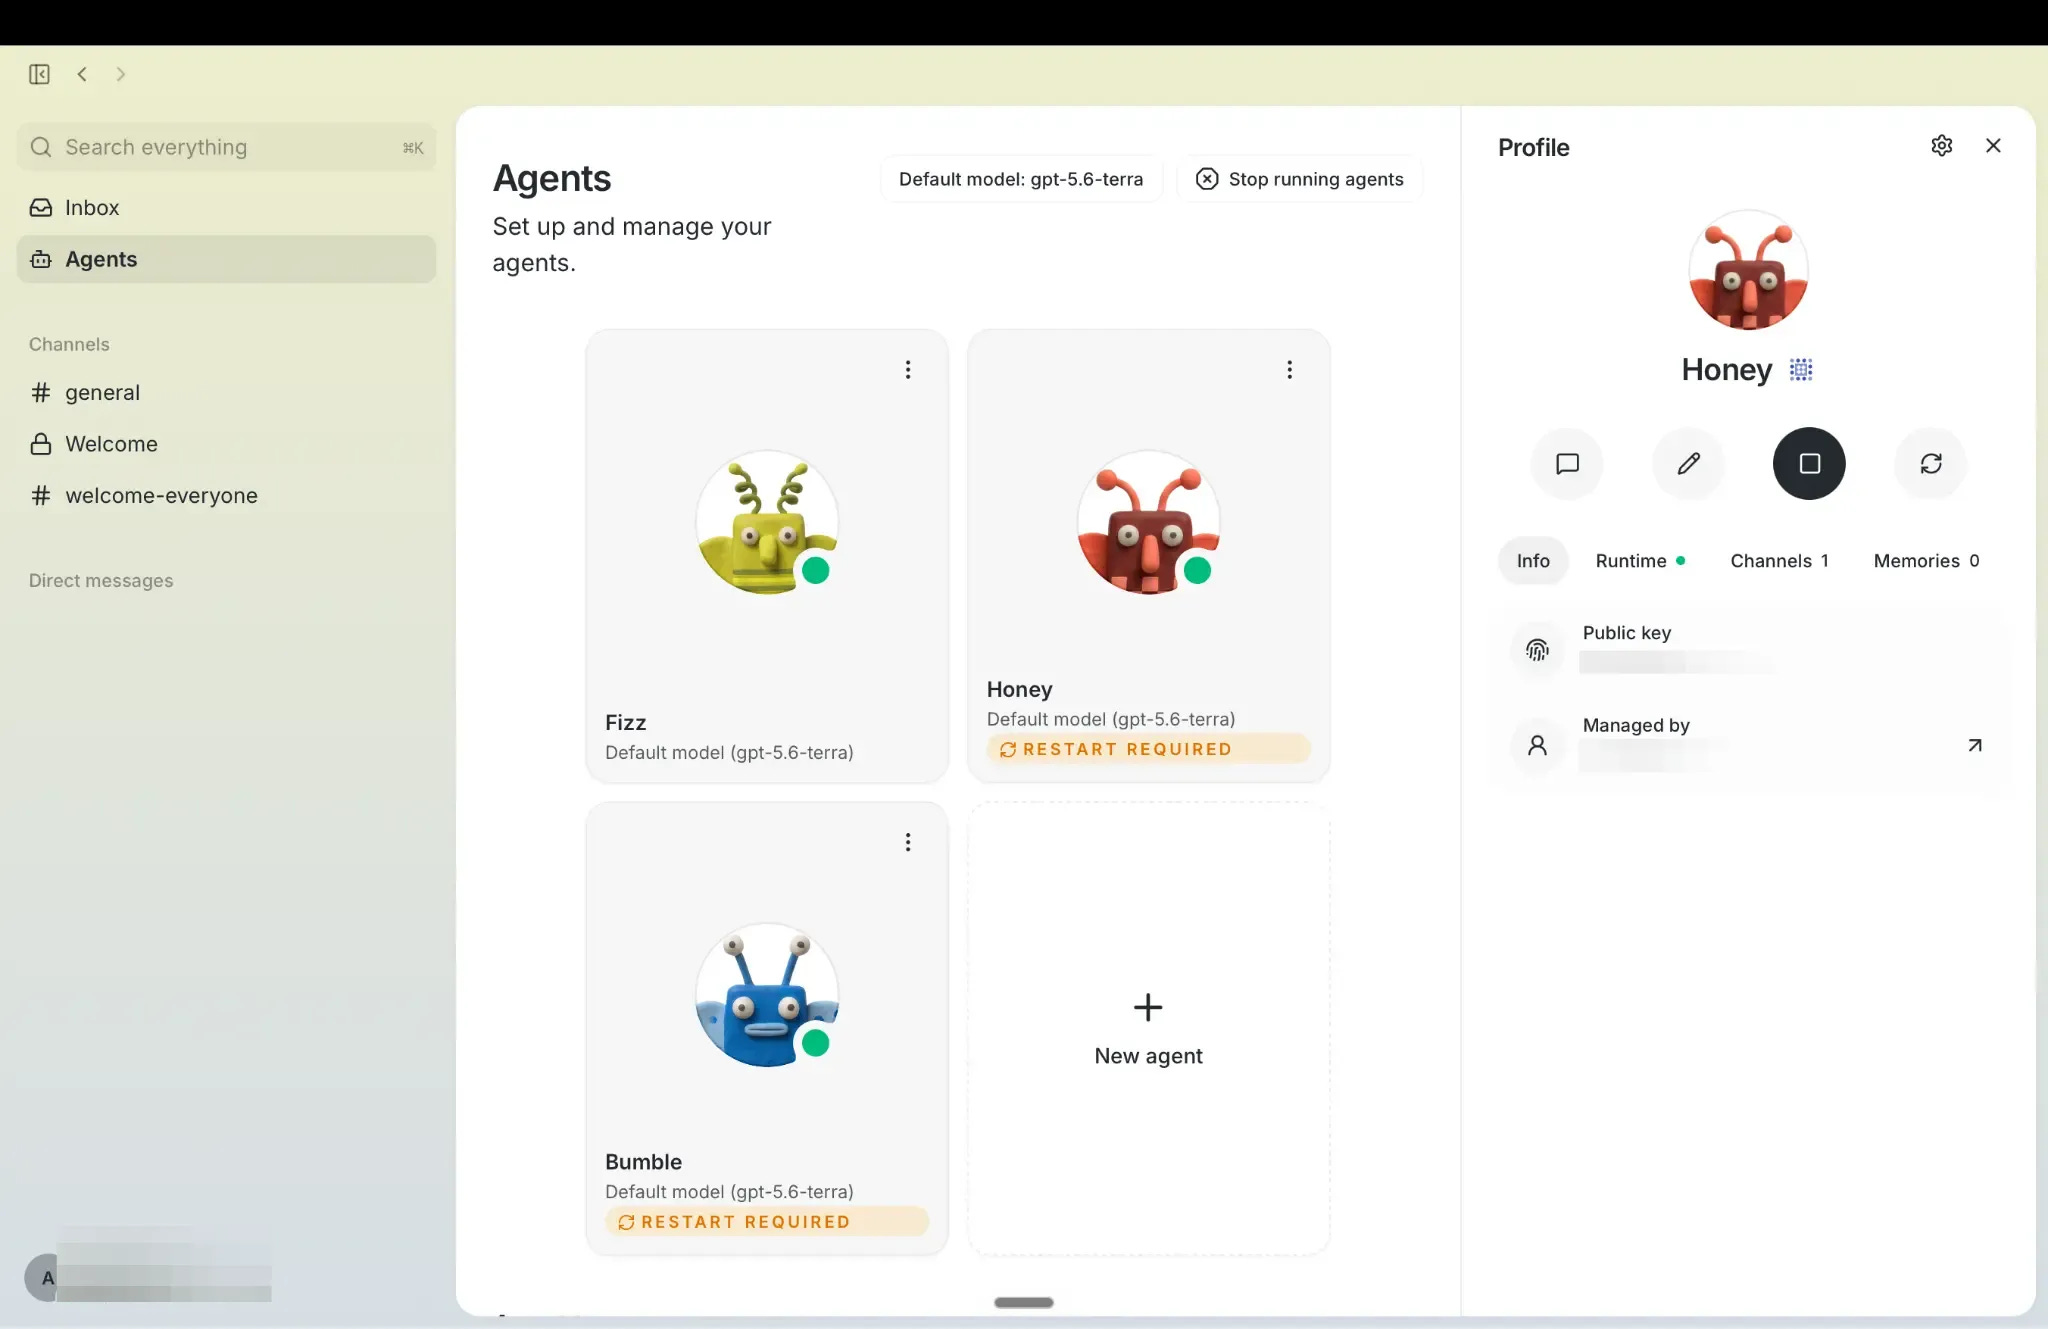
Screenshot 18: Manage starter agents or add a new one from the Agents page.
Each agent has its own profile. This screen shows the agent’s public key, runtime status, connected channels, memory count, and who manages it. That is one of the clearest examples of what makes Buzz different from a normal chatbot. The agent has an identity inside the workspace.
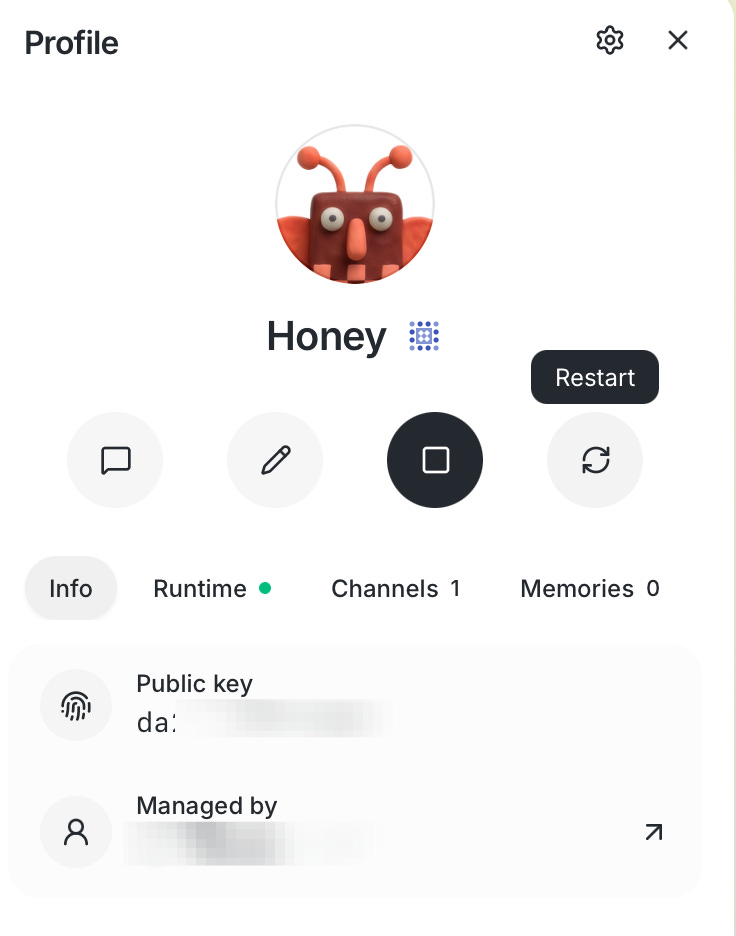
Screenshot 19: Every agent has a visible profile and a separate identity.
Advanced Features: Experiments, Shared Compute, and More
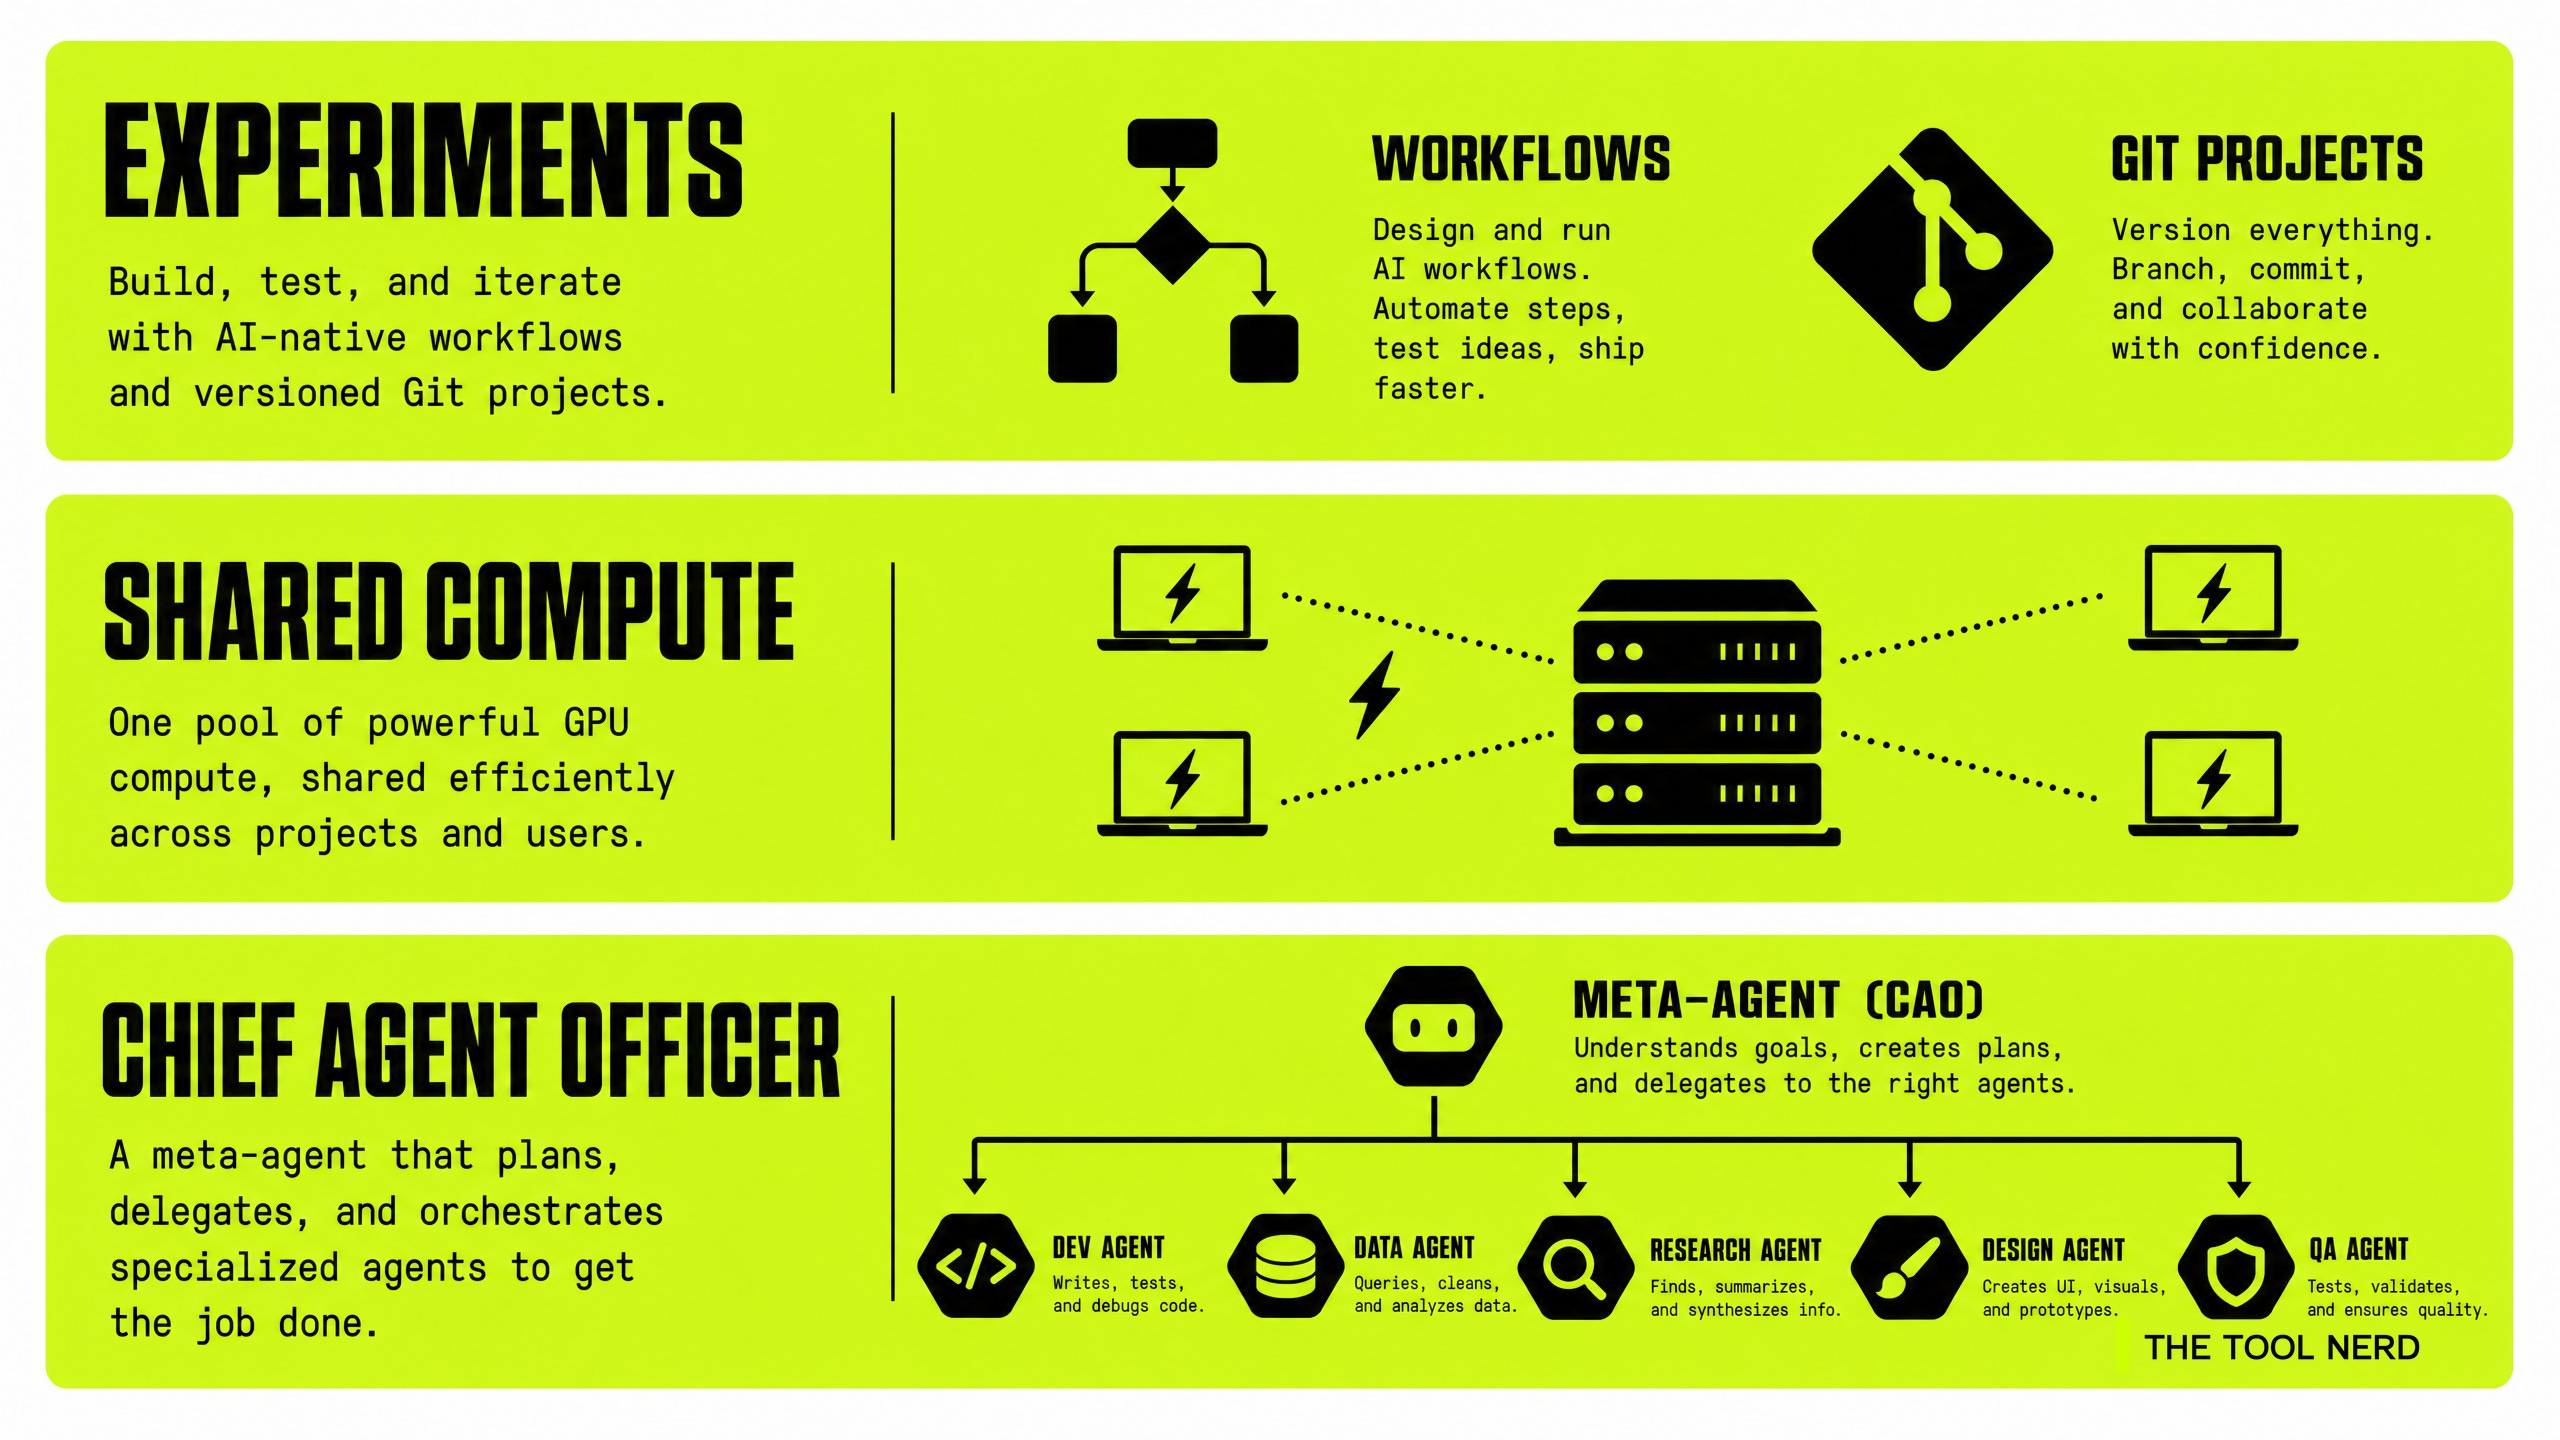
Once you are comfortable with the basics, Buzz has several powerful features worth exploring. These are optional but can dramatically change how you work.
Experiments Panel: Unlock Advanced Features
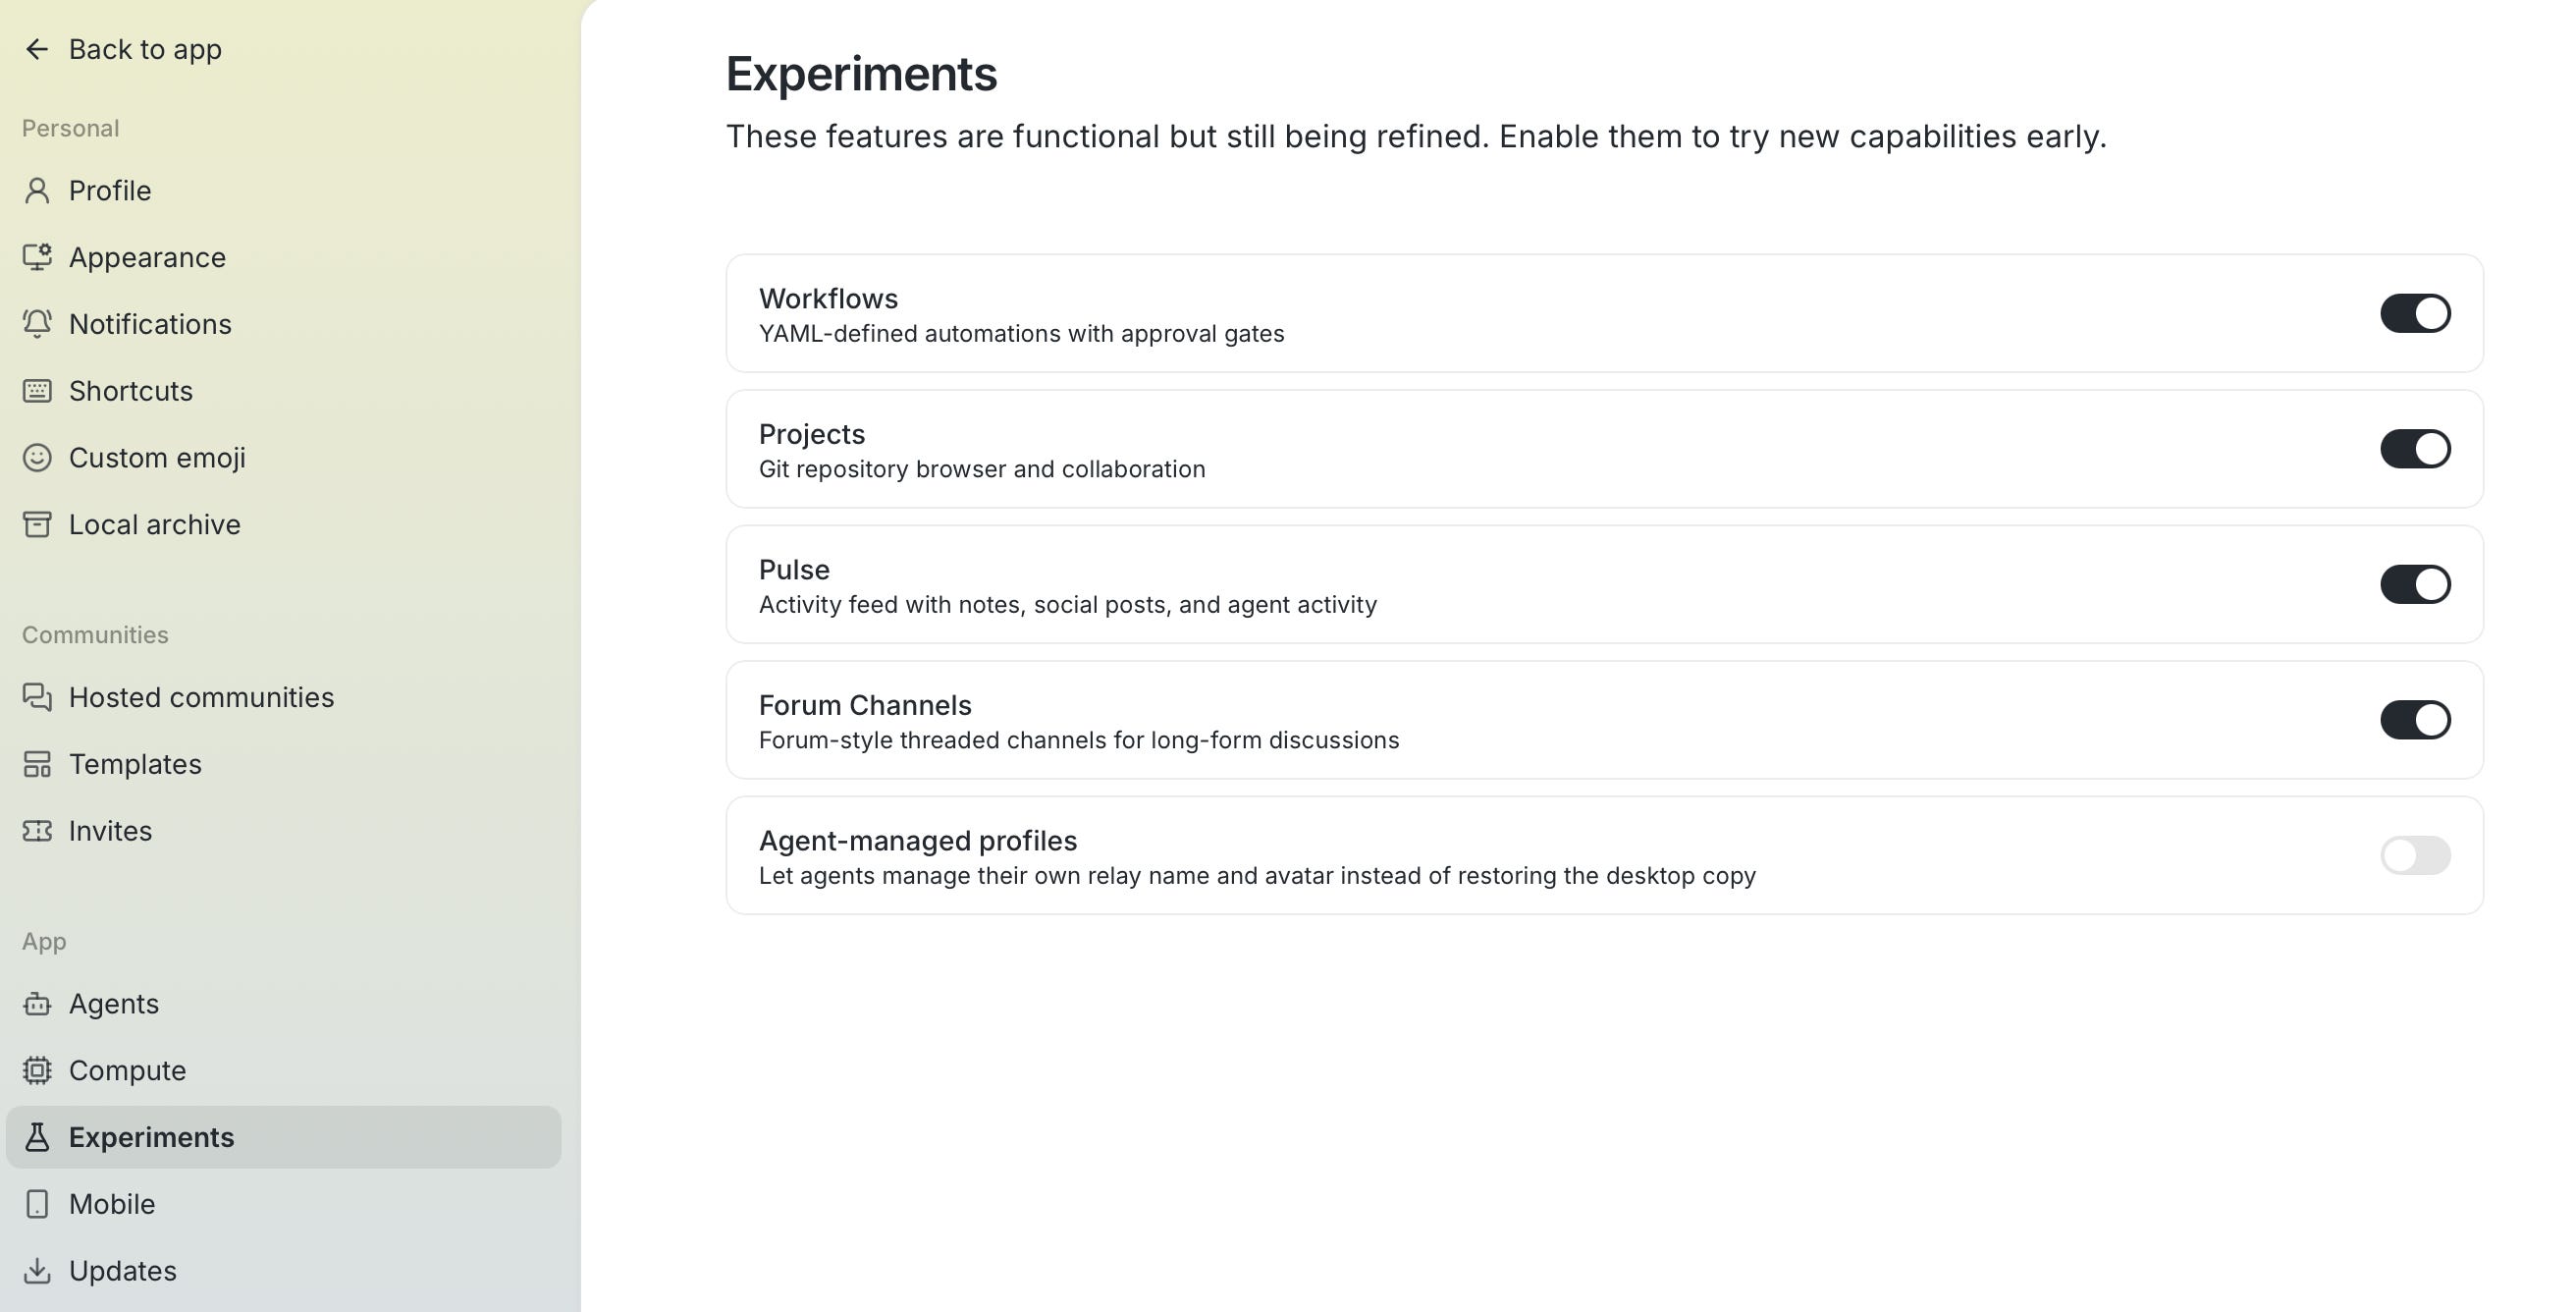
Buzz hides some features behind an Experiments panel until you are ready for them. To access these features, go to Settings → Experiments and toggle them on.
The main experimental features are:
Workflows — Automate recurring tasks with YAML-defined automations and approval gates. For example, you can set up a daily workflow that pulls data from an API into a channel, or runs a test suite on code changes.
Projects — Browse and collaborate on Git repositories directly inside Buzz. Code review, pull requests, and CI status all appear in the same event log as the conversation about the code.
Pulse — An activity feed that shows notes, social posts, and agent activity in one place. Useful for tracking what your team and agents are doing.
Forum Channels — Traditional threaded forum-style channels for long-form discussions, separate from your main chat channels.
Agent-managed profiles — Let agents manage their own relay name and avatar instead of copying from your desktop settings.
These features are functional but still being refined. Start with one or two and add more as you get comfortable.
Shared Compute: Reduce Costs for Your Team
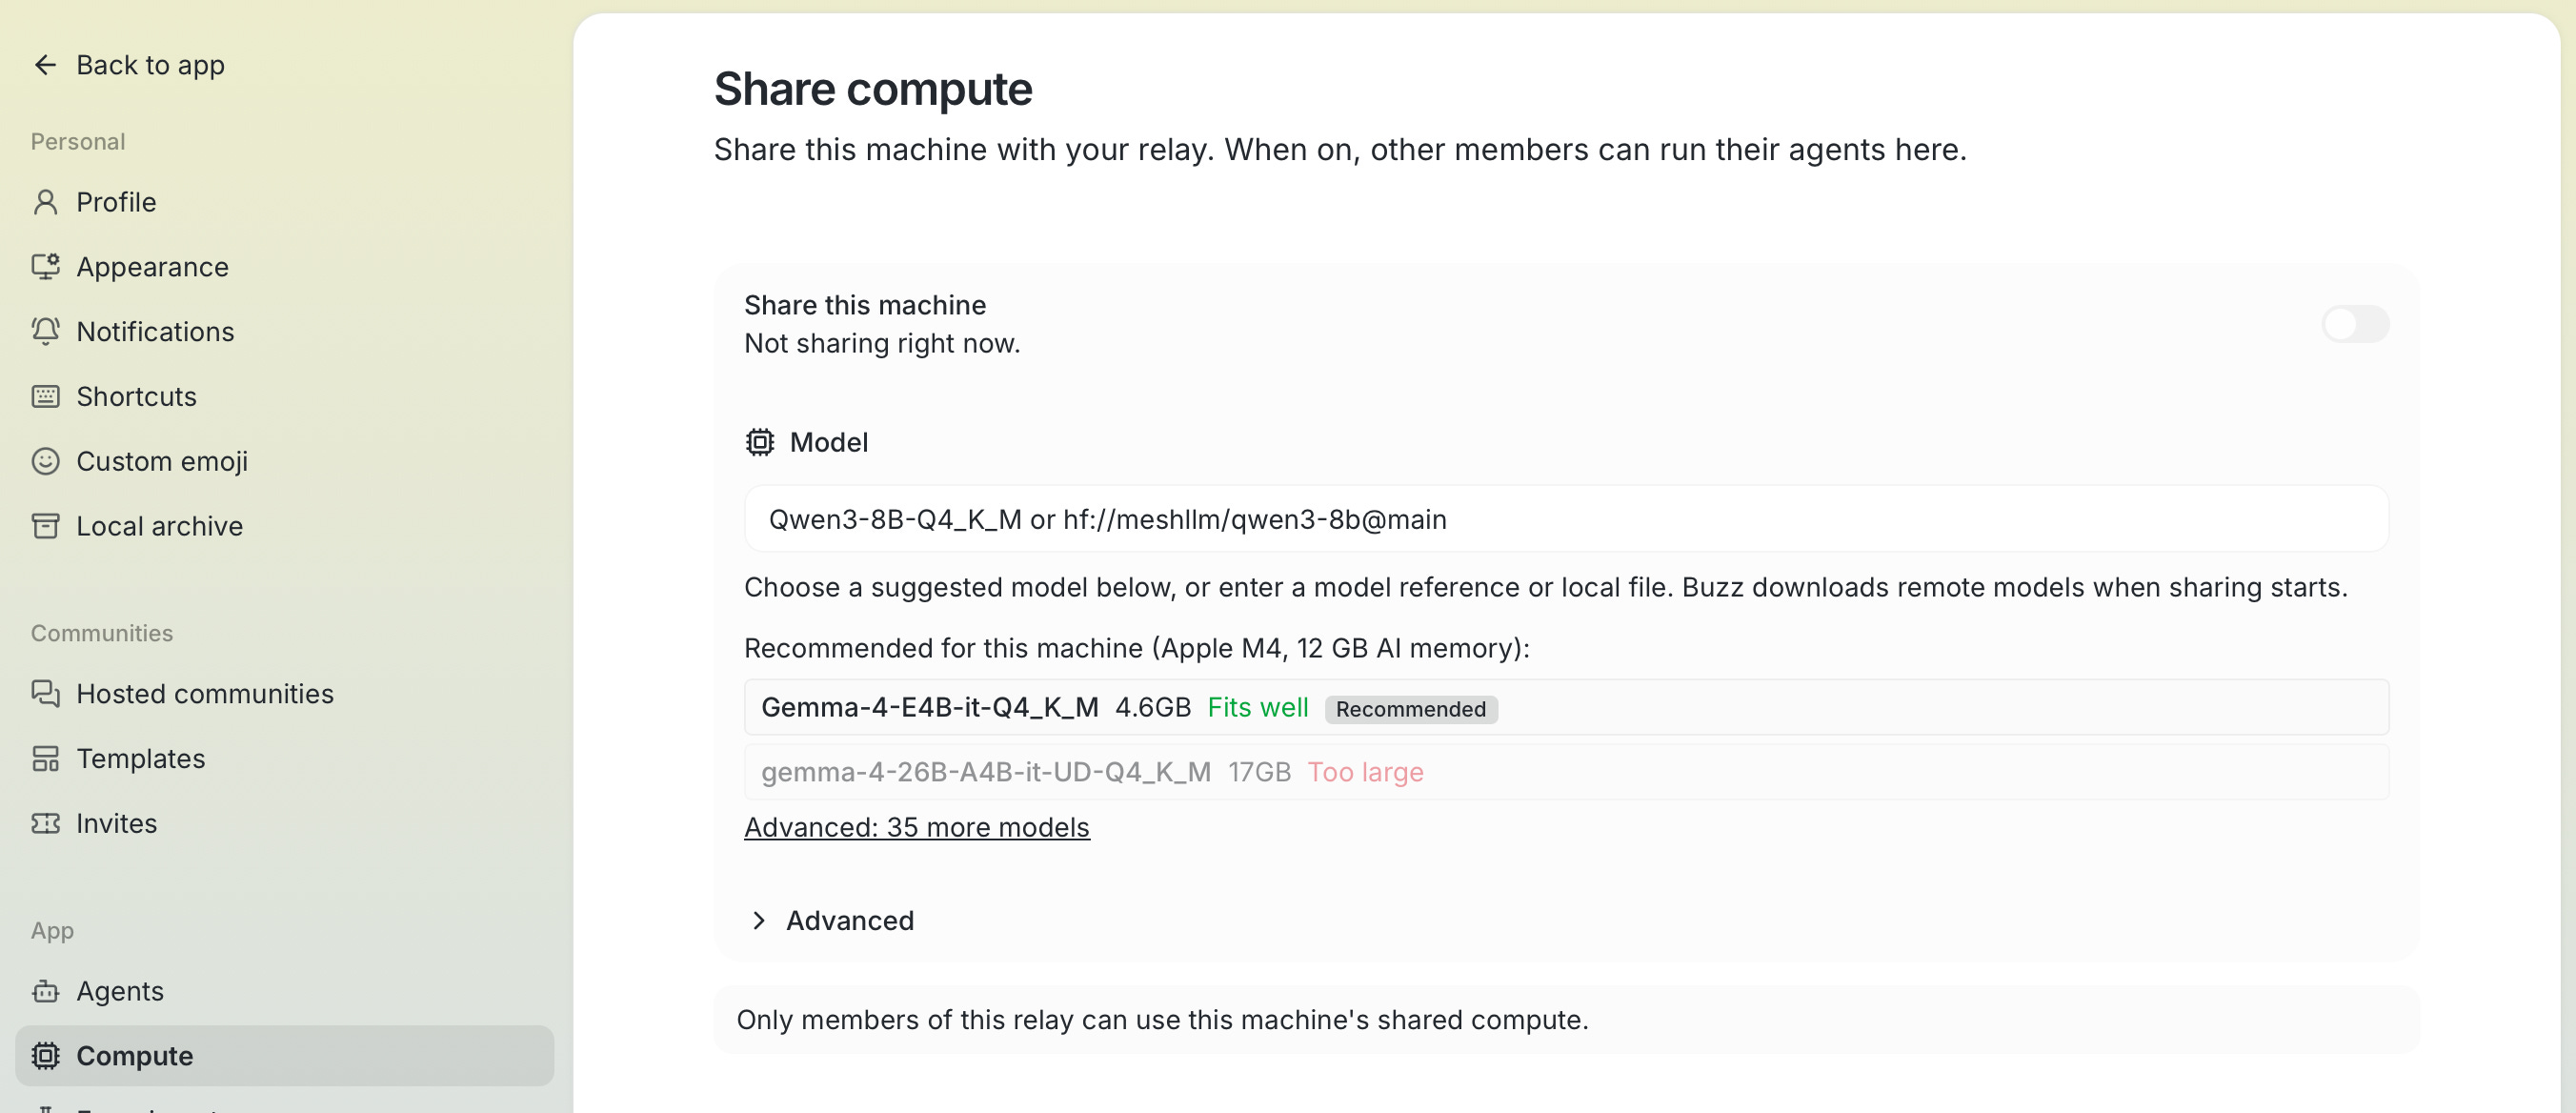
One of Buzz’s most distinctive features is shared compute. This lets you share your machine’s computing power with your team, so everyone can run agents on a single powerful machine instead of paying for expensive API plans.
Here is how it works: Go to Settings → Compute and toggle on Share this machine with your relay. Buzz will suggest local models optimized for your hardware (for example, Gamma-4 for an Apple M4 with 12GB RAM). Download a model and enable sharing.
Now, any team member on your relay can run agents on your machine. This is powerful for small teams. A college student with limited budget can join a team, and everyone pools resources into one Mac Studio or Mac Mini. Everyone gets access to a powerful model without paying $200 per month for API access.
Local models keep improving. This feature makes it practical for teams to use open-source models instead of proprietary APIs.
Model Swapping Without Losing Context
One of Buzz’s strongest features is that you can switch an agent’s underlying model without losing any context. If you are chatting with an agent powered by Claude, and you switch it to Codex or a local model, all the chat history, project context, and agent skills travel with it.
This matters because AI moves fast. New models ship every week. Instead of being stuck with one model, Buzz lets you experiment and adapt without starting over.
Real-World Workflows
Here are some practical examples of what teams are doing with Buzz:
Deploy an app in a conversation — Ask an agent to build a full-stack app using Wasp framework and deploy it to Railway. The agent writes the code, pushes to a repo, deploys to production, and sends screenshots back in the chat. You review the live app and ask for changes.
Analyze data with historical context — Set up a daily workflow that pulls tweet stats into a channel. Then ask an agent to find the common thread across your top tweets. Because the agent has the historical data it has been posting, it can analyze trends and give actionable insights.
Work in parallel — Ask agents to create three different versions of a landing page based on ideas discussed in chat. They work in separate feature branches without overwriting each other’s work.
Voice huddles with context — Start a live voice call with an agent. You speak to them, they reply with voice, and they retain all the context from your text chat.
The Chief Agent Officer Pattern
As your roster of agents grows, instead of managing each one individually, create a meta-agent called a “Chief Agent Officer.” Give it a task, and let it delegate to specialized agents (copywriter, coder, reviewer, etc.). This reduces decision fatigue about which agent to use.
“Where are my files?” - Understanding File Access
One common point of confusion is how to actually see or touch the files your agents are working on.
In Buzz, agents work in “Work Trees.” When you ask an agent to write code or create a file, it doesn’t just overwrite your local documents. It creates a separate branch or “version” of the project. To see these files:
Enable the Projects experiment in Settings.
Use the Git repository browser inside Buzz to see the different branches.
You can “check out” or download the files once you are happy with the agent’s work.
Locally, agent-created files are stored in: ~/Users/{your_user_name}/.buzz
This keeps your main files safe, but it adds an extra step that can feel clunky if you just want a quick file export.
The three parts that confused me at first
The setup is easy once you understand the order, but three terms can slow down a first-time user.
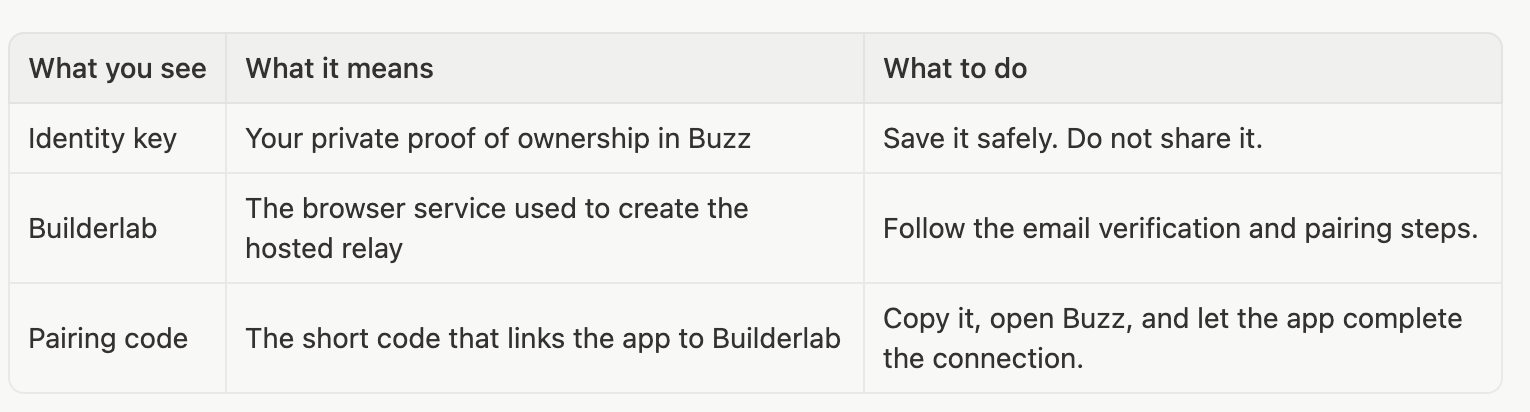
The other possible sticking point is the agent harness screen. Ignore it on your first pass if you are not already using Claude Code or Codex. Build the community first. Add the harness later when you have a clear reason to use it.
Honest limitations and early-stage reality
Buzz is new and still evolving. Here are the things you should know:
Workflows and recurring tasks are still rough. The feature exists, but reliability is not perfect yet. Test them with non-critical tasks first.
Speed lags behind direct CLI tools like Claude Code or Codex. Everything routes through your relay and back, which adds latency.
For complex software engineering, you might prefer direct CLI tools. For team collaboration and agent coordination, Buzz is faster.
Voice huddles exist but are not fully tested in production. I wasn’t able to test the feature
Buzz is best for solopreneurs and small teams iterating on small products. For complex software engineering or large-scale operations, you might need additional tools.
If you are comparing approaches to agent work, read my Hermes Agent vs OpenClaw guide and browse the TheToolNerd automation directory. You can also read my framework for selecting the right AI agentic framework.
Sources
TechCrunch, “Jack Dorsey is taking on Slack with Buzz, a group chat platform for teams...”
PYMNTS.com, “Dorsey’s Block Turns AI Agents Into Real Employees”
Daily.dev, “Jack Dorsey launches Buzz, an open-source workspace that...”
Block, “Introducing Buzz: where humans and agents work together”
TechCrunch, “Jack Dorsey is taking on Slack with Buzz, a group chat platform for teams...”
PYMNTS.com, “Dorsey’s Block Turns AI Agents Into Real Employees”
Daily.dev, “Jack Dorsey launches Buzz, an open-source workspace that...”
CryptoBriefing, “Block launches Buzz, a Nostr-based rival to Slack and GitHub”
Screenshots in this guide were captured during the setup of the TheToolNerd Buzz community on July 28, 2026. Product screens and available options may change as Buzz evolves.