
AI Learning Roadmap for Beginners — Part 3: The Content Creator’s Guide to Making Content with AI
Learn how to create cinematic videos and animations using AI tools like Midjourney, NanoBanana, and Veo. This step-by-step roadmap helps beginners plan, prompt, and produce Pixar-style content.


This article continues my AI Learning Roadmap for Beginners series:
This piece is written in collaboration with Neeraj, a creator who’s mastered AI-driven animation and 3-D storytelling.
This AI content creation roadmap for creators shows beginners how to plan, prompt, and produce videos end-to-end.
At the end you’ll find his step-by-step tutorial for building your own Pixar-style 3-D video scene.
Each week, I share practical guides and roadmaps that help you move from idea to execution — using AI like a pro. Stay Updated
Prerequisites — Before You Dive In
1. The Art of Prompting (Structured JSON / XML Prompts)
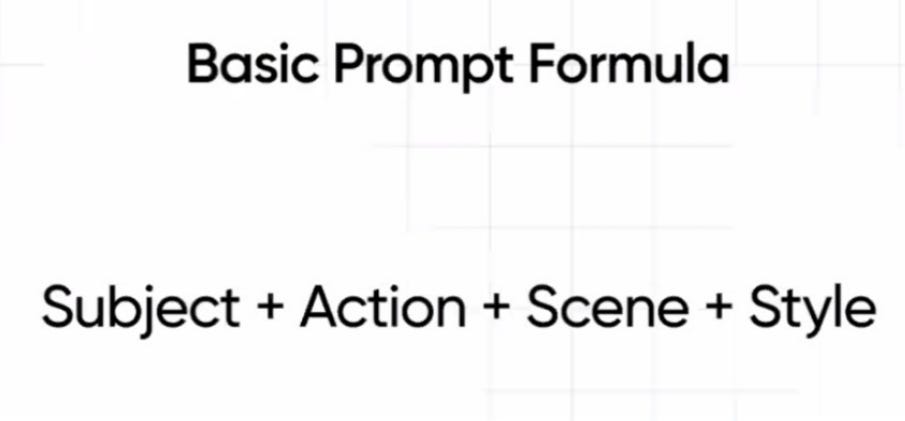
Prompting is a creative language. Think like a director giving detailed stage directions instead of a vague sentence.
Structured prompting (JSON or XML) turns loose text into precise commands a model can reliably interpret.
Example:
{
  “camera”: “eye-level underwater, medium shot”,
  “character”: {
    “type”: “old man”,
    “style”: “Pixar 3D”,
    “action”: “swims left and exits”
  },
  “environment”: “blue ocean, coral reef, soft daylight”,
  “style”: “cinematic, film grain, high detail”
}
The clearer you define scene + camera + style + emotion, the more controllable your output becomes.
(If you’re new to prompting, revisit Part 1)
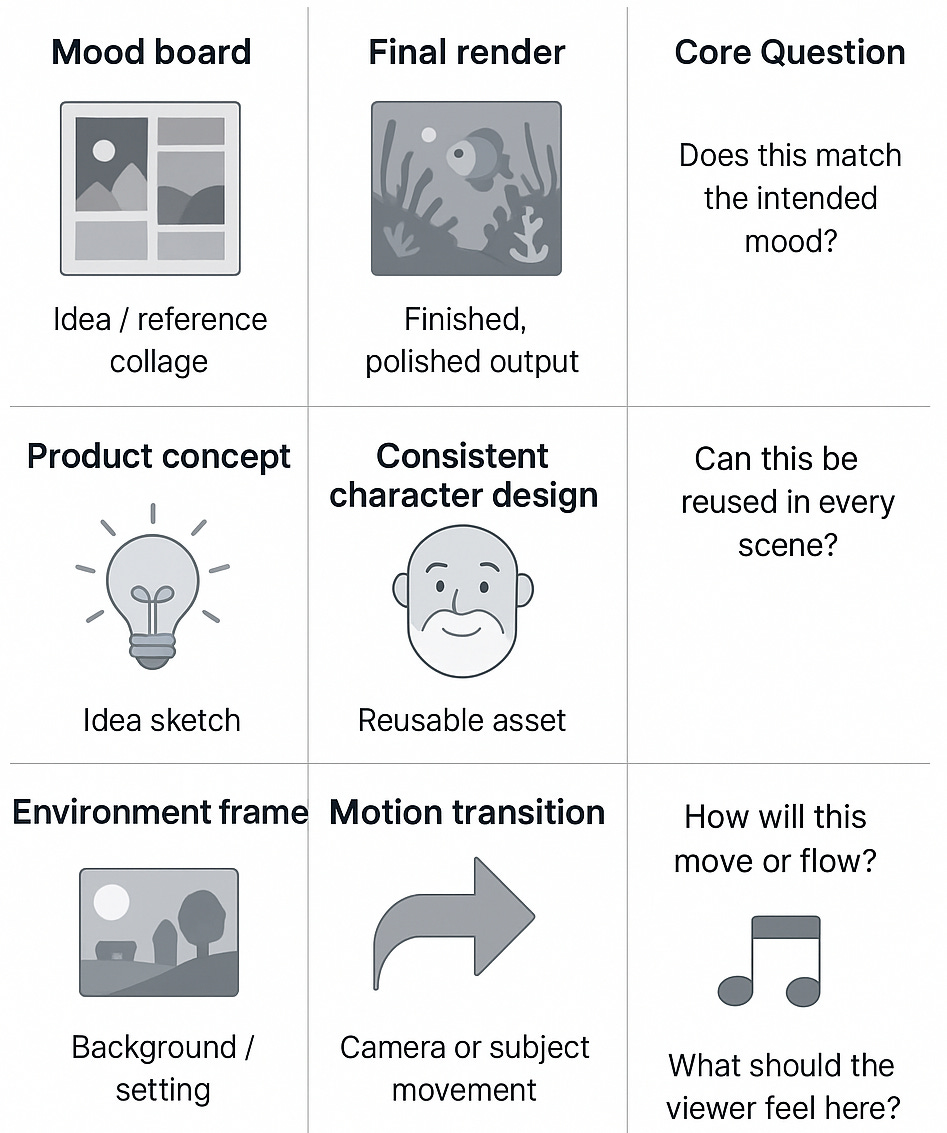
2. Basic Asset Literacy — Understanding What You’re Building
A creator’s toolkit involves assets — visuals, backgrounds, characters, audio, and motion clips. You need to know the terminology to make the best of the AI tools as you need to instruct them.
Know the differences:
Mood board vs final render
Product concept vs consistent character design
Environment frame vs motion transition
Voice track vs music bed
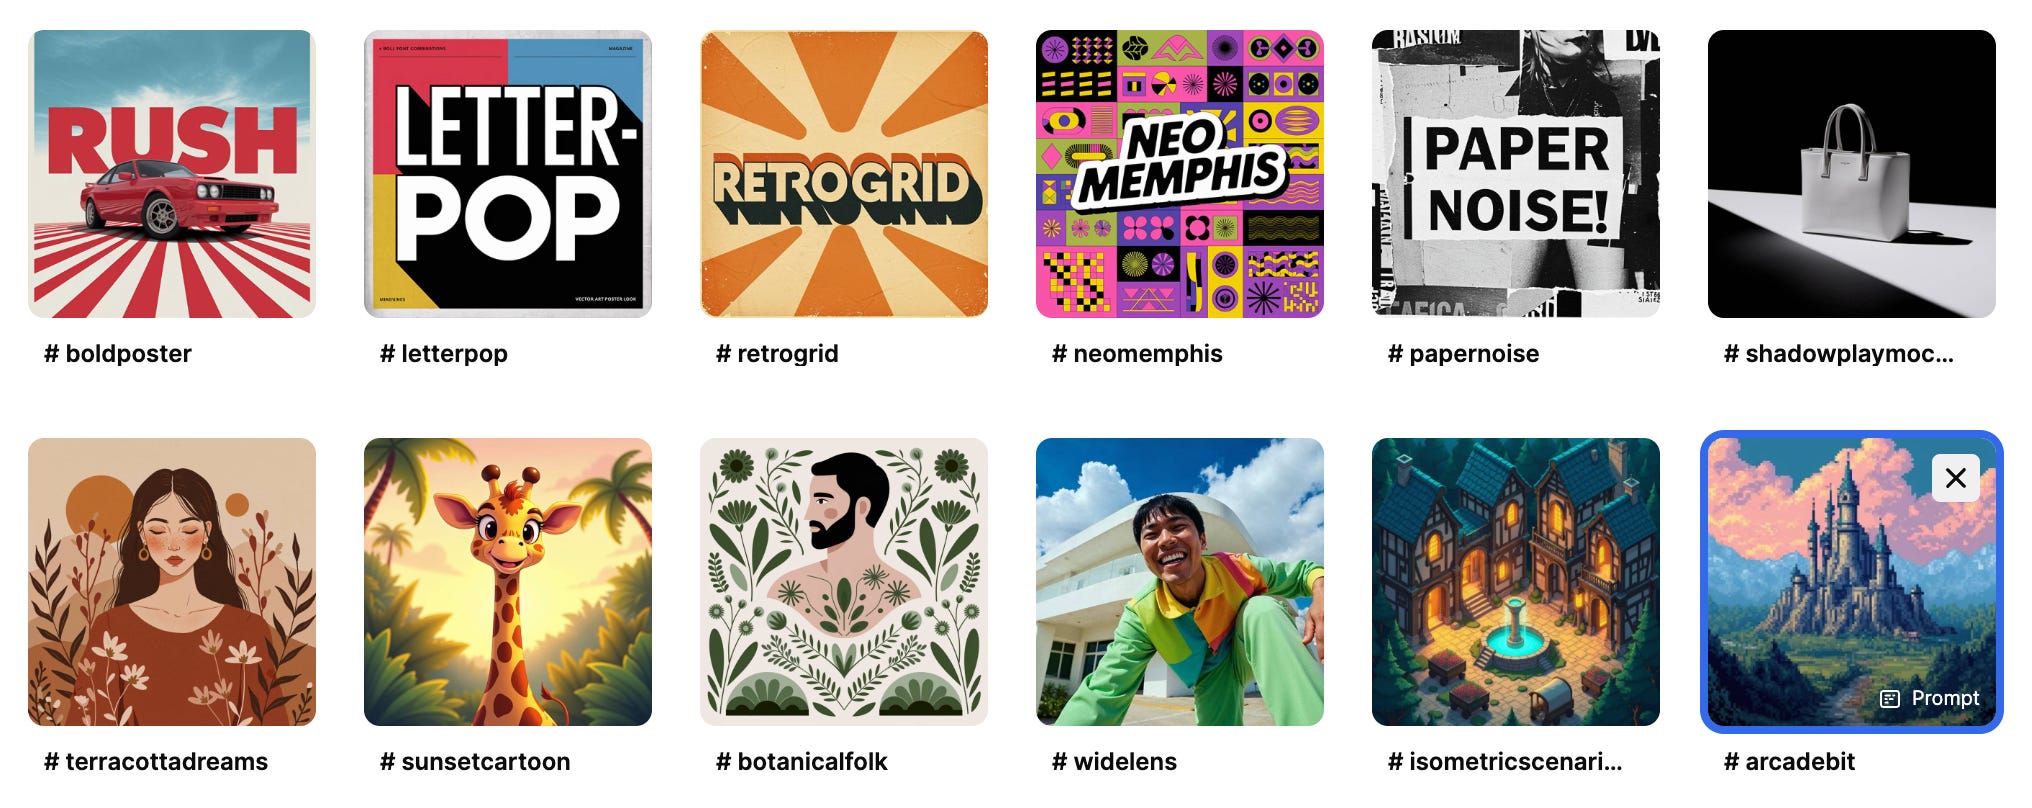
To see prompt styles and real examples, browse these free prompt libraries:
Prompt Hero : https://prompthero.com/
Arthub AI : https://arthub.ai/library
and many more!! Just search online and you will get them .
Your Creator Stack & Roadmap — Tools to Learn and How to Use Them
Stage 1: Prompt & Plan
Goal: Learn to describe scenes and emotion using structured prompts as part of an AI content creation workflow. You can ask it to generate JSON prompts and it will do it
Recommended Tools:
ChatGPT (ChatGPT) – OpenAI’s conversational AI, excellent for brainstorming scene ideas and generating structured JSON prompts
Google Gemini (Gemini) – Google’s multimodal AI assistant, great for analyzing images and refining creative concepts
Grok (Grok) – X’s AI with real-time web access, ideal for trend-aware content planning and research
What to Learn: Practice scene definition, camera angle, lighting keywords. There are number of styles that you may need to know to define the right prompts.
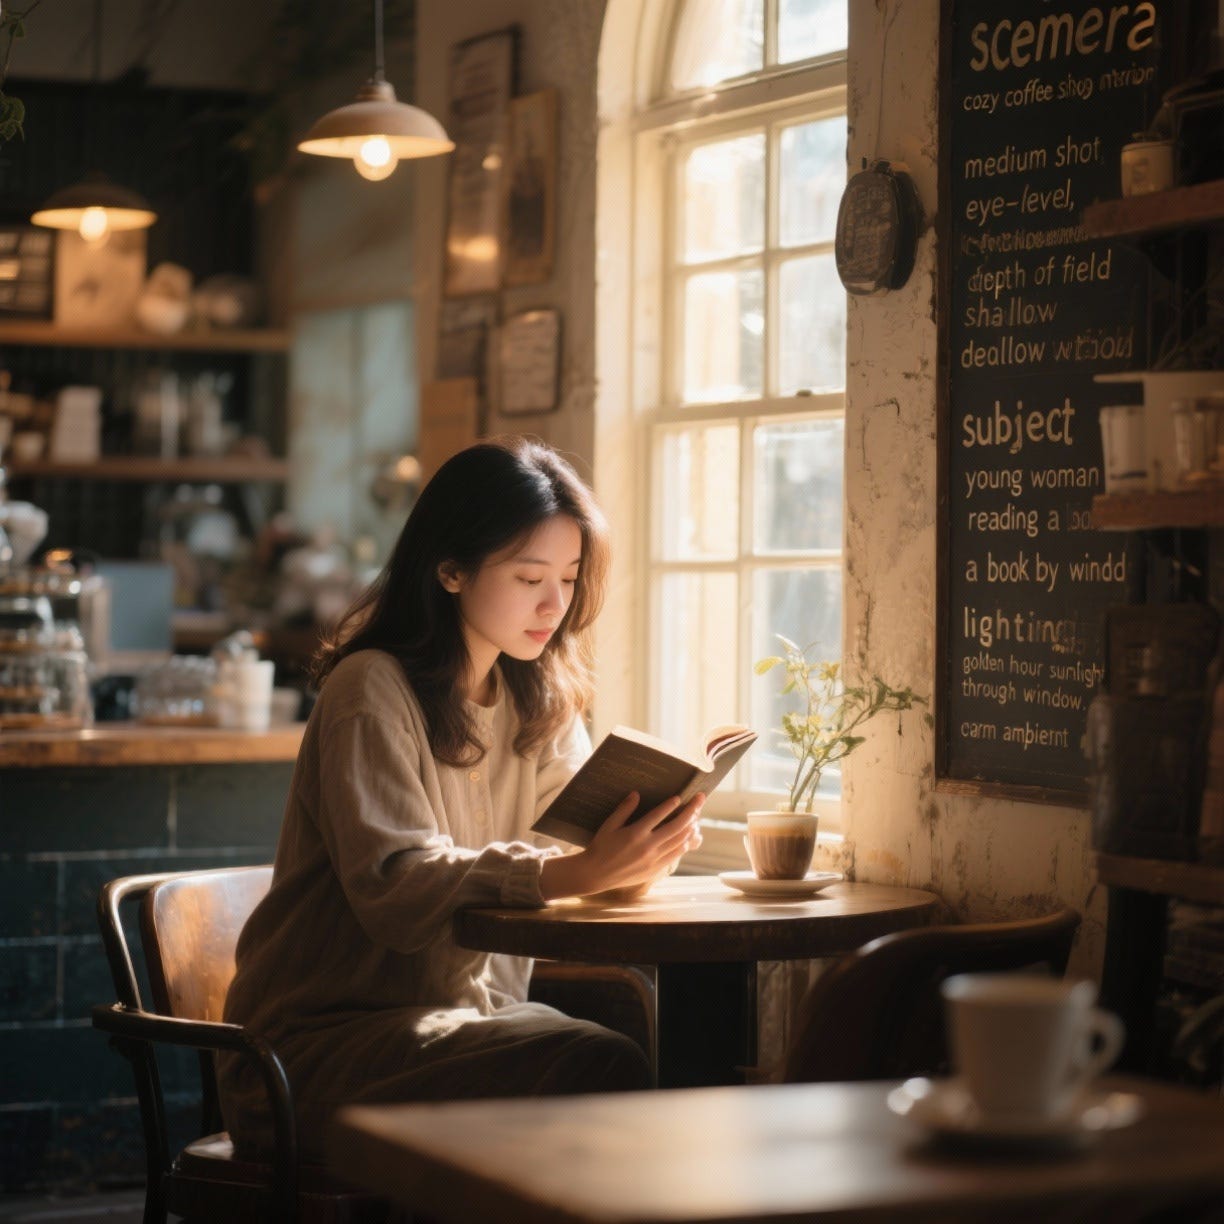
Sample Prompt:
{
  “scene”: “cozy coffee shop interior”,
  “camera”: “medium shot, eye-level, shallow depth of field”,
  “subject”: “young woman reading a book by window”,
  “lighting”: “golden hour sunlight streaming through window, warm ambient”,
  “mood”: “peaceful, contemplative”,
  “style”: “cinematic, film grain”
}
Stage 2: Create Images (image generation)
Goal: Turn imagination into visuals.
Recommended Tools:
Midjourney (Midjourney): Best for cinematic, highly artistic image generation with dramatic lighting and composition
Flux (Flux): Specializes in photorealistic images with accurate details and natural-looking results
NanoBanana / Google AI Studio (Google AI Studio): Excels at maintaining character consistency across multiple images through chat-based editing
ChatGPT (ChatGPT): Versatile image generation tool integrated with conversational AI for iterative refinement
Ideogram (Ideogram): Strong at generating images with accurate text rendering and typography
Grok (Grok): X’s AI model with real-time information access and unique personality, great for trendy visual concepts
To access multiple models at one place — Freepik, Higgsfield
Sample Prompts:
Midjourney:
A brave knight in silver armor standing on a cliff at sunset, cinematic lighting, epic fantasy, detailed armor reflections, dramatic clouds, 8k, photorealistic --ar 16:9 --v 6Flux (Realistic):
Professional portrait of a businesswoman in her 30s, confident expression, modern office background, natural window light, shallow depth of field, Canon EF 85mm f/1.4
Stage 3: Add Motion (image-to-video)
Goal: Bring images to life with short video clips (image-to-video).
Recommended Tools:
Veo 3 (Google Flow) – cinematic storytelling, perfect for short films or ads.
Sora (Sora) – OpenAI’s video generation model, excels at realistic physics and complex scenes with multiple characters.
Kling (Kling Studio) – built for fast-motion, social-ready clips.
Runway (Runway) – top choice for animated styles; its Act 2 mode simplifies workflows.
Higgsfield (Higgsfield) – go-to for VFX and visual experimentation.
What to Learn: Experiment with 5-10 s shots, pans, transitions.
Sample Prompt:
{
  “prompt”: “Camera slowly pushes in on the character, who turns their head and smiles”,
  “duration”: “5s”,
  “style”: {”motion”: “smooth”, “camera_movement”: “dolly-in”}
}Stage 4: Add Sound
Goal: Generate realistic narration and music.
Recommended Tools:
ElevenLabs (ElevenLabs) – industry standard for voice cloning and text-to-speech. They also have music as well
Suno (Suno) – a rising star for AI-generated music.
What to Learn: Voice cloning, pacing, matching music mood.
Sample Prompts:
ElevenLabs Voice:
Voice: Rachel (warm, conversational). Text: “Welcome to this journey through time and space. Let me tell you a story you won’t forget.” Settings: Stability 0.5, Clarity 0.75cinematic adventure soundtrack, with a swelling, theme, heroic theme, soundtrack, orchestral, uplifting, featuring epic strings and brass, inspirational tone and grand dynamics, inspirational, uplifting orchestralStage 5: Edit & Assemble
Goal: Merge all elements into one piece.
Recommended Tools:
CapCut (free, mobile-friendly, AI tools),
Clipchamp (browser-based, integrated with Microsoft),
Canva (design-first editor with templates),
Descript (text-based editing, transcription, filler word removal),
Veed.io (online editor with auto-subtitles, AI avatars, collaboration tools)
What to Learn: Timeline editing, transitions, color grading.
Sample Workflow:
Import all video clips in sequence
Add crossfade transitions (0.5s) between scenes
Apply color grading: +10 contrast, +5 saturation, slight warm tint
Layer audio: dialogue track, background music at -12dB, ambient sound at -18dB
Now that you’ve mastered the fundamentals, let’s dive into a real-world example. Neeraj, co-author of this guide and an expert in AI-driven animation, will walk you through his complete process for creating a stunning Pixar-style 3D underwater scene—from initial concept to final render.
If you’ve enjoyed the content so far, please share it with others and help us grow this community of AI-literate creators. AI isn’t just a skill anymore — it’s the new literacy of the digital age.
How to Make an AI Animation Pixar-Style (Step-by-Step Tutorial) by Neeraj
I’m Neeraj an AI nerd, Freelancer, and I love to vibe code apps and make 3D AI videos for children
Before we go ahead , checkout the video that’s created. This is the final output but what you will see is a step-by-step process to create a small scene in this final output.
Every thing is with AI.
I’ve been creating AI images and videos since February 2025, starting with ComfyUI, SDXL, Flux, and LoRAs. Early video tools like Runway and Kling only handled simple, static clips.
ChatGPT‘s 4o image model changed everything, producing high-quality, animation-ready images that sparked the Ghibli-style and 3D-cat video trend.
Video generation has since advanced rapidly. Midjourney, Wan, Runway, Kling, and Veo now create photoreal and 3D scenes, though they still struggle with complex sequences and typically limit outputs to 8–10 seconds.
The breakthrough came with Flux Kontext (May 2025) and Google’s NanoBanana (August 2025), which maintain character and asset consistency across edits. These tools made creating 3D Pixar-style videos accessible without Blender.
Below is a practical step-by-step using the stack I use:
NanoBanana + Veo 3 / Flow (or Kling) + ElevenLabs + CapCut/Clipchamp/Canva.
The steps and example prompts are adapted directly from my notes.
Concept & Stack
Concept: Short underwater Pixar-style scene — a character drops in, sings about the number “zero,” spins, then swims left and exits.
Stack:
NanoBanana (character + environment) → Veo 3 / Google Flow (video) → ElevenLabs (voice) → Kling (lip-sync) → CapCut/Clipchamp/Canva (final edit).
Step 1 — Decide the core plot and shot sequence
Plan the sequence before you generate anything. For this scene:
Empty underwater ocean frame — character drops in with bubbles.
After a moment, character sings about the number zero and does a small spin while singing.
Character swims left and exits the frame.
Plan each shot’s start & end frame — this makes video generation far easier.
Step 2 — Design characters & environment (assets)
Identify the right character for your story. Use ChatGPT or Claude to brainstorm character details.
For this project, after a lot of brainstorming, I have decided on the character Uncle Bhopi, an old man; Environment is an underwater ocean.
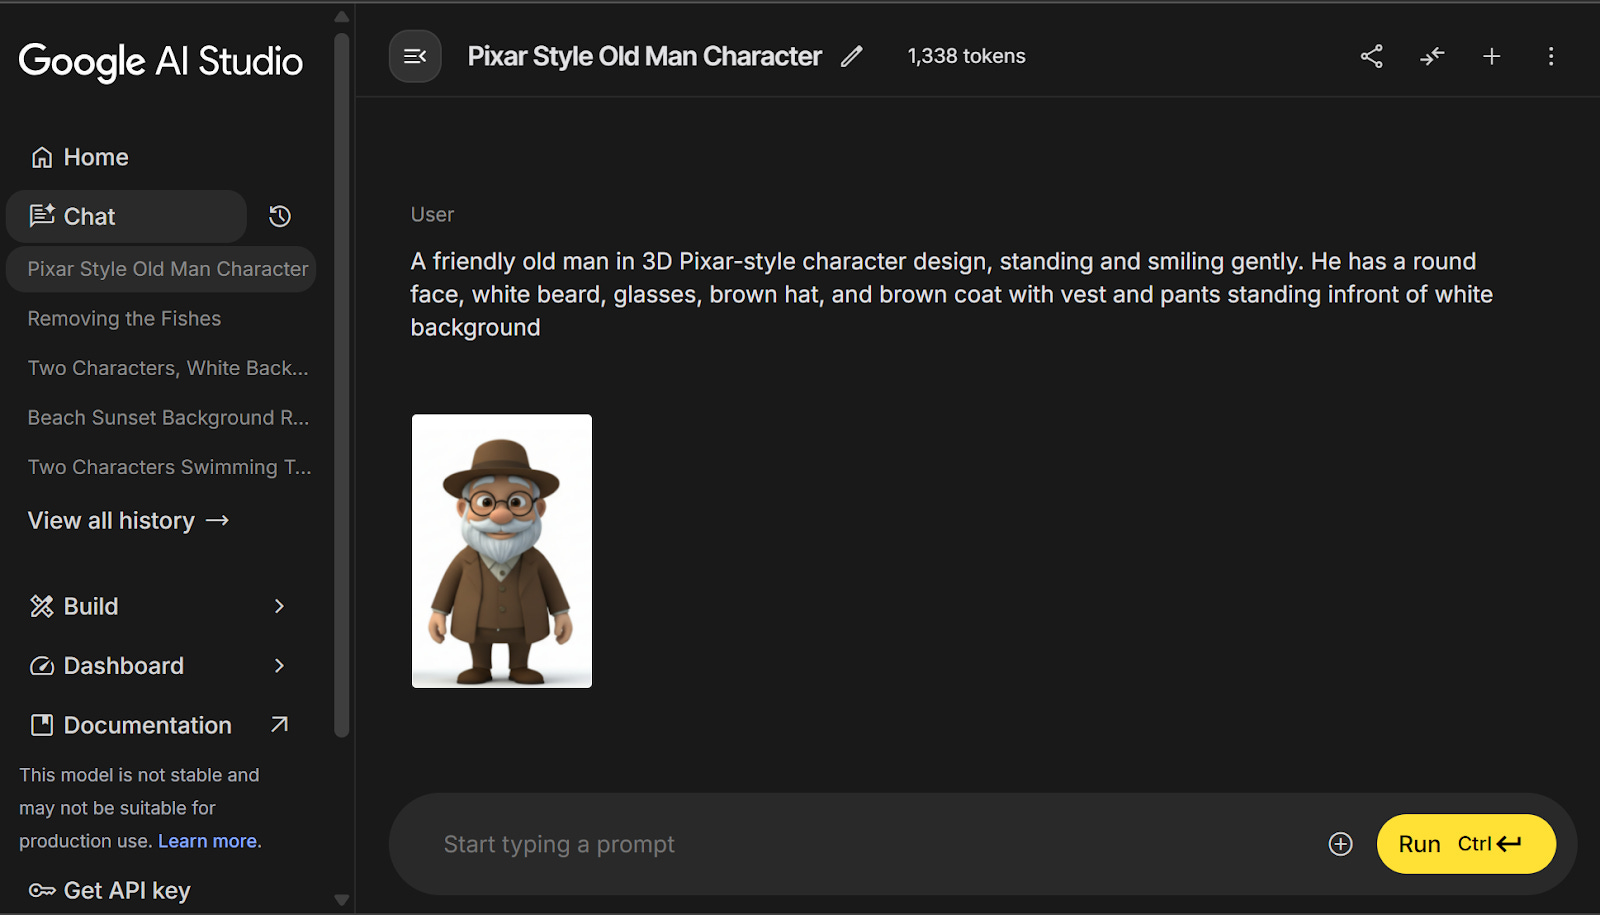
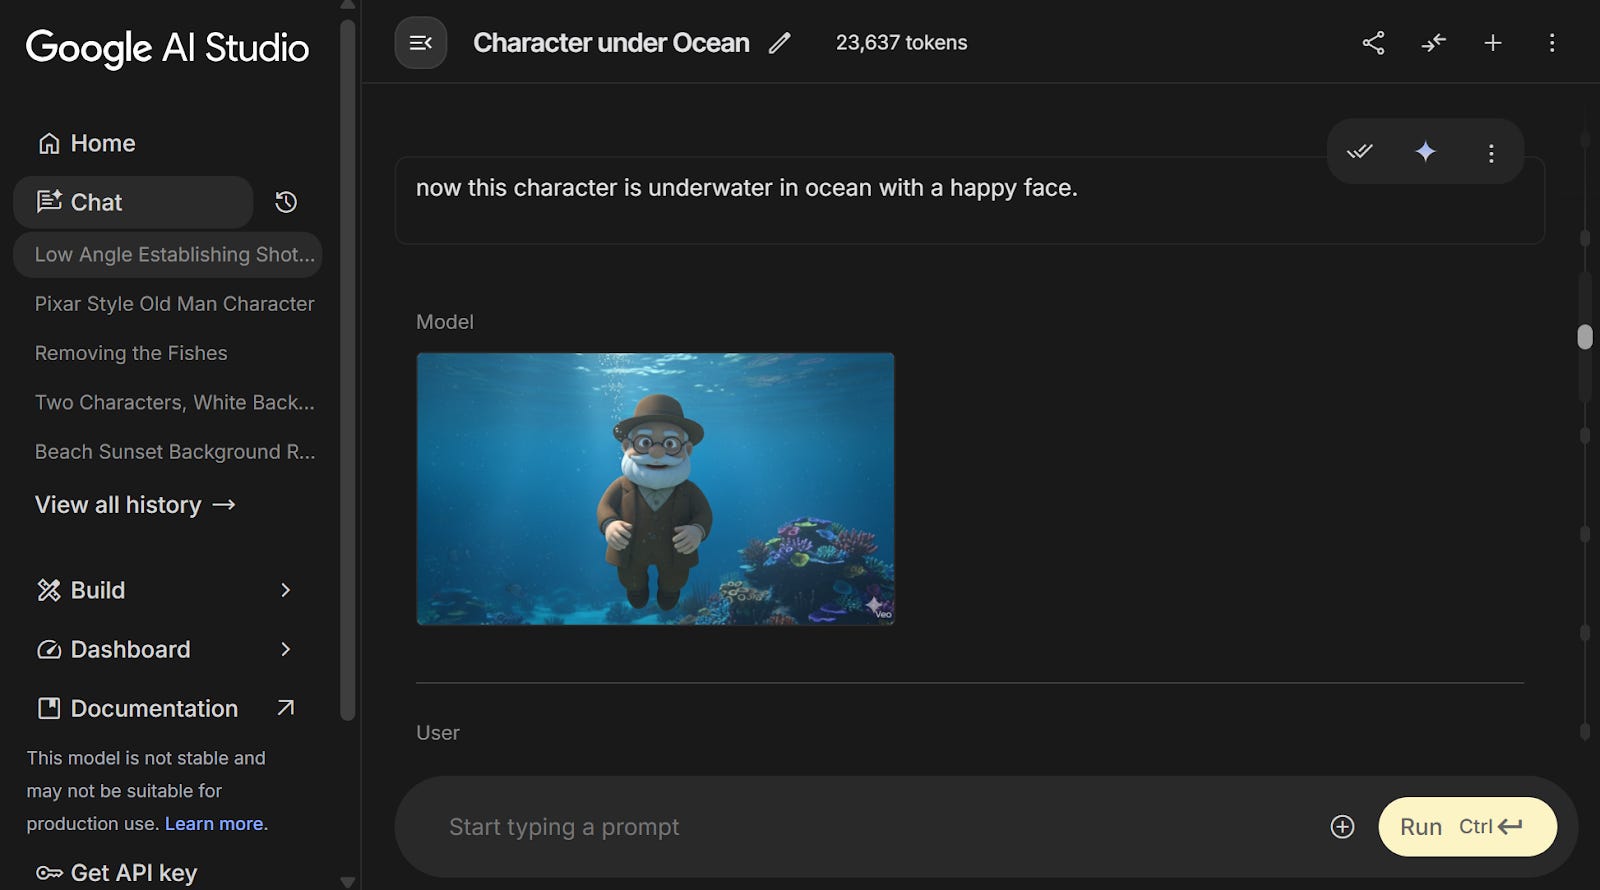
NanoBanana (Google AI Studio) is perfect for chat-based image creation and consistent edits: go to aistudio.google.com → Try NanoBanana. Use natural language to describe the character fully:
Character prompt (example):
“A friendly old man in 3D Pixar-style character design, smiling gently. Round face, white beard, glasses, brown hat, brown coat with vest and pants. Front-facing, neutral white background.”
You can take inspiration from platforms like OpenArt and Leonardo AI to get your characters.
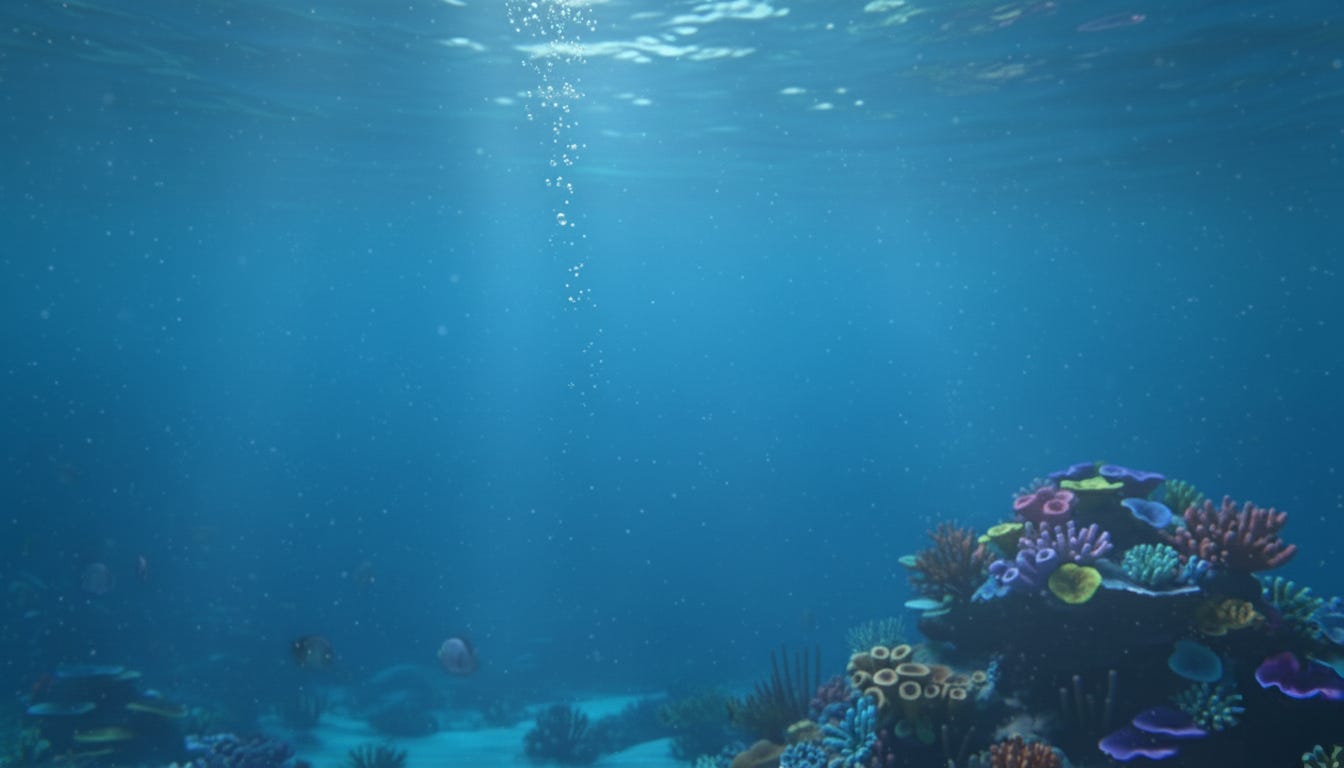
Generate the environment next:
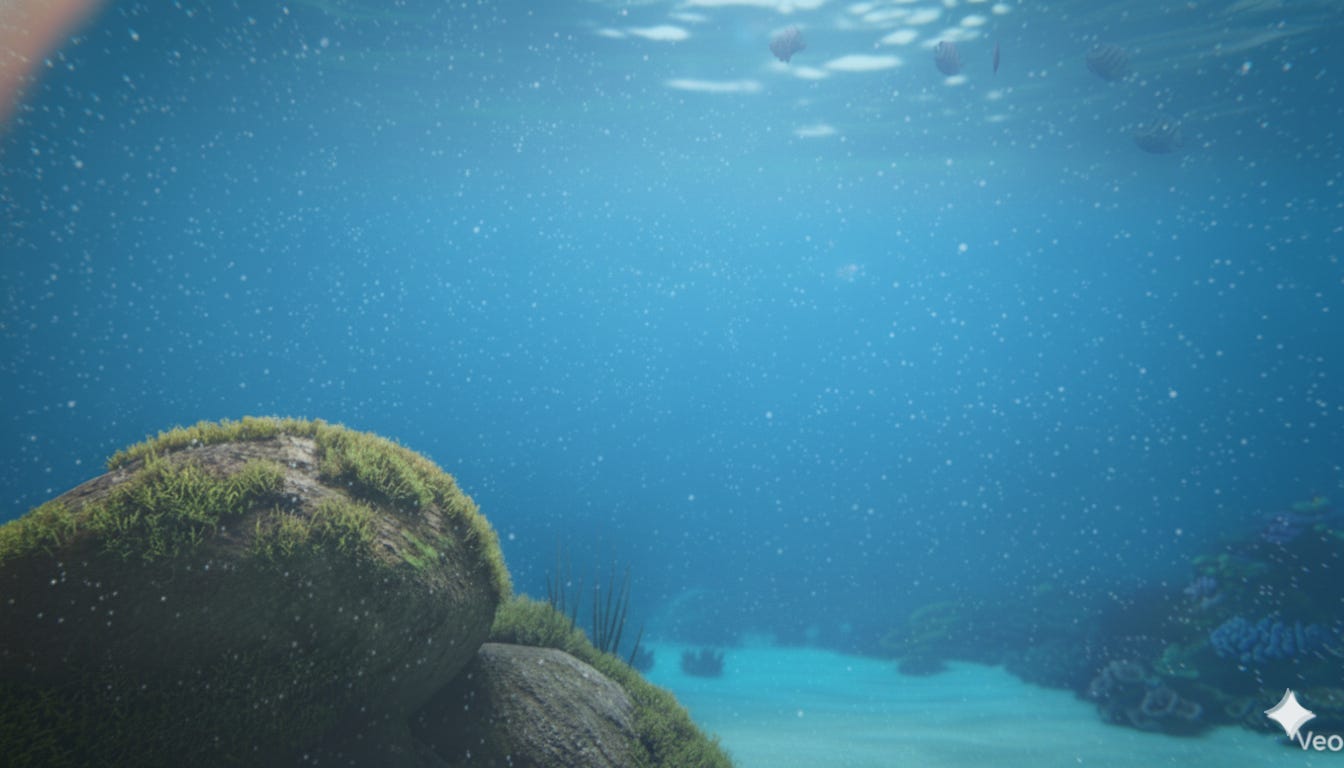
Environment prompt (example):
“A simple empty underwater frame in 3D Pixar style — blue water, soft daylight, coral reef, gentle bubbles.”

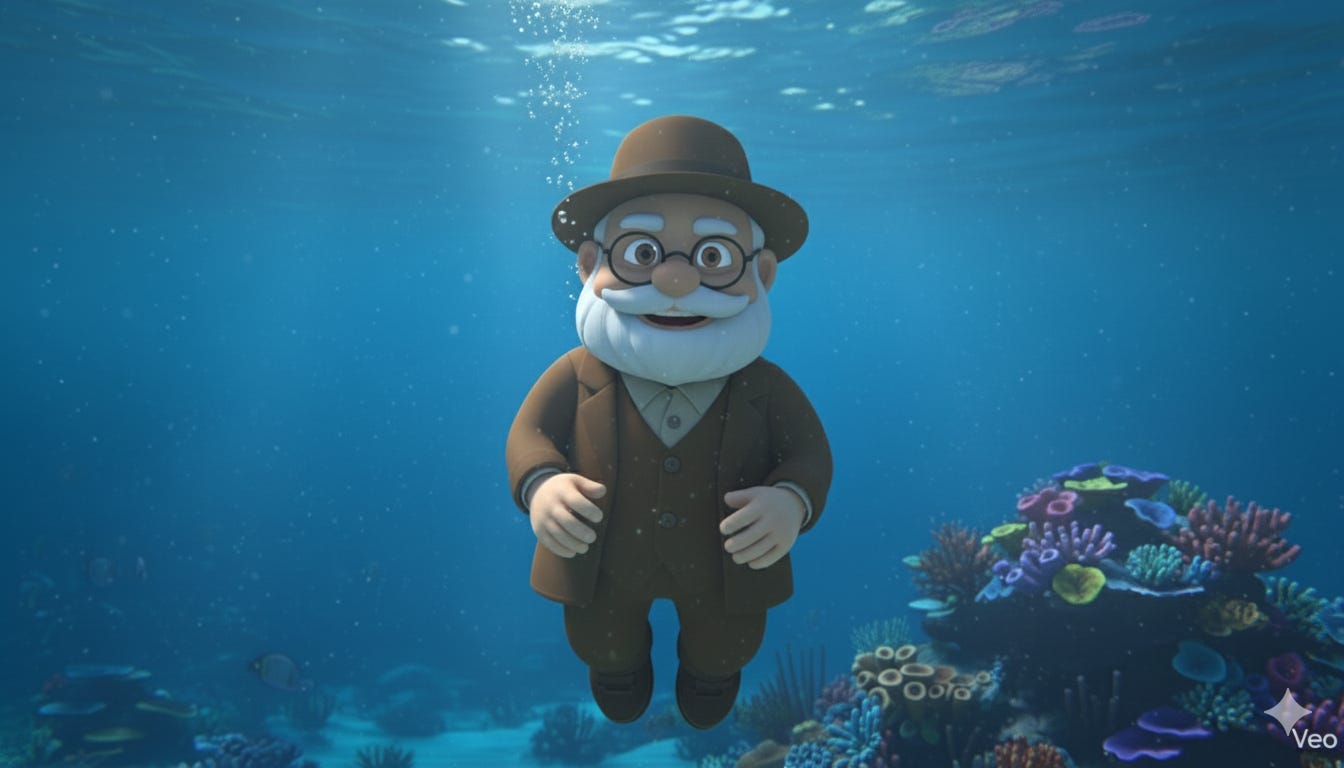
Then combine the two images into one :
put the character into the underwater environment in the same NanoBanana chat (or upload both images and request the composite).
NanoBanana maintains chat context so it can preserve character consistency across edits — but if the chat gets too long or starts producing artifacts, start a new chat and bring the character image back into context.
Step 3 — Video generation: methods & tool choice
You now have:
Character image(s), Environment image(s), first-frame and last-frame images.
Choose a video tool — Veo 3 / Google Flow, Runway, or Kling are good options.
I use Google Flow (Veo) often because Veo 3 gives very high prompt adherence for 3D-style renders.
In Flow (or your chosen tool), create a new project and top up credits if needed: https://labs.google/flow/about. There are three common video-generation workflows:
Text → Video — when you have only an idea; the model creates everything from scratch.
Ingredients/Assets → Video — when you have several visuals (characters, backgrounds, logos) and want the model to compose them.
Image → Video (First + Last Frame) — best when you already have a starting and ending look and want animation between the two.
For controlled character entry/exit, Image → Video (First + Last Frame) is the most reliable. Provide the first-frame and last-frame images to control the scene.
Step 4 — Prompting: JSON-style for precise control
After you set first and last frames, describe exactly what happens between them.
Use JSON prompting to give the model structured instructions (camera, action, environment, audio, style). You can generate these JSON prompts with ChatGPT or Claude once you provide context.
Example — Drop & Smile (first shot):
{
  “prompt”: “The old man suddenly drops down fast from above into the water and smiles at the camera. The camera remains underwater, completely still, centered on the same framing.”,
  “style”: {
    “visual_style”: “Pixar-style 3D animation”,
    “render_quality”: “cinematic high detail”
  }
}
Click generate. If you’re not satisfied, tweak the prompt and regenerate until you get a usable clip. We got a good drop-and-float shot using this method.
Step 5 — Extend vs Jump-to
Most tools cap single outputs to ~8–10 seconds and can handle only one or two actions reliably. Use Extend to continue a sequence in the same environment — Flow takes the last frame of the previous scene as the first frame of the next scene automatically.
Jump To (switching environments) exists but is unreliable and far more expensive in credits — avoid it unless necessary.
Example — Extend (sing & spin):
{
  “prompt”: “Continuing the underwater scene from the previous frame, the old man floats gently in the water, smiling warmly. He says in a cheerful voice, ‘Zero is nothing, zero is clear… zero is the start of a brand new year!’ As he finishes, he slowly rotates once around his vertical axis, then stops facing the camera and smiles proudly. Light bubble trails drift upward.”,
  “camera”: {”motion”: “static”, “angle”: “eye-level underwater”, “framing”: “medium shot”},
  “character_actions”: [{”character”: “old man”, “actions”: [”floats”, “delivers line”, “rotates slowly”, “faces camera and smiles”]}],
  “environment”: {”lighting”: “soft underwater daylight”, “background”: “coral reef and blue water”},
  “audio”: {”dialogue”: “Zero is nothing, zero is clear... zero is the start of a brand new year!”},
  “style”: {”visual_style”: “3D Pixar-style children’s animation”, “animation_quality”: “smooth”}
}

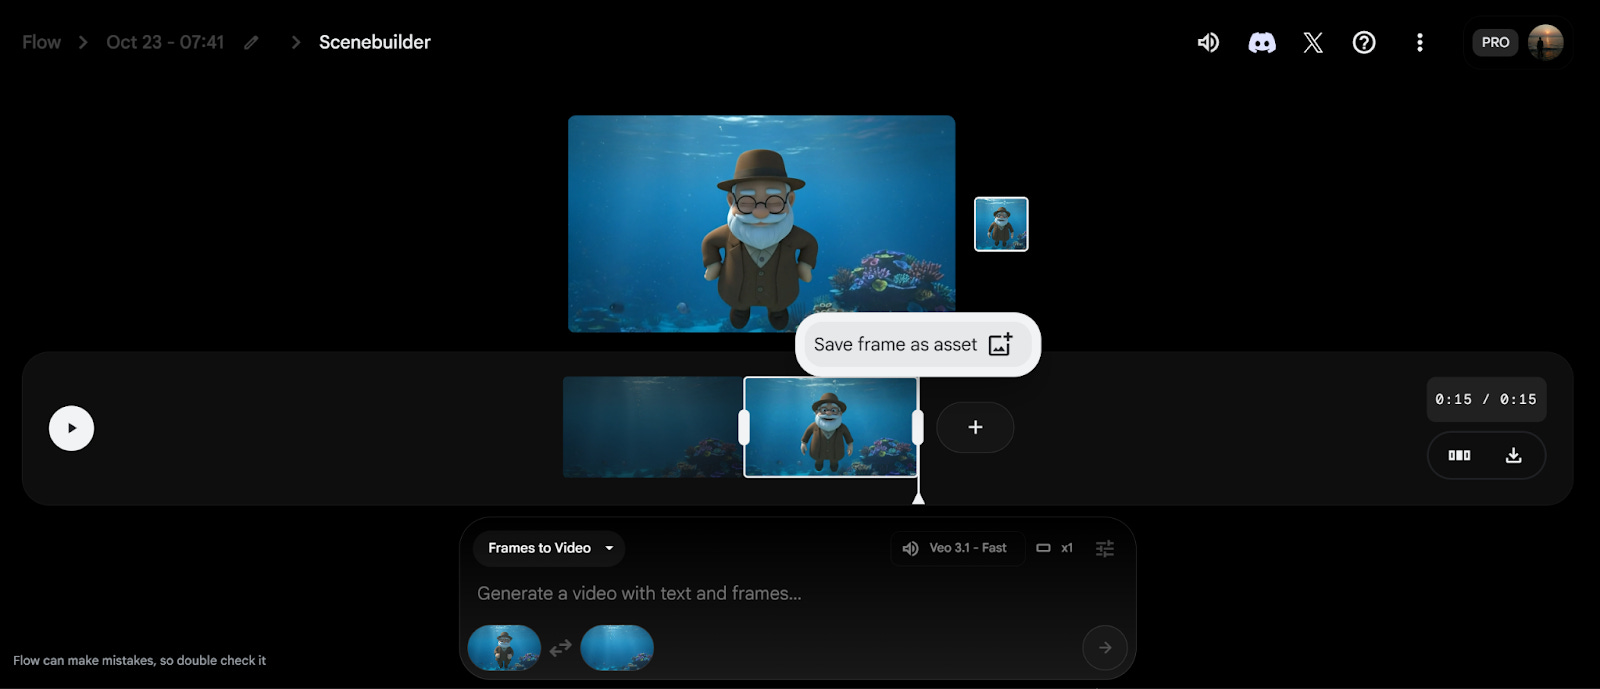
Save the generated frame or asset in Flow’s SceneBuilder if useful.
Step 6 — Swim away (final shot)
Use Extend again (or supply a last frame) to animate the exit:
{
  “prompt”: “Continuing seamlessly from the previous underwater shot, the old man pauses briefly, then pushes off with his legs and arms, swimming quickly toward the left side of the frame while smiling. Small bursts of bubbles trail behind him as he exits the frame. Camera stays still, coral background remains.”,
  “camera”: {”motion”: “static”, “angle”: “eye-level underwater”, “framing”: “medium shot”},
  “character_actions”: [{”character”: “old man”, “actions”: [”pauses”, “pushes off”, “swims left and exits”]}],
  “environment”: {”lighting”: “consistent underwater daylight”}
}
The final combined output I got from this workflow was a short clip and when you combine many such clips you can generate a whole story like we saw earlier.
Step 7 — Audio & Lip-sync
Veo 3 supports audio fields, but its built-in voices are robotic for complex deliveries. For human-sounding dialogue, I use ElevenLabs:
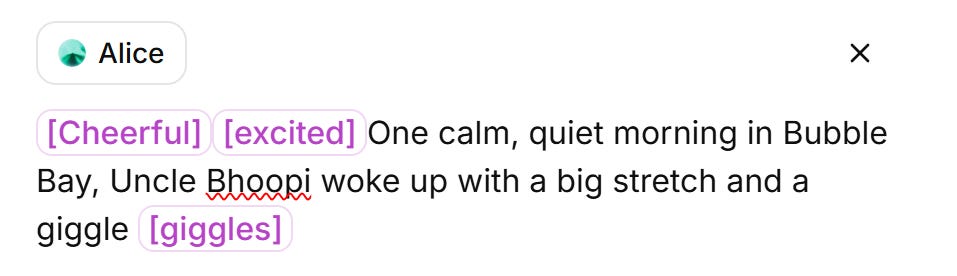
Generate the dialogue audio in ElevenLabs (use v3 alpha for tone and emotion markers inside square brackets).

Upload the audio and the character video to a lip-sync tool such as Kling Audio. Kling maps speech to facial motion; keep audio shorter than the video (Kling limit: 1 minute).
Download the lipsynced clip and compile it in CapCut or Canva with music and transitions.
Generate background music with Suno (mood = “uplifting underwater”, tempo = “medium”) and mix in your editor. Repeat for all shots, iterating prompts until you’re satisfied.
Final production tips & common gotchas
Version assets: keep folders for Prompts, Images, VideoShots, Audio, FinalExports. Use version tags (
Scene1_v1).NanoBanana chat context: NanoBanana uses the whole chat history as context. If the chat grows too long, it can produce poor edits (or “dust” artifacts). Start a fresh chat and reintroduce the previous images when this happens.

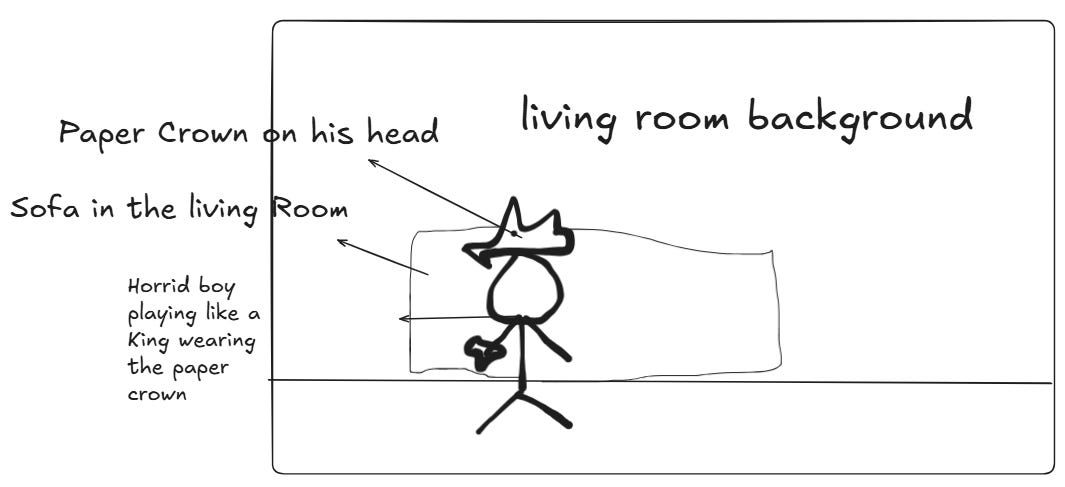
Labeling and sketches: NanoBanana responds well to labeled sketches — I use Excalidraw or even notebook drawings and label them in prompts for precise edits.


Short test renders: make 4–8 second tests to iterate fast before spending credits on longer renders.
Result
If you follow these steps, you’ll be able to produce a short 3D Pixar-style film end-to-end.
Congrats — you just made your first 3D Pixar-style film with AI.
You can follow me on : https://www.linkedin.com/in/neerajyadavgosu/ and on Substack : https://substack.com/@neerajgosu?utm_source=edit-profile-page
You just finished Part 3 of the AI Learning Roadmap.
Subscribe now to get the next guide — AI for Small Business Owners — straight to your inbox.
Closing Thoughts
You’ve now completed the foundation trilogy:
Part 1: Think with AI.
Part 2: Connect AI tools.
Part 3: Create with AI.
You’re moving from user to creator. Next up in this series: AI for Small Business Owners
For now, take one idea, follow Neeraj’s steps, and ship your first AI-made story.
You can check out my previous articles:


 | A guest post by
|