
Step by Step Guide - Mindstudio AI Agent Platform
Mindstudio is a powerful Agent Building platform suitable for No Code and Developers. It is one of the best tools & frameworks to build AI Agents in 2025

Last Week I have written about the Best Frameworks to build AI agents. If you haven’t read it , do have a read here.

One of the platform, I mentioned was MindStudio and today I am trying to share my experience of using the application.
Mindstudio - Build Without Writing Code
Mindstudio is one of the No Code - Ai tool for building agents. Today I would like share a step by step process of building a simple ai agent leveraging Mindstudio.
Create Sophisticated Workflows
Design multi-step workflows using language, image, voice, and other AI models—no coding required.
Mix and Match AI Models
Leverage 50+ state-of-the-art models from OpenAI, Anthropic, and more, including your private models. Use testing tools to compare models for the right mix of speed, performance, and cost.
Leverage Your Own Data
Fine-tune AI Workers effortlessly with no-code Retrieval-Augmented Generation (RAG) and advanced data analysis techniques. You can connect to various data source like Notion, Google, Clickup, Zendesk, Google sheets, Google Docs, Calendly, HubSpot, Salesforce and a lot more.
Test and Evaluate as You Build
Automatically generate adversarial datasets to test various scenarios. Track how changes impact cost and accuracy in real-time.
Steps to create an AI Agent in MindStudio
Below are the steps to create an AI Agent in Mindstudio.
Create a New AI Worker
Define the AI Worker's Task
Generate the AI Worker
Review the AI Worker Architecture
Accept and Build the AI Worker
View the AI Worker Implementation
Run the AI Worker and View Results
Publish the AI Worker

Let’s create and agent to check how things work.
Agent Idea : A newsletter that sends the latest AI news to my email id
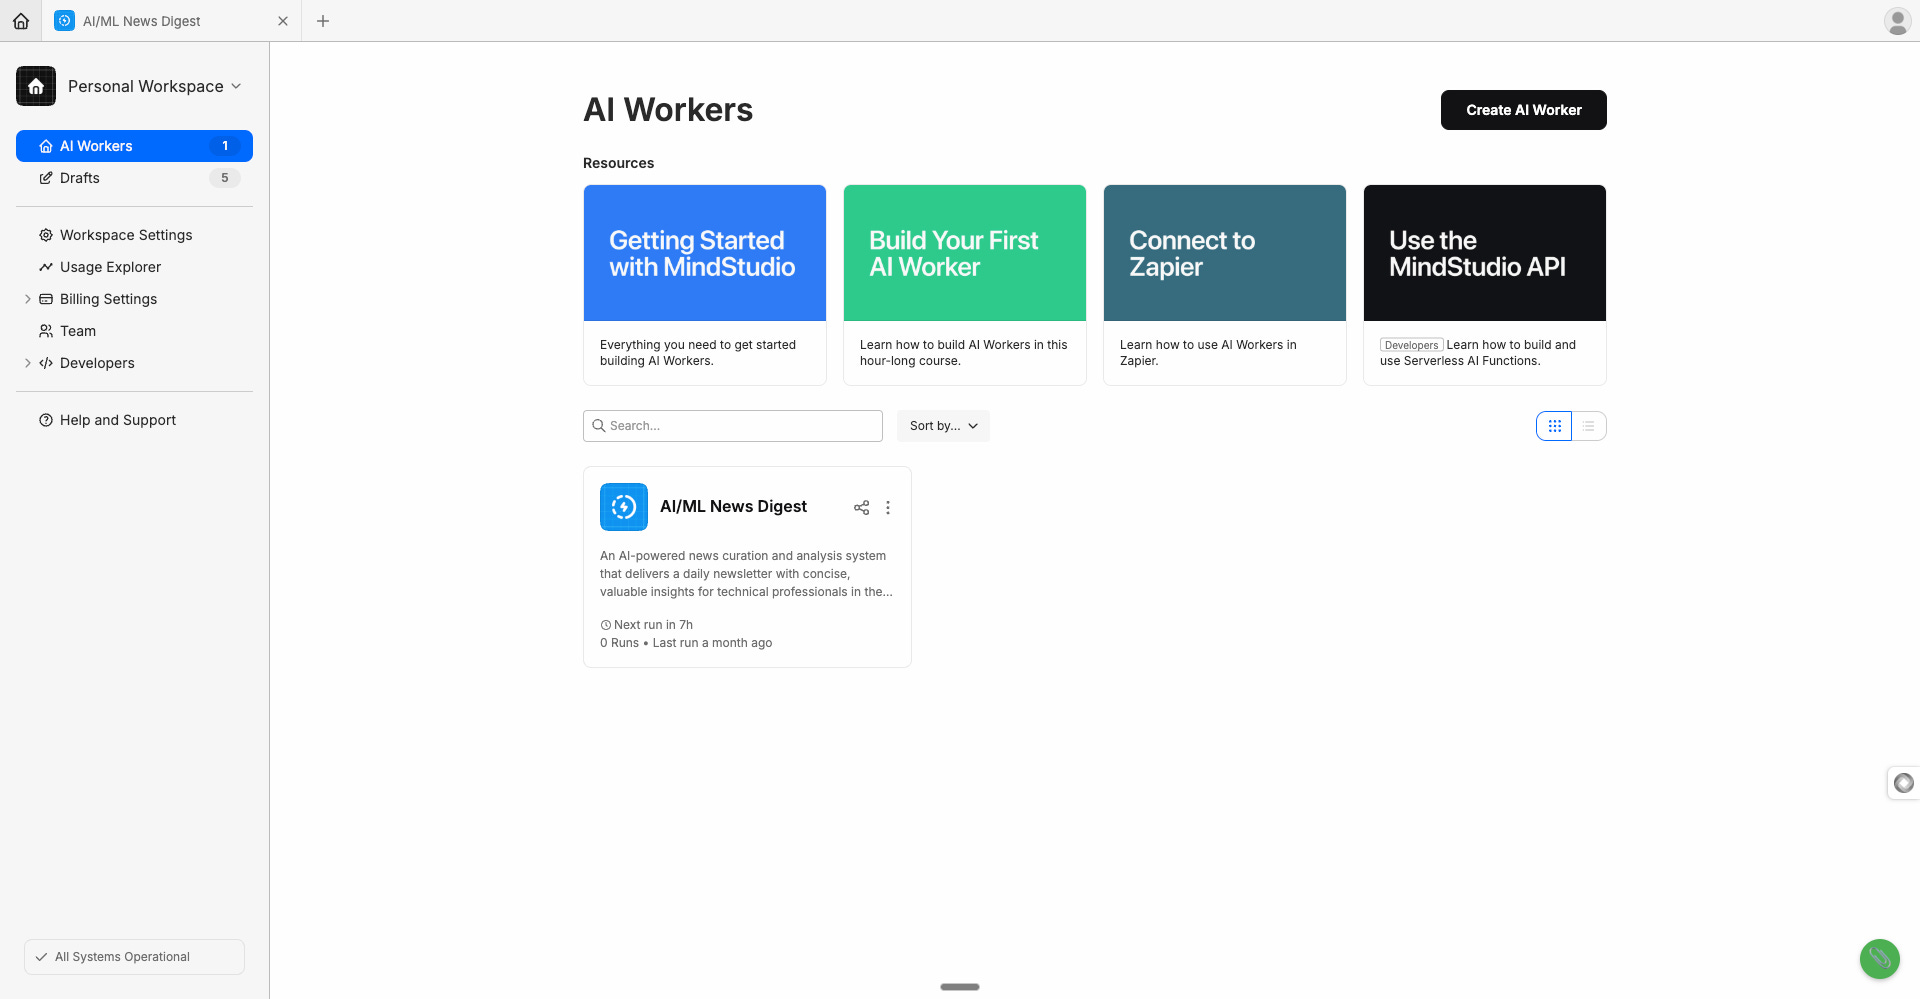
Step 1: Create a New AI Worker
Locate the "Create AI Worker" Button
Find the button in the top right corner of the page labeled "Create AI Worker."
Initiate Creation
Click the "Create AI Worker" button. This action will take you to a new page or load the AI Worker development interface.
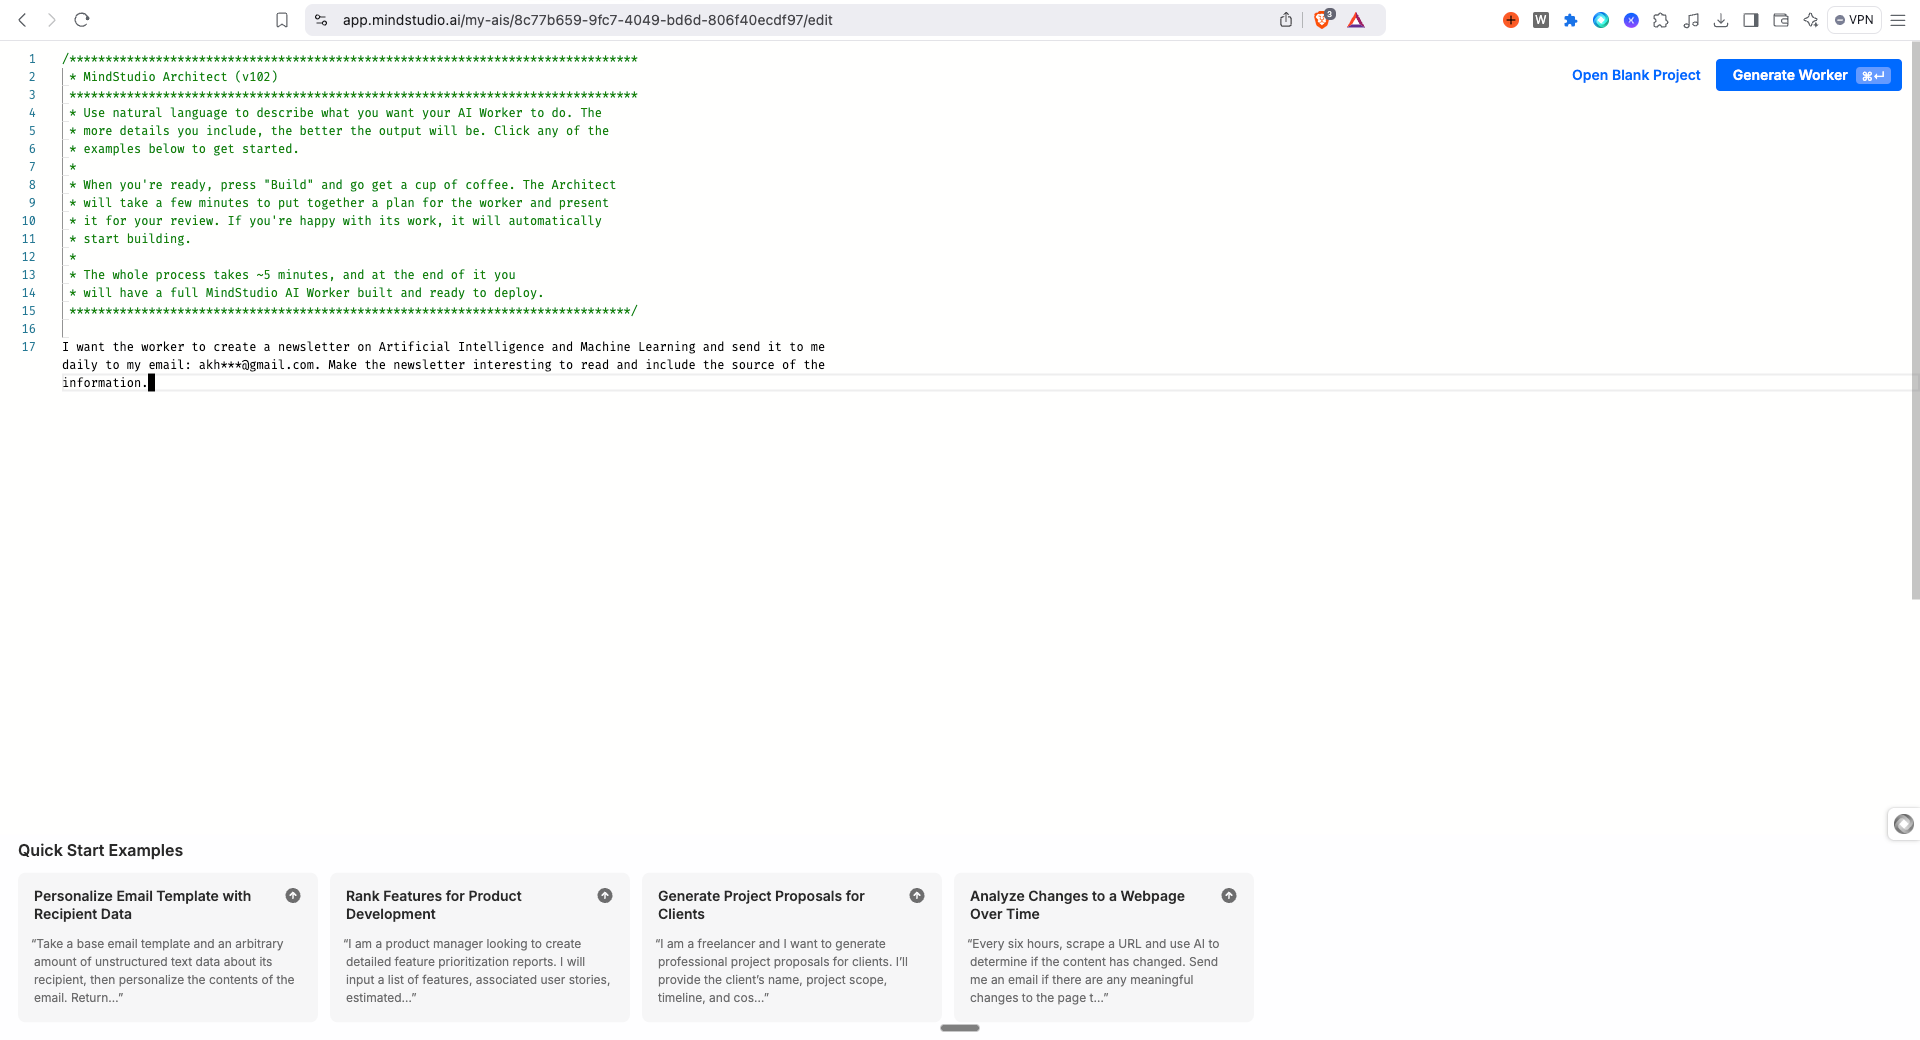
Step 2: Define the AI Worker's Task
Mindstudio Architect
Once the interface loads, you will see a code editor. This is where you define the AI Worker's task.
Write Your Instructions
Below the initial guidelines in the code editor, you'll find a prompt labeled: "What do you want the Worker to do?" Write your instructions here in natural language. For instance:
I want the worker to create a newsletter on Artificial Intelligence and Machine Learning and send it to me daily to my email: akh***@gmail.com. Make the newsletter interesting to read and include the source of the information.
Step 3: Generate the AI Worker
Locate the "Generate Worker" Button
In the top right corner, find and click the "Generate Worker" button. Allow a few minutes for the MindStudio architecture to design the architecture for your idea.
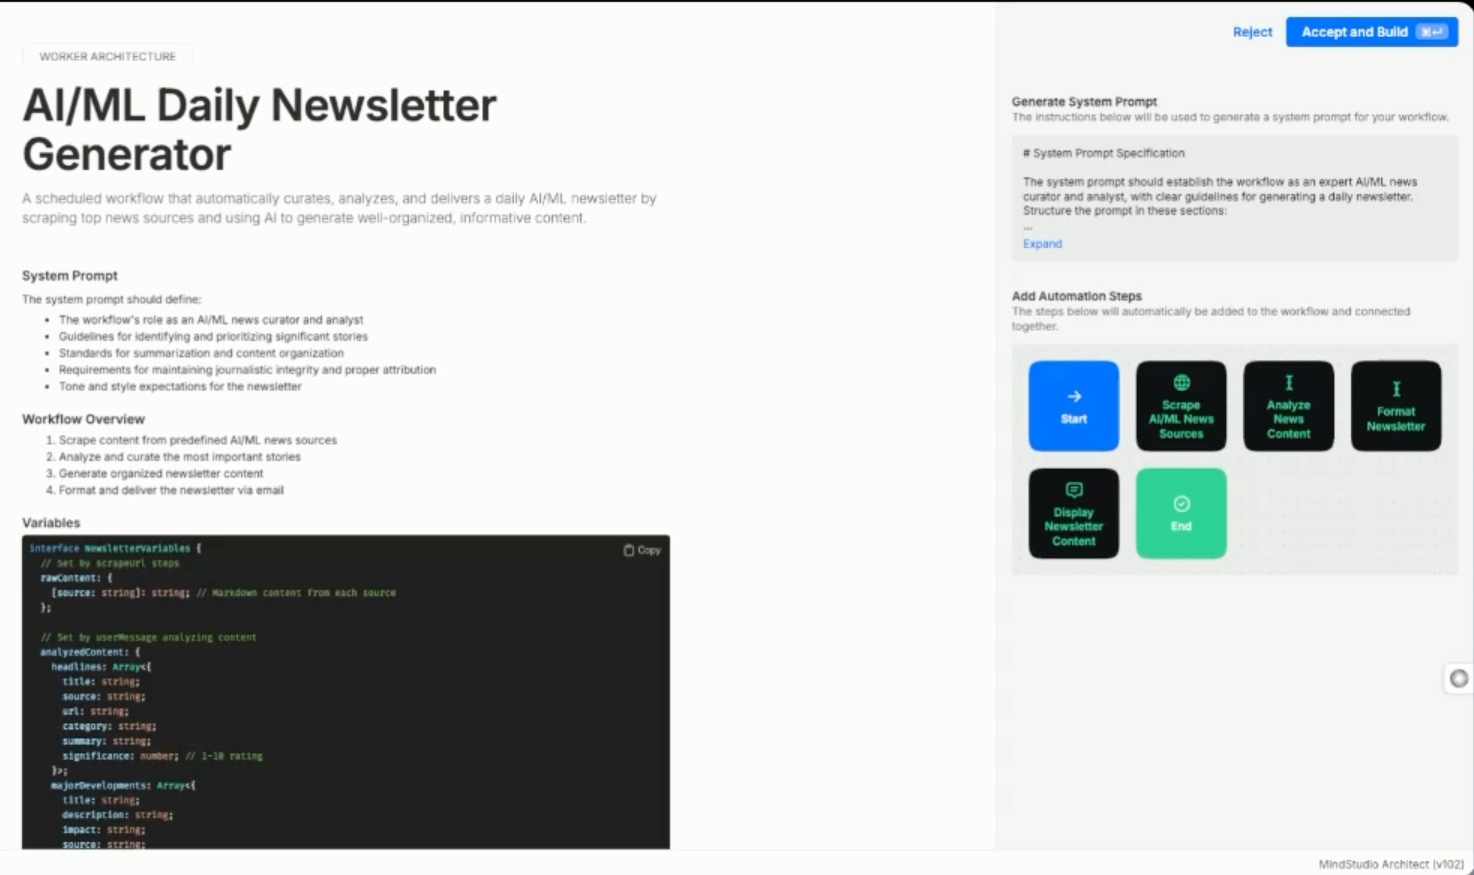
Step 4: Review the AI Worker Architecture
Analyze the Architecture
Once built, the AI Worker architecture page will load. It contains:
Title: For example, "AI/ML Daily Newsletter Generator."
System Prompt Overview: A high-level description of what the AI will do.
Workflow Overview: Numbered steps the AI will follow.
Variables: Code that defines the AI Worker's functionality.
Workflow Visualization: A flowchart of steps (e.g., Start > Scrape News Sources > Analyze News Content > Format Newsletter > Display Newsletter Content > End).
Detailed Review
System Prompt: Read and confirm the AI's role and expected behavior.
Workflow Steps: Check the logic and steps for task completion.
Variables: Verify the data and parameters being accessed.
Automation Steps: Each automation step will display text and a corresponding icon for clarity.
If you haven’t checked out my previous articles you can read them here:


Step 5: Accept and Build the AI Worker
Confirm the Build
After reviewing, click the "Accept and Build" button in the top right corner. Wait as the system finalizes the AI Worker.
Step 6: View the AI Worker Implementation
Explore the Implementation
Once the build is complete, access the detailed implementation page. On the side bar you can see the below options:
Data Sources: You can add your custom data sources if you want any.
Functions: You can write your own functions to do the specific tasks.
User Inputs: Inputs required from the user.
Workflows: The sequence of steps.
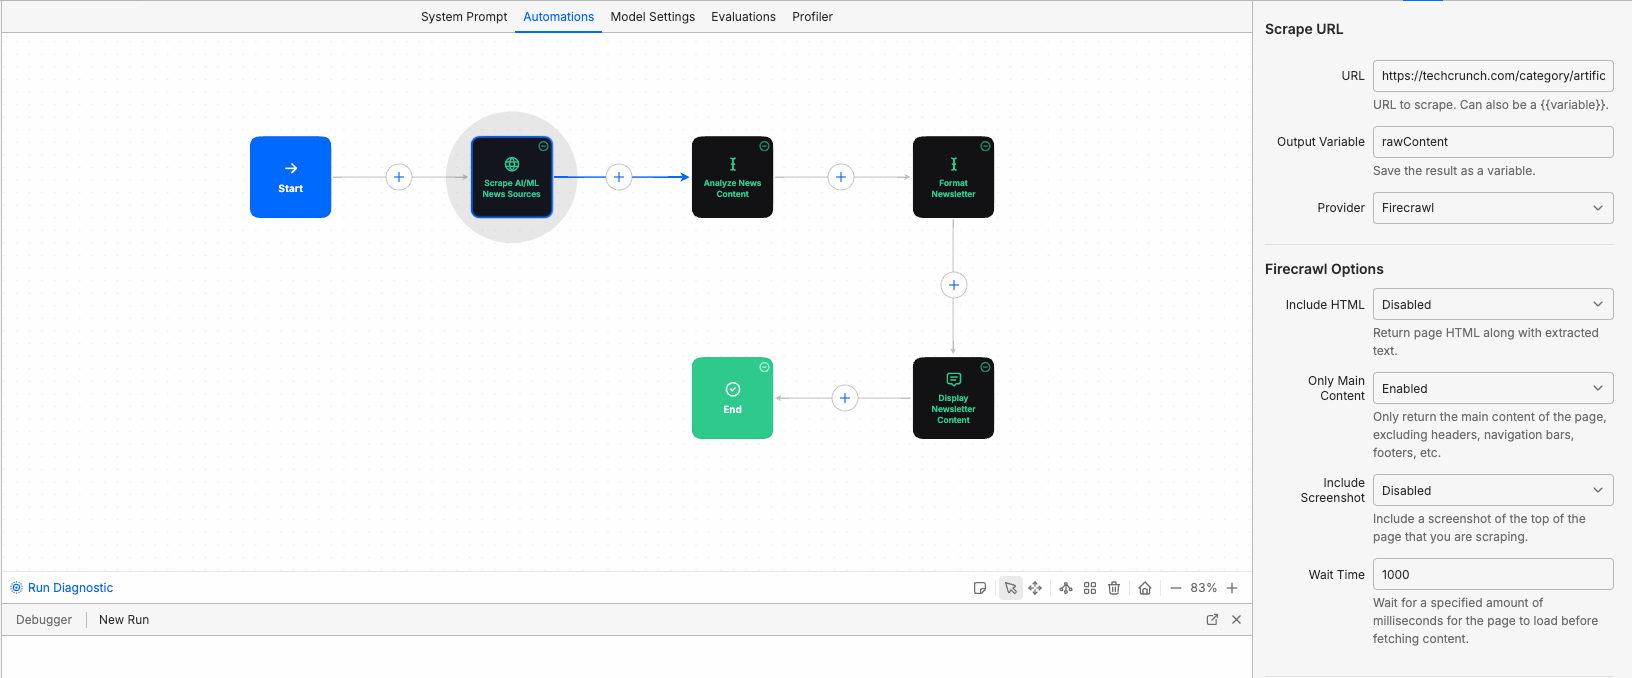
Workflow Visualization
Click "Automations" at the top center to see a visual flow of the AI Worker's steps, including:
Start Button: Initiates execution.
Scrape URL: Explains how data will be sourced. Here the Mindstudio has automatically considered the below urls as source of information. You can always add many more urls that you might be interested in.
https://techcrunch.com/category/artificial-intelligence/, https://venturebeat.com/category/ai/, https://blog.google/technology/ai/, https://openai.com/blog, https://deepmind.google/
Generate Text: Defines how content will be created.
Format Newsletter: Outlines formatting processes.
Display Newsletter Content: Details display steps.
End: Finalizes the task.
Run Preview
Use the "preview" dropdown in the top right and select "Run in Debugger." Click "Run" to execute the AI Worker.
Step 7: Run the AI Worker and View Results
Monitor Progress
Run Diagnostics: See real-time logs of the AI Worker's actions and associated costs.
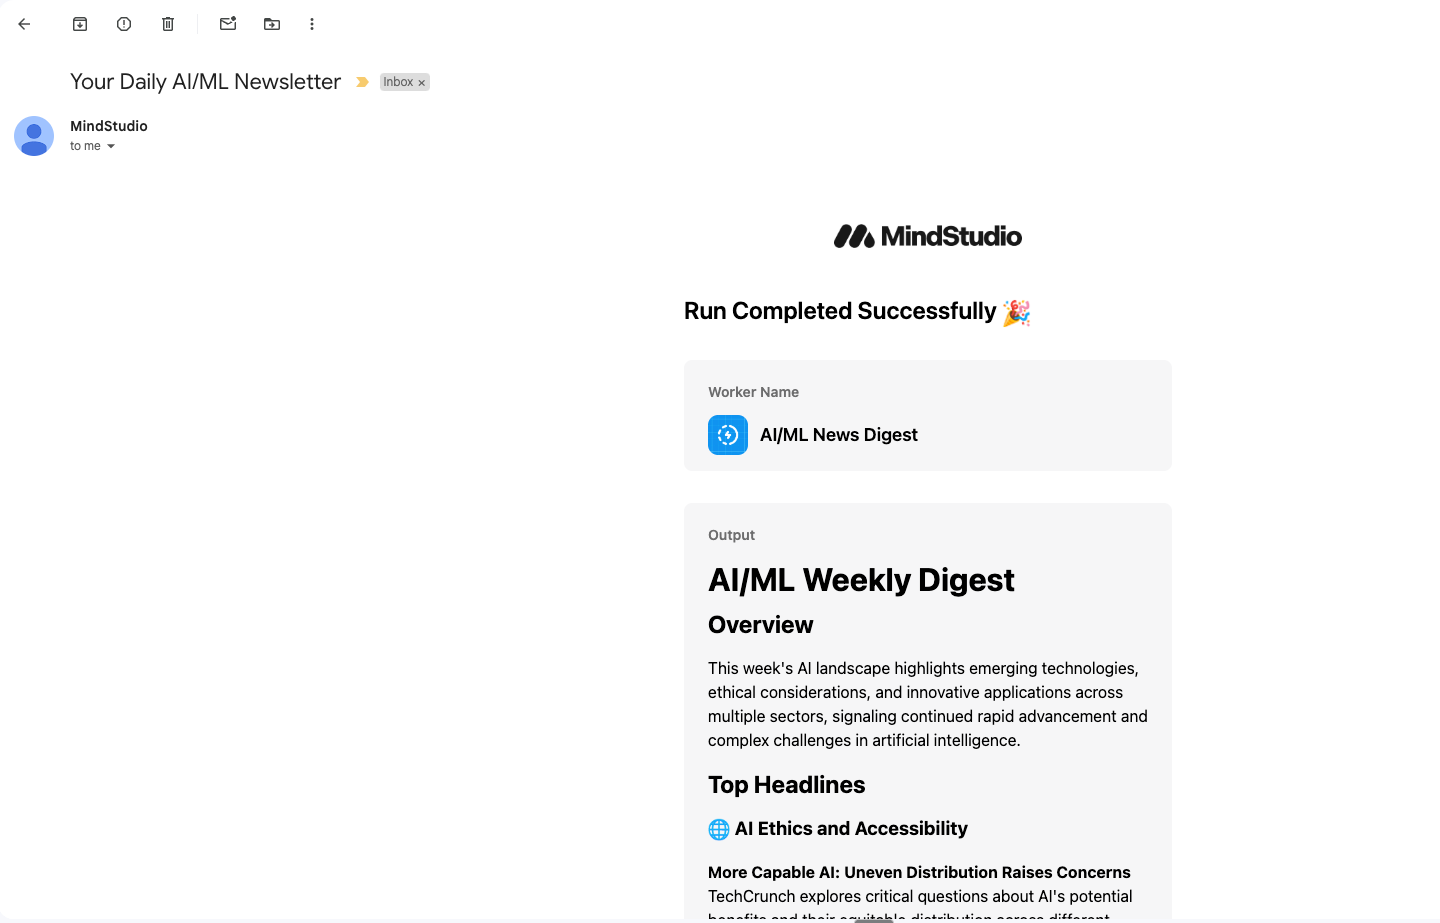
Review Output
Email Confirmation: Confirm that your request is completed and emailed.
View Email: Check your inbox for the AI-generated newsletter.
Step 8: Publish the AI Worker
Finalize
Once you're satisfied with the results, click the "Publish" button to make the AI Worker live.
Step 9: Further Exploration (Optional)
Connect via API
Integrate the AI Worker into your system using APIs and tools like Zapier, Make, or NPM.
Pros & Cons of Mindstudio
Pros:
Powerful No-Code Tool: Mindstudio enables the creation of high-quality agentic systems without requiring coding expertise.
Efficient Workflow Building: The Mindstudio Architecture feature is remarkable. With a simple prompt, it constructs an end-to-end workflow, eliminating the hassle of starting from scratch.
Time-Saving for Beginners: Its automation capabilities can save significant time for those unfamiliar with coding.
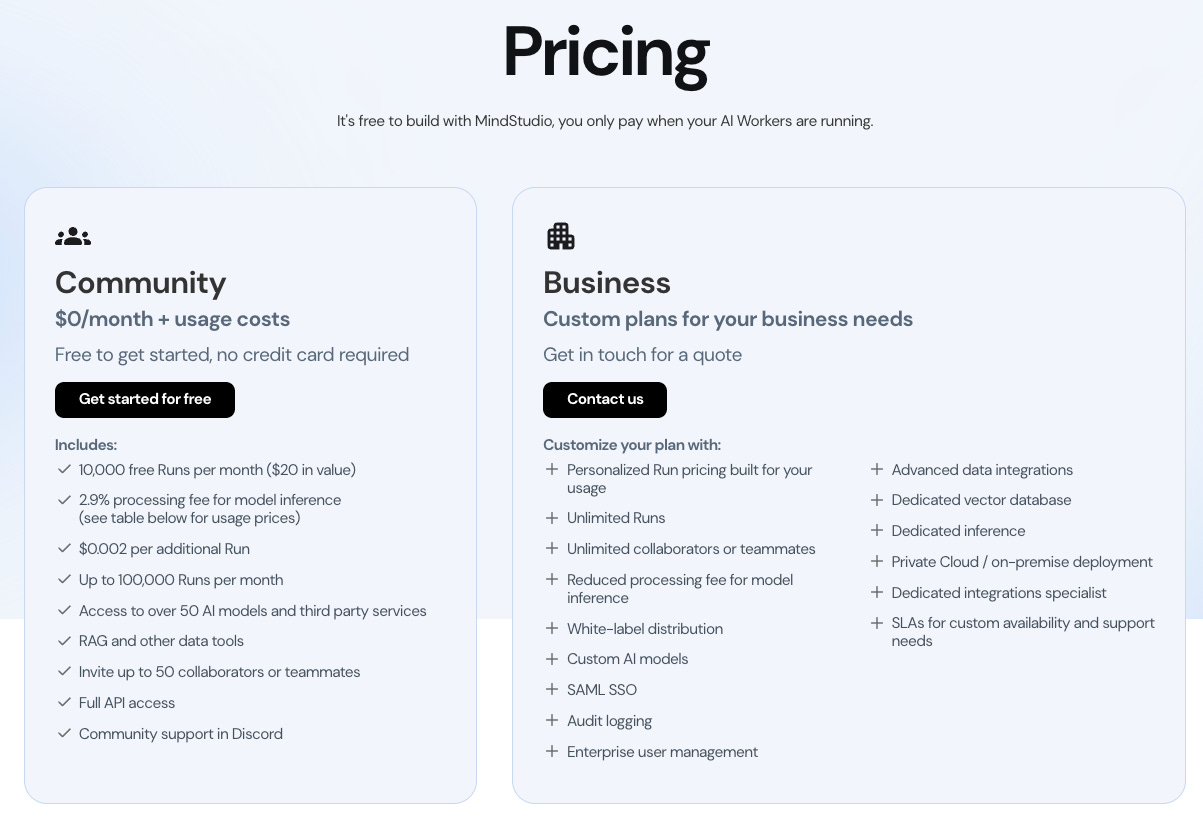
Attractive Pricing: It has a very good free tier for community upto 10000 free runs, which is quite awesome.

Cons:
Learning Curve: There is a moderate learning curve to mastering Mindstudio. Familiarity with coding can greatly enhance the ability to create complex applications.
Incomplete Workflow Generation: Occasionally, it fails to generate complete workflows, missing code for specific steps. This can leave users spending extra time troubleshooting and understanding the workflow.
Limited Editing Options: When the workflow misses a step, there is no straightforward option to update or fix the content within the architecture. A feature to edit missed steps would be highly beneficial.
Conclusion
MindStudio is a good platform to build your own agents. If you are familiar with how variables work, coding works then this might help you leverage the platform way better. It is very competitive to other alternates like RelevanceAI, Lyzr etc.. I find it’s user interface to be a bit difficult for normal user with no coding background.
Your blog post was incredibly insightful and engaging. The way you explained, was both clear and thought-provoking. Thank you for sharing your knowledge and perspective—it's an inspiring read that truly adds value. Keep up the great work!